Lynn Amber - Travel & Photography
sharing my thoughts through words and images
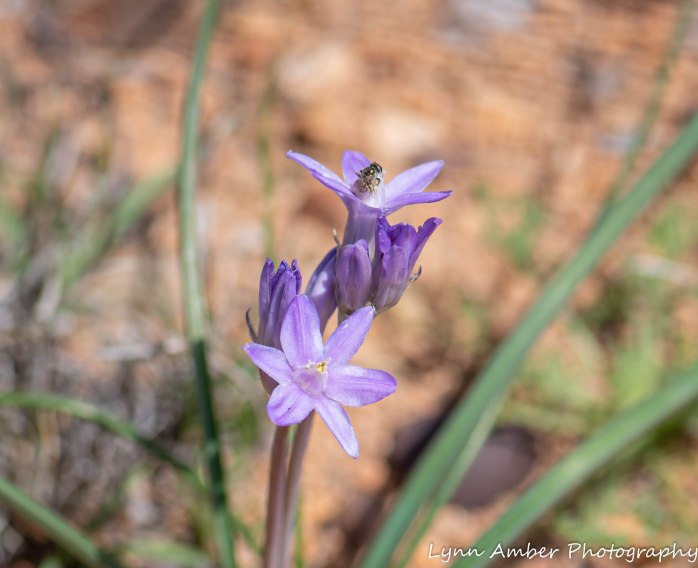
Photo of the Day 4.6.20

The sunsets have been incredible here in the Las Cienegas NCA. As I post this one taken last night, I am looking out the window at an even more incredible color display!! The above photo is looking toward the eastern sky and the colors are more pastel. The photo below is taken toward the western sky. Both in the same evening minutes apart!
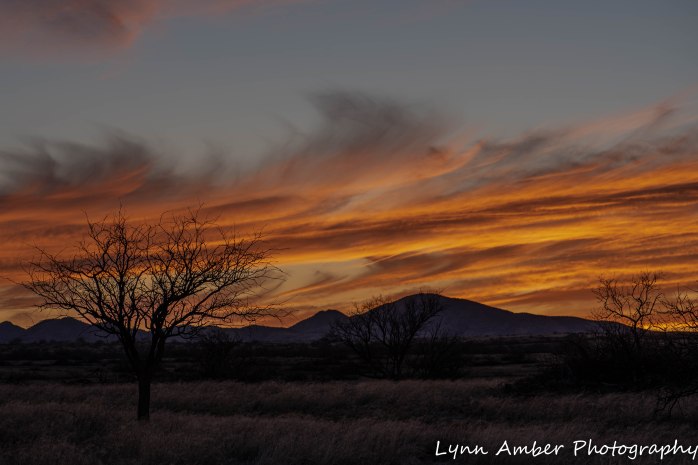
Photo of the Day 4.5.20

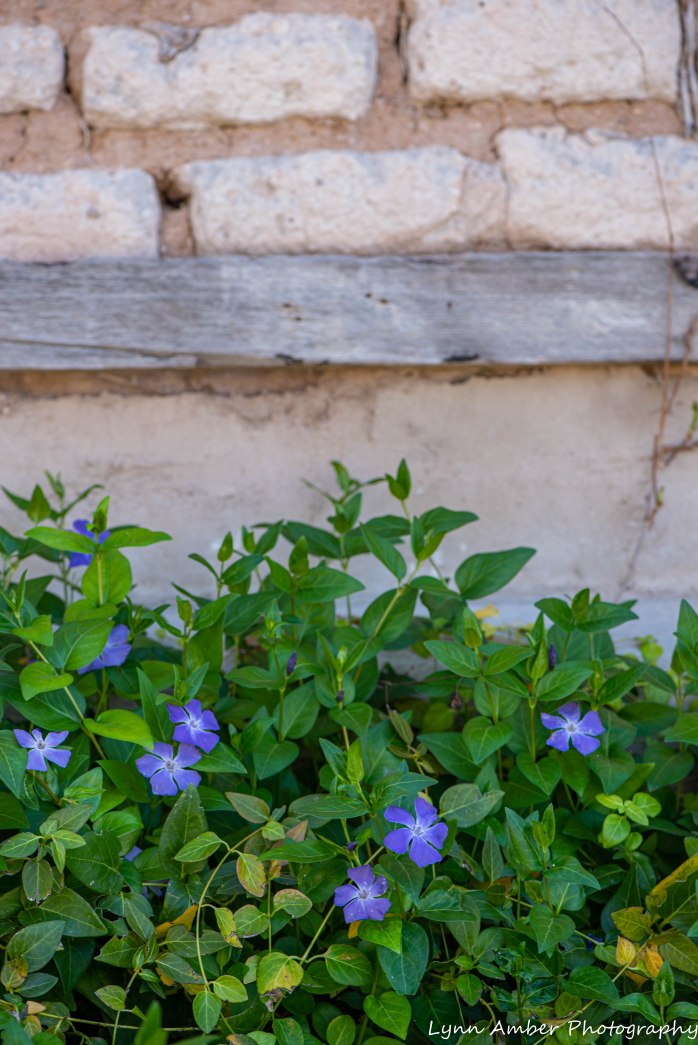
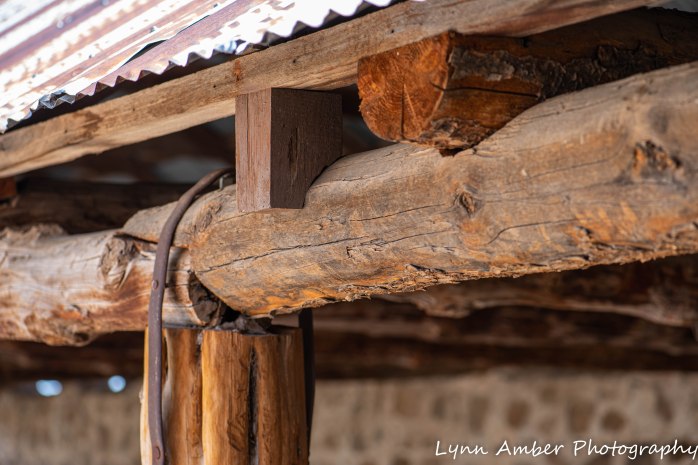
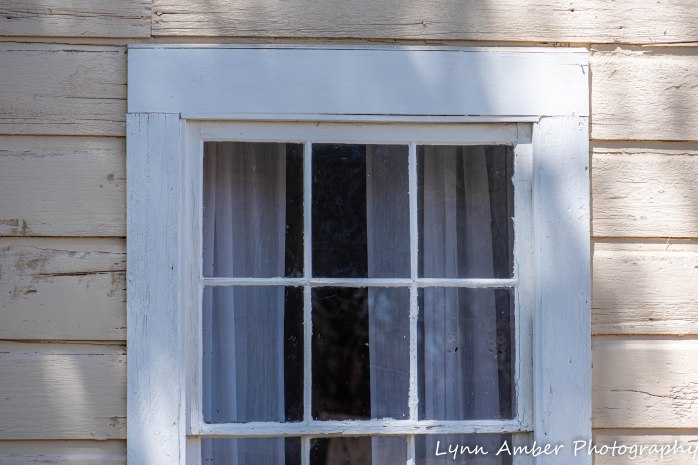
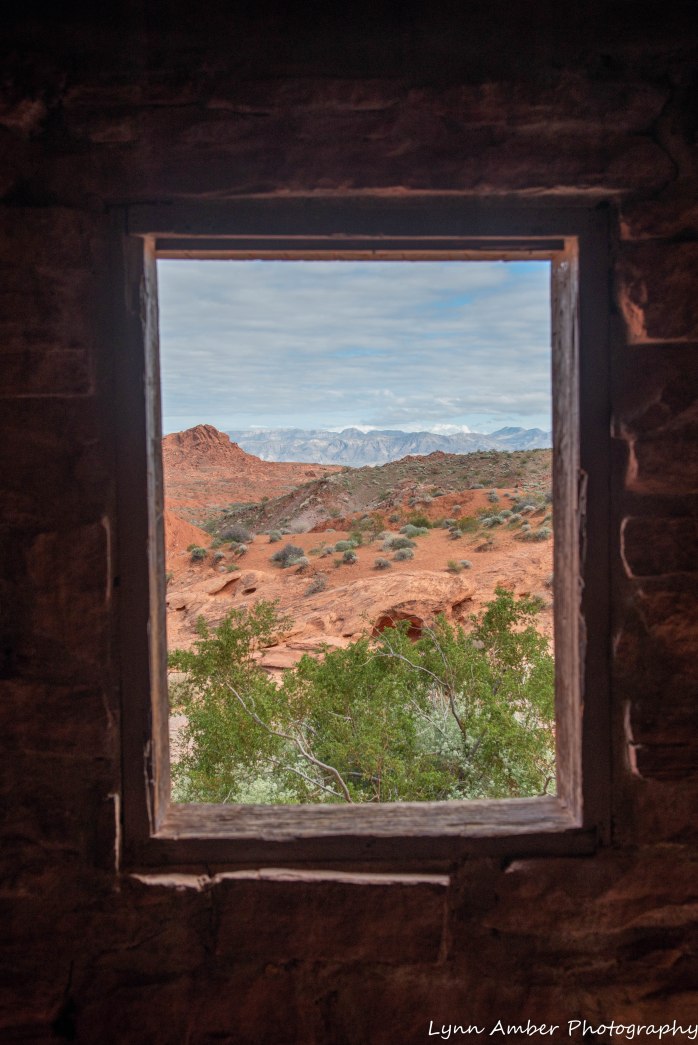
We had to go fill up our 6-gallon water container today so we could add some water to our fresh water tank in the trailer. At the Empire Ranch Historic Site, there is a potable water source that we can access. While Jim was filling up the container, I walked around the historic site and in the ranch house taking “architectural” photographs. I was struck by these gingham curtains at the window in one of the rooms. The pretty, old-fashioned curtains contrasted against the cracking, peeling plaster walls just begged to be photographed.
As I walk around the old ranch, it almost feels too familiar to me. Maybe it’s just that it’s so reminiscent of all those western TV shows I watched as a kid. Or, perhaps in some other life, I was raised and lived on an Arizona cattle ranch – who knows!! 🙂
Valley of Fire State Park
Based on a conversation with some fellow Vermonters who were camped near us at Hole in the Wall campground in the Mojave Preserve, we decided to make Valley of Fire State Park our next destination on our southwest tour. We have been past this park before but never at a time when we felt inclined to venture in and camp.

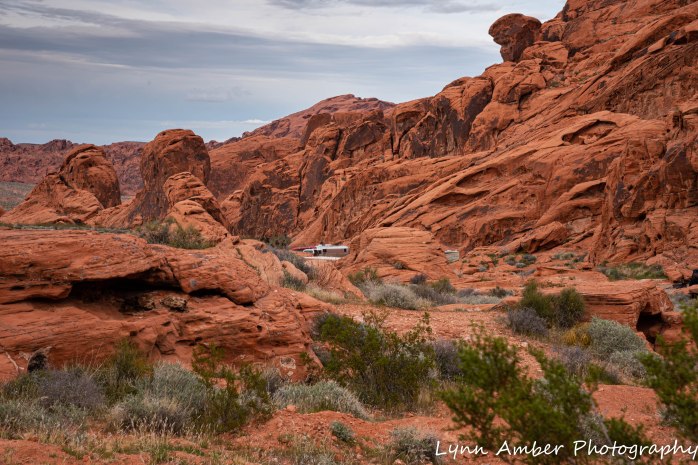
There are two campgrounds within the park that are first-come, first-serve. The Atlatl Campground has a few sites with electric and water hookups while the Arch Rock Campground is dry-camping only. Of course, in our usual style, we arrived late afternoon since it was a trek from the Mojave Preserve. The ranger at the entrance station did not know if there were any sites available in the campgrounds but wanted to charge us the $10 entrance fee anyway. We talked him out of it indicating that if the campgrounds were full then we would not be staying. His comment at first was “That’s what everyone says.” Not the right answer for this here customer service oriented person and park ranger! I can safely say I grimaced visibly! We insisted on not paying him since I knew that if we did find a campsite we could pay the entrance fee as part of our site price. He let us in 🙂
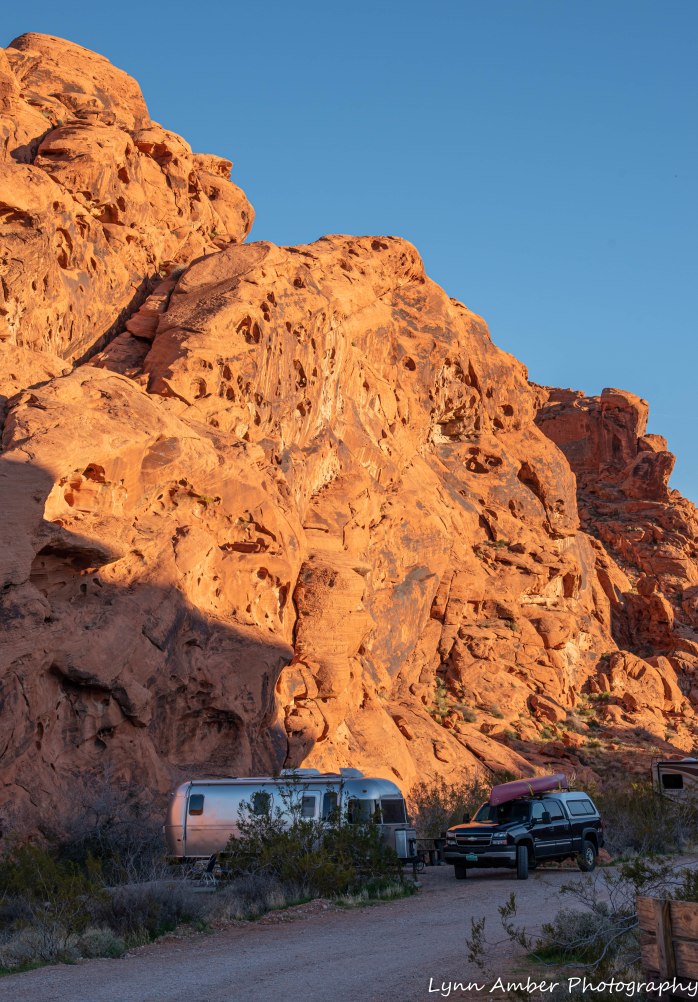
We reached the turn off for the campgrounds and there was a FULL sign posted out on the main road. We never believe FULL signs and ventured on into the camping area. The first campground to appear on our left was Atlatl CG. There was an additional sign there indicating it was full so we kept on driving to the Arch Rock CG a mile or so down the road. We did not see a FULL sign at the entrance so we pulled right on in and scoped out the situation. Right away, a camp host came riding up in his little buggy and, offering us a wide, toothless grin, said, “I think I may have just one site left, stay right there and I’ll go check it out.” He came back minutes later and directed us to follow him. We had indeed secured the very last site that was unoccupied. The site was on the outside of the loop and backed right up to a red sandstone cliff. It was perfect! We knew that if the campgrounds were full we had our choice of several BLM lands surrounding the park at which to boondock but it sure was nice to be able to be right in the park!
A very, very brief history…..information taken from the Valley of Fire SP website:
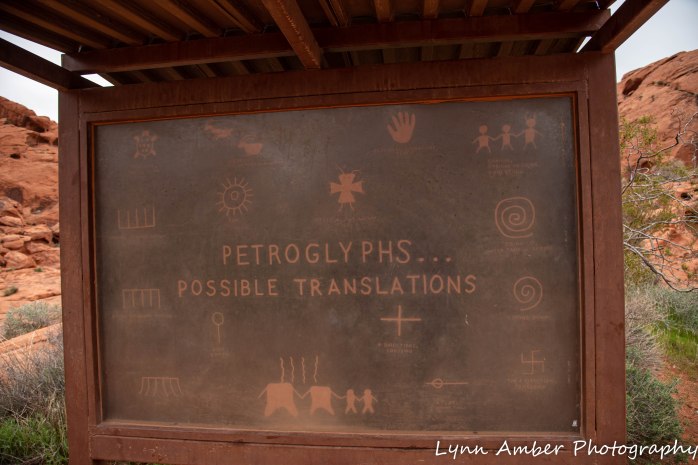
Valley of Fire was established as a state park in 1935. Prior to this, the land had a rich history of Native American occupation as evidenced by the numerous preserved petroglyphs carved into the sandstone rock by the Basketmakers some 2,500 years ago. More recently, the Paiute tribe lived here and, soon after, they were followed by white settlers including the Mormons.
A road was constructed through the area in the early 1900’s that connected Los Angeles to Salt Lake City and it was then that the geologic richness, historical significance and recreational potential of the “Valley of Fire” was recognized. The federal government owned much of the land and donated it to the state of Nevada for preservation and maintenance.
It was the Civilian Conservation Corps who built the initial buildings and campgrounds.


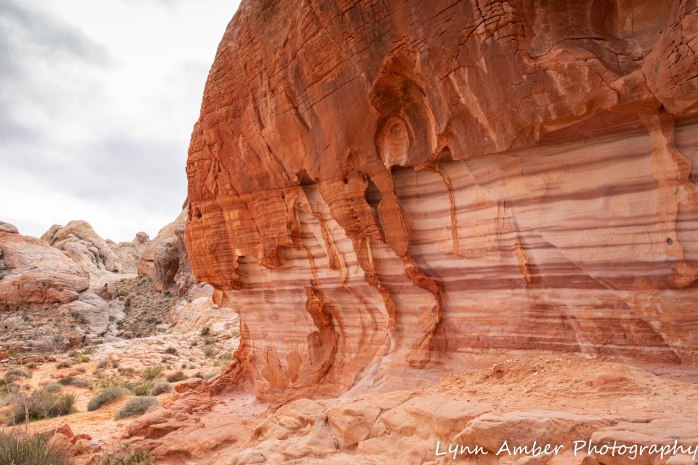
The geology of the area consists of Aztec sandstone outcroppings (the red stone) interspersed with limestone (the gray rock). Forces of nature over the years has produced the effect we see today. Earthquakes and volcanic action caused the older limestone rock that formed the floor of a giant ocean to be thrust up and exposed. The red sandstone was created during a period of drought when great sand dunes appeared. Over time, the dunes became compacted and, through iron oxide and various other minerals interacting with water, the rich colors of the resulting sandstone emerged. Wind and water continue to erode the delicate sandstone creating an ever-changing land of wonder!

Our visit…..
In and around the campground
While we stayed in the campground, we often took walks in the evening around the loop. There are some really nice private sites along the one-way road leading out of the campground. Although most sites, including ours, were nicely spaced apart.


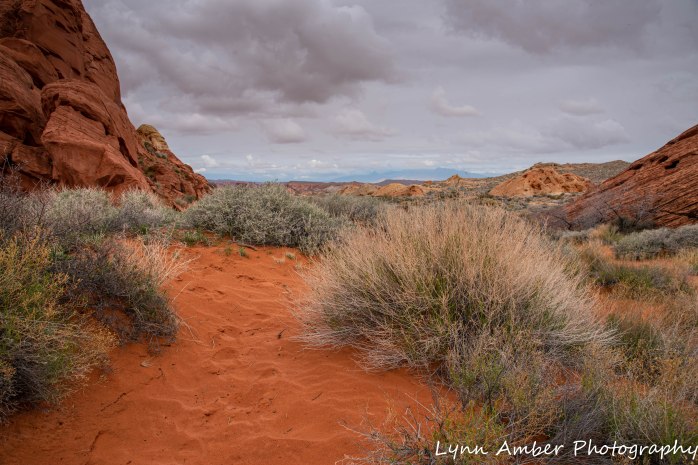
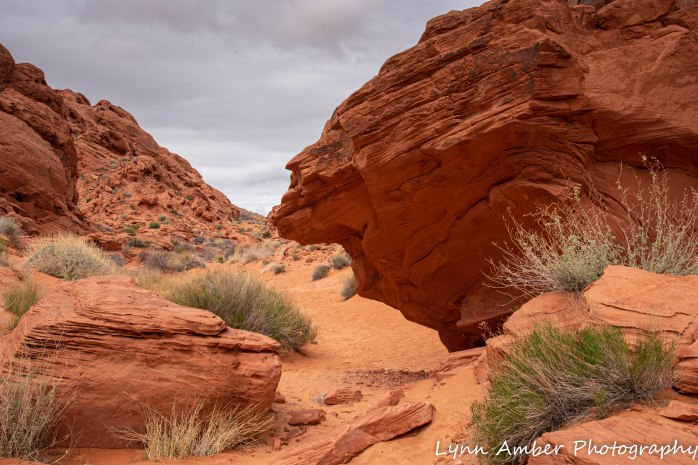
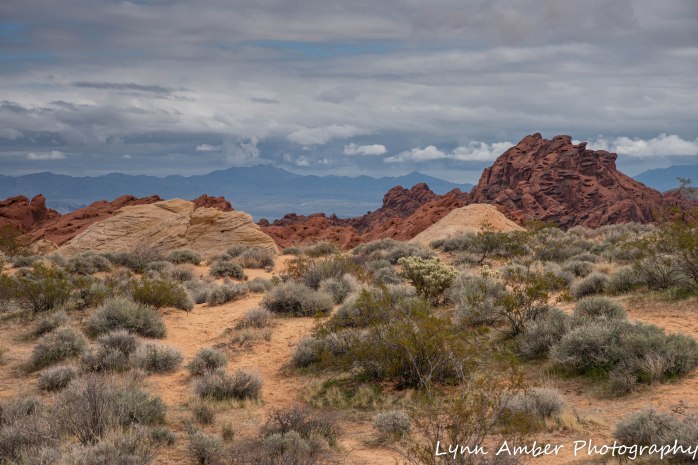
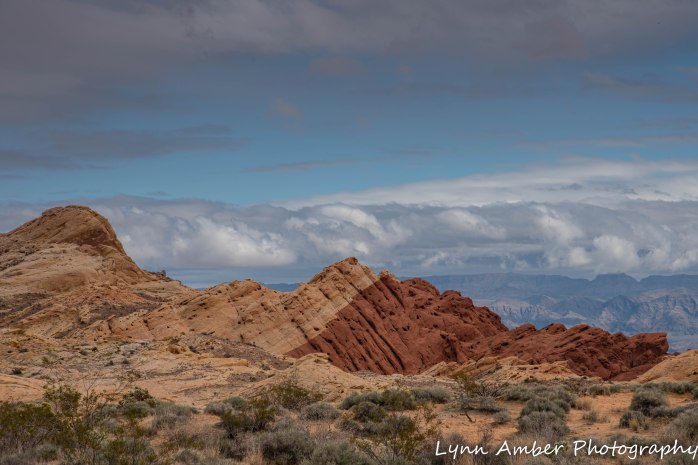
During our visit here, we traveled the White Domes Road through the main area of the park. We stopped at each trail head and overlook! Most of the hikes along this route were short and passed through some unique rock formations.
Mouse Tank Trail
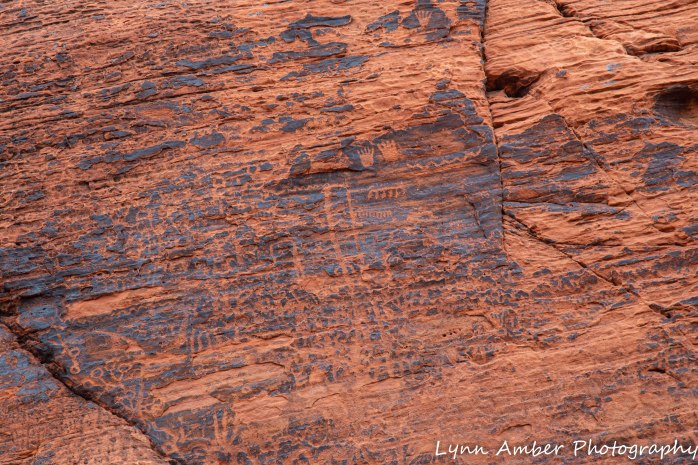
Along the Mouse Tank Trail exists some of the best example of petroglyphs that I have ever seen. The Native American Anasazi lived and farmed in the area between 300 BC and 1150 AD. They carved into the black patina “desert varnish” on the red sandstone leaving behind symbols that give us a glimpse back in time. This rock art is remarkably preserved here!


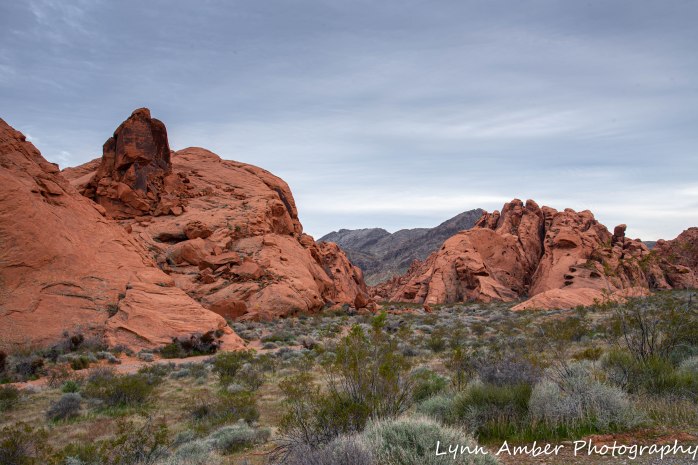
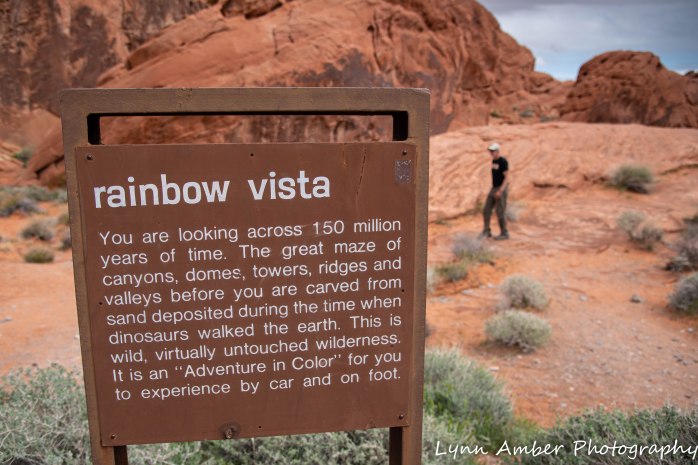
Rainbow Vista
A Rainbow Vista was a short loop trail that showed examples of the colorful sandstone rock formations. Half-way around the loop, there is a side trail that ends at an overlook for Fire Canyon. Please forgive all the photographs! Around every corner was an amazing view!!

Love the contrast of the Teddy Bear Cholla against the landscape!!


The side trail to the Fire Canyon overlook…..


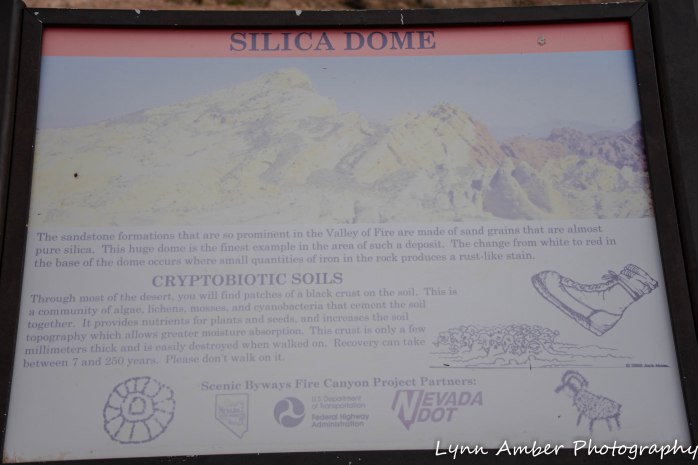
Silica Dome
We rode out to the Silica Dome – a white-colored dome rock formation. There were some incredible vistas along the way. Oddly enough, it was at the end of this road where I could actually get cell phone service! Otherwise, we were completely tuned out for the several days we were here.

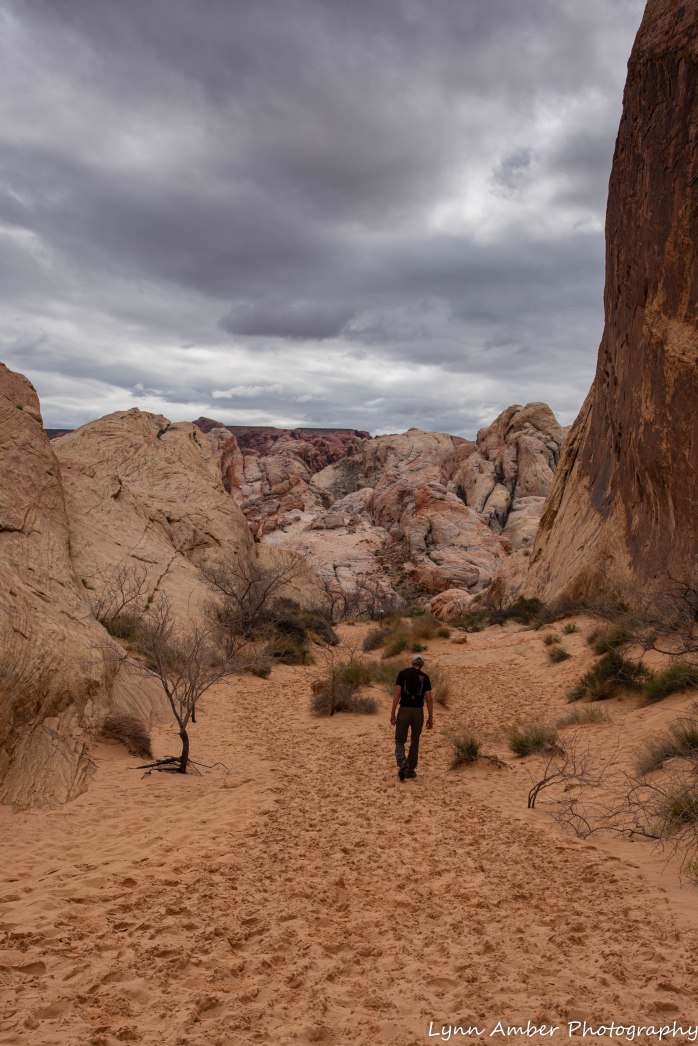
White Domes
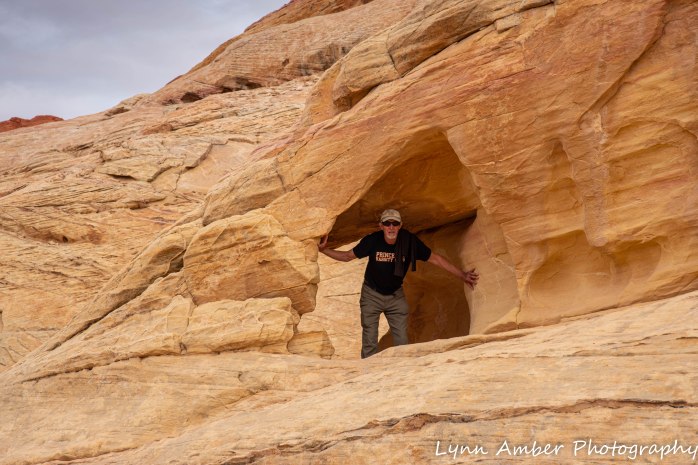
The White Domes Road ends at area called White Domes where there are amazing rock formations and slot canyons. The trail is a 1+ mile loop and includes some ruins from a movie set. Given the beauty of the area and history, it’s no surprise that the film industry shot on location here!
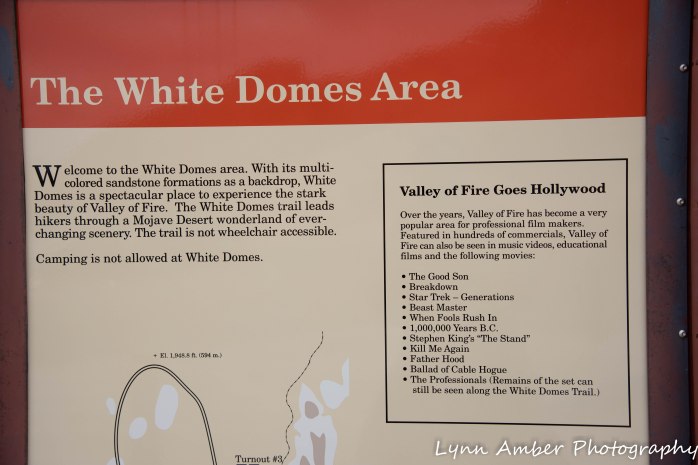

Lights, Camera, Action!!


Going through one of the slot canyons….


And Jim, just being – well, Jim! 🙂
Hope you enjoyed the journey through Valley of Fire!!
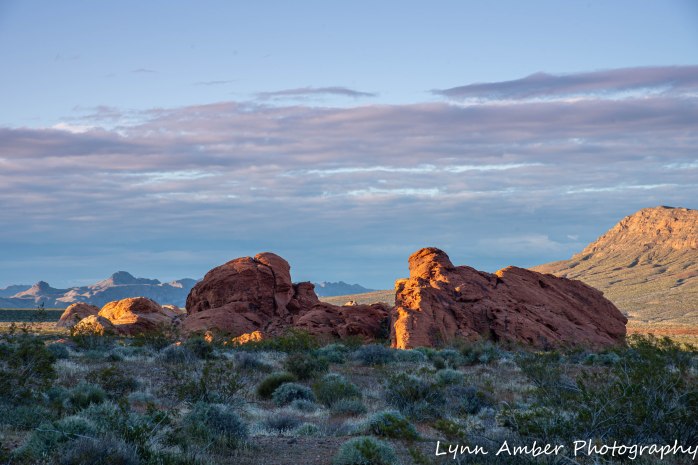
Photo of the Day 4.4.20

We take nightly walks after dinner to watch the sunset across this high-desert grassland. The sky is ever changing and we are always rewarded with a unique display each night.
Photo of the Day 4.3.20

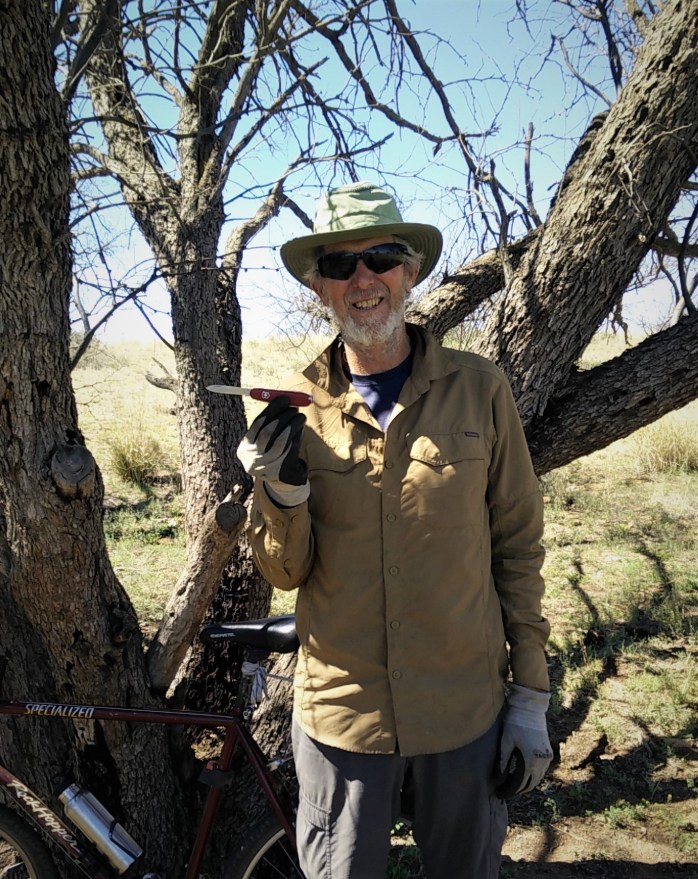
Back to a ranch land photograph today! This morning, we retraced our bike ride from several days ago -getting an earlier start since the winds were supposed to kick up during the afternoon hours. We had a very good reason for riding the same route. A couple of days ago, Jim reached into his pants pocket to extract his Swiss Army Knife so he could slice up a naval orange. (We’ve been eating an orange a day – believing this will pump us up with Vitamin C and ward of evil viruses!) It was not in his pocket where it normally resides. Now, a man and his Swiss Army Knife are seldom separated so you can imagine the trauma he was feeling.
We deduced that the last time he used the knife was when we took the bike ride down to Cienega Creek. We had stopped for lunch at one of the cattle watering ponds and he thinks he may have left it sitting on the back of my bike on the rack where he had cut up the orange. I just knew this was somehow going to be my fault!! He thinks I rode off and knocked the knife off into the grass. (I know for a fact that there was no knife on my bike rack when I mounted and started to ride because I had glanced at the rack and noticed all the orange juice that I would have to wipe off later – but if it made him feel better……) I suggested that it was a possibility. 🙂
So, today we went in search of a small red Swiss Army Knife amidst acres of grasslands. He decided that it also could have slipped out of his pocket at some point when he was dismounting the bike along our trip. On our way to the watering hole, we both scanned the dirt road looking for anything “red” that caught our eye. Eventually, we rode down the hill to the pond and Jim went over to the tree where my bike had been leaning. A picture says a thousand words!

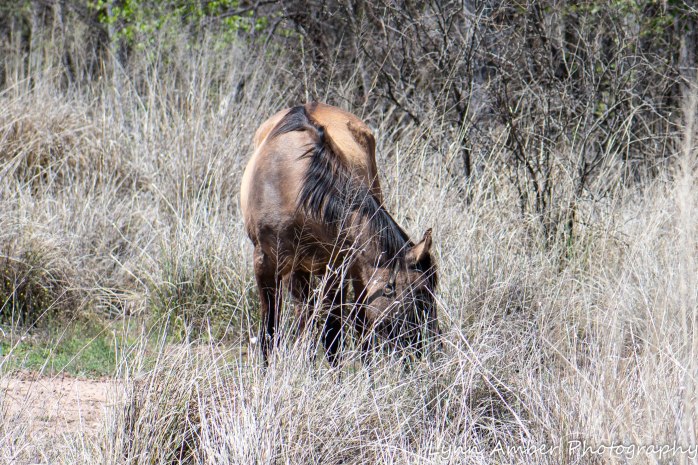
Now that we had the knife, we could really enjoy the rest of the ride!! We came across some horseback riders down by the creek watering their horses. They were going through the conservation area taking down white ribbons that had been marking the route of a local trail ride that had occurred in mid-March. They were having difficulty getting one of the horses to cross the creek, and while that rider was working with his horse, we chatted with one of the other women. Turns out her husband is from the Chittenden,Vermont area and we got to talking about horses and maple-sugaring with her. Apparently, her husband’s brother still lives and sugars in Vermont. Small world!

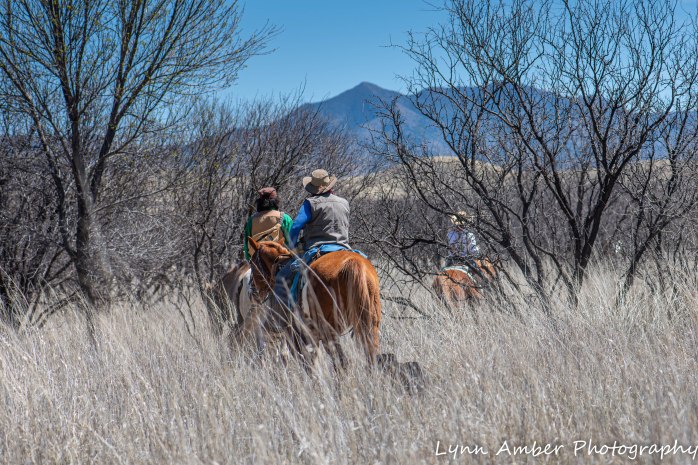
Eventually, the other rider was able to coax his horse across the creek and they went on their way. And, so did we 🙂


The wind did start blowing on our ride back – so we got a bit more of a work-out as we headed into the wind most of the way. Another perfect day here in the Cienegas! 🙂
Photo of the Day 4.2.20
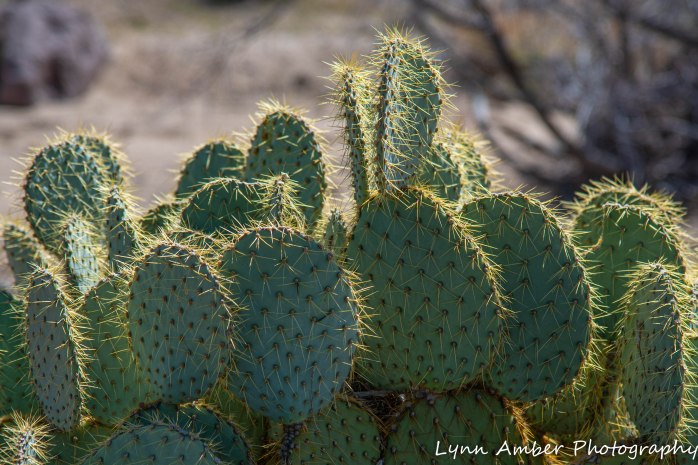
Another photo from earlier in the month of March when we were camped in the Mojave Preserve. I loved how the light was catching the thorns and pads on this Prickly Pear. It was just glowing! I understand that the preserve is also closed now including all campgrounds. So glad we passed through here earlier in the winter!
Photo of the Day 4.1.20

While we were camped in the Mojave Preserve, we had a great conversation with some fellow Vermonters who were traveling in a vintage Airstream. Upon their recommendation, when we left the Mojave Preserve, we decided to head to Valley of Fire State Park on the northeastern side of Las Vegas. Part of the fun of traveling on the fly is being able to make these last minute decisions! My next blog post will detail our stay in this incredibly unique area.
The best part of the decision to detour to Valley of Fire was discovering a hiking trail with the most amazing petroglyphs I have ever seen! The Mouse Tank Trail is a short trail leading back to a hide-out used by a local renegade Southern Paiute in the late 1890’s. On the way back to the terminus of the trail, the rock walls are teeming with petroglyphs.
Photo of the Day 3.31.20
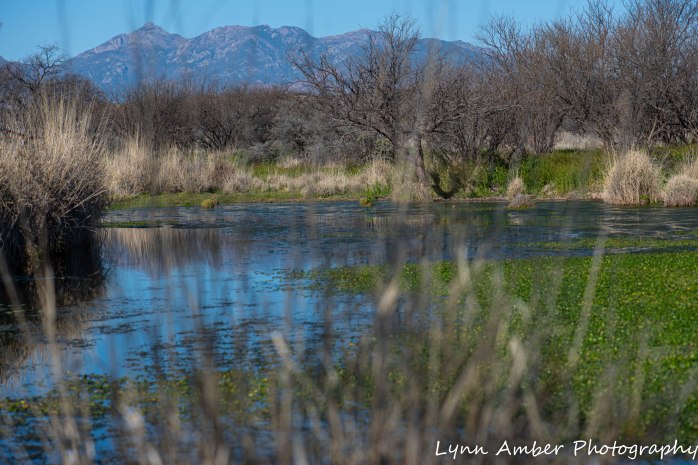
I walk to this pond in the conservation area daily. It is a source of rejuvenation for me and reflection. It brightens my spirit during this difficult time. I love spending time watching the great egret who lives here – and find myself concerned that I have not seen him for a couple of days. I am amazed by the Tree Swallows who inhabit this watershed – their flight patterns are so acrobatic as they dive, climb and circle in the air in search of insects to nab for a meal. I delight at watching them as they periodically dip down to the water and literally pick insects off the surface!
Today, we took a late afternoon walk down to the pond. We had some RV business to take care of – dumping our tanks, filling up with fresh water, and topping off our propane supply. Those tasks encompassed most of the day and we returned to our camp site ready for some exercise. We were treated to a greater variety of birds at the pond today – maybe it was the time of day. We observed a Cedar Waxwing perched in a tree along the water’s edge, more Tree Swallows performing for us and several Vermillion Flycatchers hunting for food. I caught a glimpse of a small, mostly yellow bird darting between several trees – that I’m guessing may be a Wilson’s warbler. The habitat certainly fits and the time of year coincides with its presence here. I’ll look for him again tomorrow and hopefully get a better look.
The Tree Swallows, in particular, are catching our fancy. As we stand quietly, we are convinced that our presence brings them out in force to show off their agility for us! And, they do not disappoint!
Photo of the Day 3.30.20
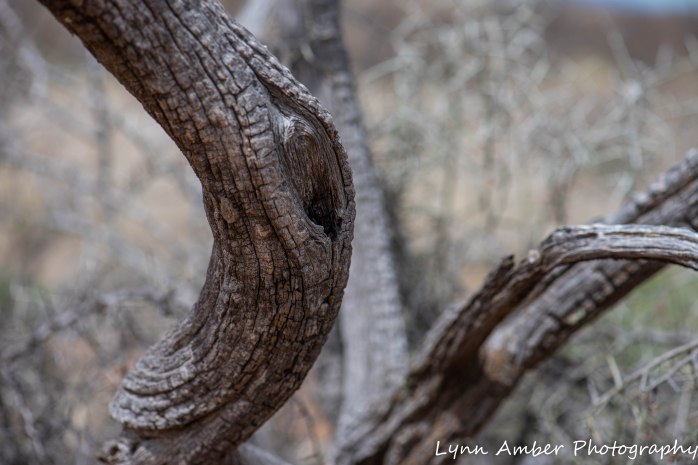
On my morning walk with coffee mug and stroopie in hand, this dead Mesquite tree caught my eye with its gnarled, twisting dead branches. I’m a “bark” person – I love trees with interesting bark – dead or alive. The monochromatic effect this photo imparts is calming and meditative. The photo will always remind me of this unique place with its tangled landscape of Mesquite bosques.
While continuing down the road to the pond, I heard the distinctive screech of a what I think was a red-tailed hawk. I scanned the sky in the direction of the noise and discovered these two hawks in the huge Fremont cottonwoods along the edge of the wash. What do you think – red-tailed hawks?? That’s my guess. I cropped the photographs significantly to get a better look at them. I did not have my binodulars with me. While not the best wildlife photography, I had fun watching them fly around the cottonwoods! I noticed a substantial nest in the largest cottonwood the other day and now I’m wondering if it could belong to one of them. The one hawk kept up a constant screech as if disturbed by something. I’m not sure if he was irritated with me or something else – but I kept my distance and photographed from afar. I was actually surprised at the clarity of the pictures given the distance and lack of a tripod.

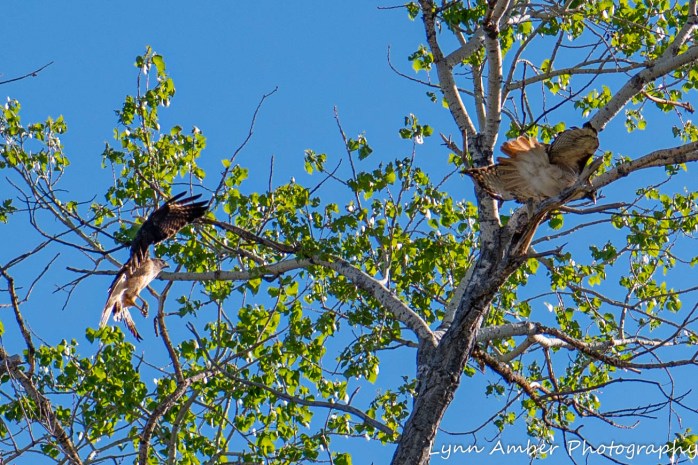

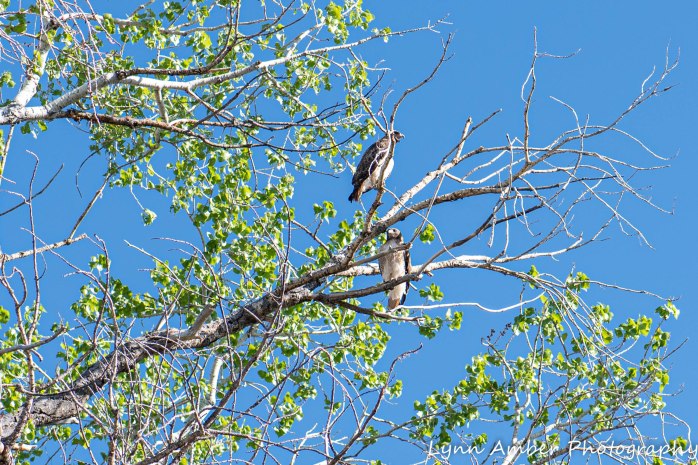
Photo of the Day 3.29.20

We took an extended bike ride yesterday along yet another unexplored dirt road in search of the Cienega Creek. We have noticed the sprawling line of green-topped cottonwoods from a distance. As we were riding along, it would seem as though the road was leading to the creek but then it would always veer away from it just when we thought we were getting close!
After a while, we decided to turn back since it was getting late in the afternoon. We stopped to quench our thirst and noticed a woman approaching from the opposite direction on a very eccentric, colorful electric bicycle with two flags flying above her. One of the flags was displaying the Burning Man 10 Commandments! The way the bike was decorated, it definitely resembled a bike someone would take to Burning Man! She chatted with us for quite awhile. We are all getting a tad lonely trying to distance ourselves from human contact! She explained that her husband has been a Burning Man participant for many years hence the flag and unusual bike. She mentioned they are also founding members of the Rubber Tramp Rendezvous group who have annual gatherings in and around Quartzsite, AZ each winter. I have heard of this group but never met anyone who participated in the community gatherings.
The best part about the encounter was her recommendation that we keep going another 2 miles, through two gates and, eventually, we would indeed reach the Cienega Creek!! She had just come from there and mentioned there was actually water running in the creek. It was serendipity that we happened upon her! Her enthusiasm about the beautiful landscape up ahead and the creek infused us with the extra energy we needed to continue!!
The absolute best part of the ride happened on our return trip. I was leading the way and saw movement up ahead. I stopped and watched two coyotes cross the road in front of me and head off into the grass. They stopped a distance away and looked back at us. We noticed the cattle in the area huddling up around their calves as they had caught sight of the coyotes as well. We stood by our bikes and enjoyed watching them several minutes before they scooted off across the land. It was a glorious end to a perfect day.


