Lynn Amber - Travel & Photography
sharing my thoughts through words and images
30 Days and 30 Photos – Day 2
After work today, we headed out to explore the “quiet” side of the island, and wandered down to Bartlett’s Landing. It was late, and we got there at dusk. Clouds were settling in over the ocean and the light was fading fast. This is a working man’s harbor. There was a lobster boat at the dock with a few dinghy’s tied up in front of it. I tried a few shots from different angles. The motion of the water prevented me from getting a really sharp photo – but I still like the “realness” of the picture.
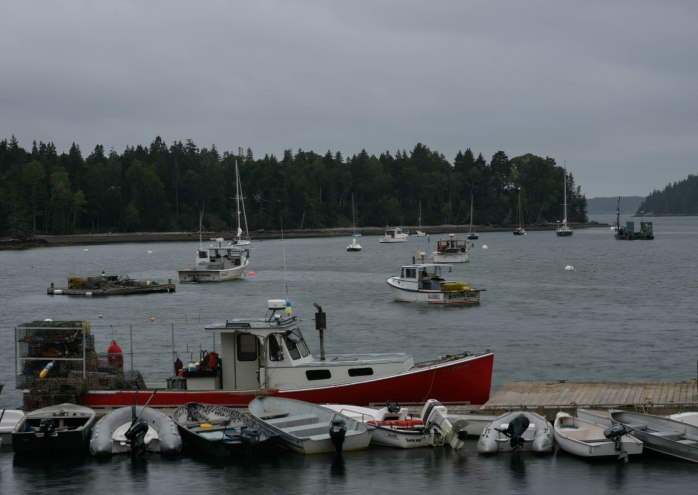
- I used the Aperature-priority setting and had it set to f/16. My ISO was set at 100. The camera determined the shutter speed. The final shot was recorded at 1 sec. f/16 82mm
- I used Live View and manual focus – which I set to infinity. The motion of the water kept the focus from being totally sharp.
- My camera’s timer was set
- I also used my Exposure Compensation settings to under- and over-expose each shot. This photograph is slightly under-exposed at –0.3
- In Lightroom, I adjusted the following settings very, very slightly: Highlights and Shadows. For this photo, I did very little editing. I did crop the photo to bring the lobster boat into the foreground more prominently.
30 days and 30 photos – Day 1
A few days ago, I started to think about how I could challenge myself to become a better photographer. I’ve been starting to use my tripod more often – especially practicing late afternoon and evening shots. I also want to become better skilled with the Lightroom photo-editing software I have purchased. I’ve heard all the advice about getting out and shooting photographs every day – practice and experimentation being the key to improvement. I have certainly taken many, many pictures this summer so far. But, I have not made the commitment as yet to get out every day. They say if you do something every day for 1 to 2 months that it becomes habit. Okay – let’s put that theory to the test!
My goal for the next month is to get out with my camera every day – either early morning before work, or later at night after work – and capture some of the scenic spots in Acadia. I will post a picture a day. The criteria I’ve set for myself is simple:
- The photo that I select must be taken the day of the posting – and I will submit a photograph every day for the entire month of September.
- A tripod must be used (so that I get fast and efficient with setting up and composing shots using a tripod)
- Each photo will be processed in some way through Lightroom before posting (forcing me to become more familiar with this software)
- A brief description of my camera settings and the basic editing I performed will accompany each photo.
DAY 1

I climbed on top of some cliffs overlooking Little Hunter’s Beach snapping pictures as the sun was setting. This was one of the last pictures I took this evening. I wanted to make sure I could get back to the road before it got too dark, and the mosquitoes were starting to come out in full force! Admittedly, had I stayed a little longer, the colors would have intensified even more.
- I used the Aperature-priority setting and had it set to f/16. My ISO was set at 100. The camera determined the shutter speed. The final shot was recorded at 1/25 sec. f/16 32mm
- I used Live View and manual focus – which I set to infinity
- My camera’s timer was set and my tripod was positioned as level as I could get it on the uneven rocky cliff
- I also used my Exposure Compensation settings to under- and over-expose each shot. This photograph is slightly under-exposed at –0.3
- In Lightroom, I adjusted the following settings: Shadows – bringing out the rock in the foreground; Highlights – to deepen the colors of the sky; and Vibrance – to slightly increase the intensity of the colors
29 days to go!
Hiking Acadia – Part 2
AUGUST IN MAINE
Fog rolls in slowly
Replaced by the scorching sun
The sea breeze gives relief.
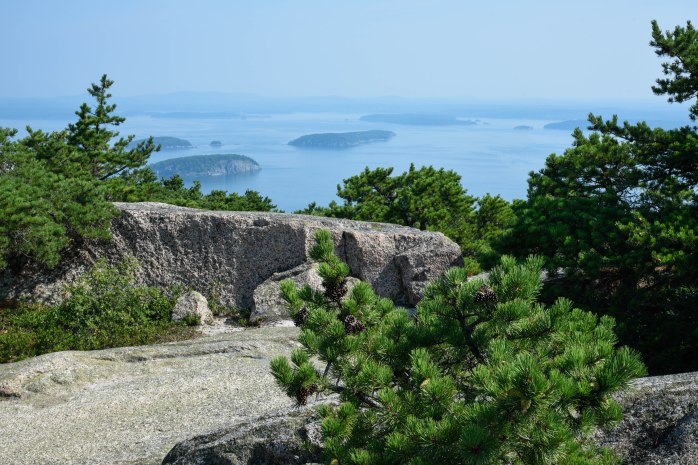
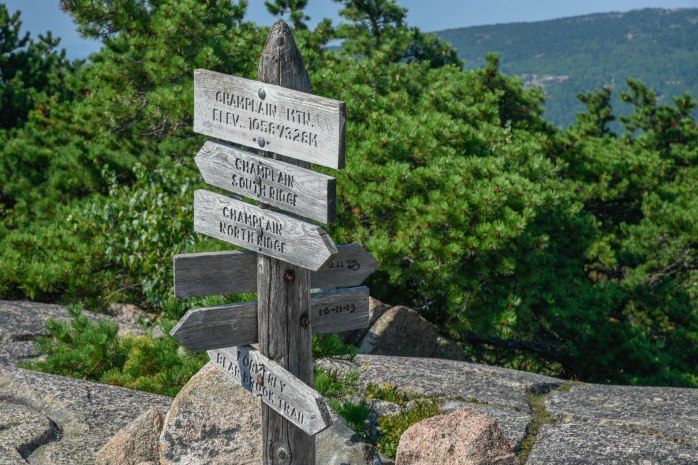
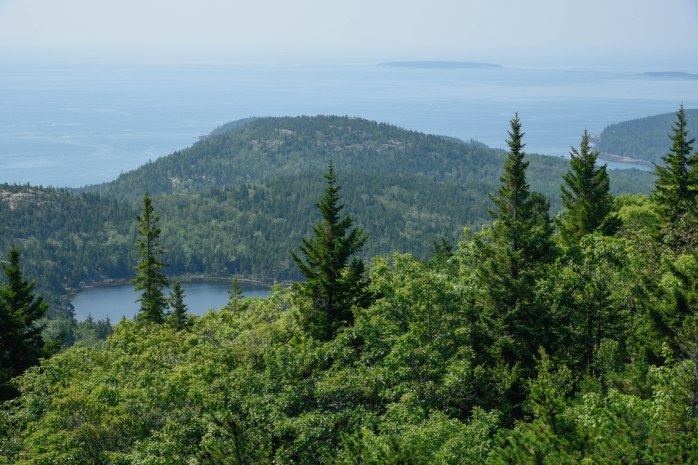
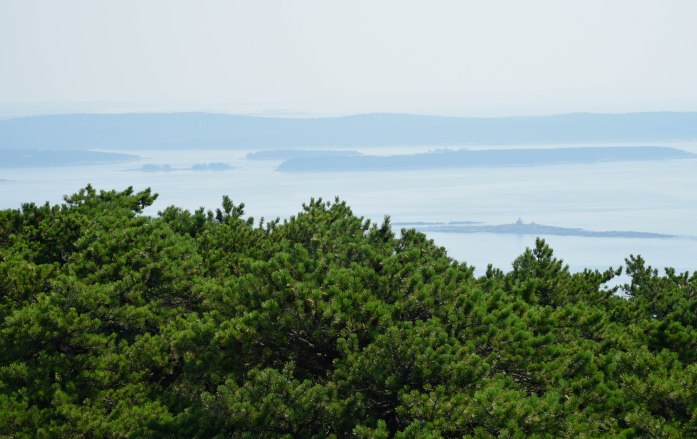
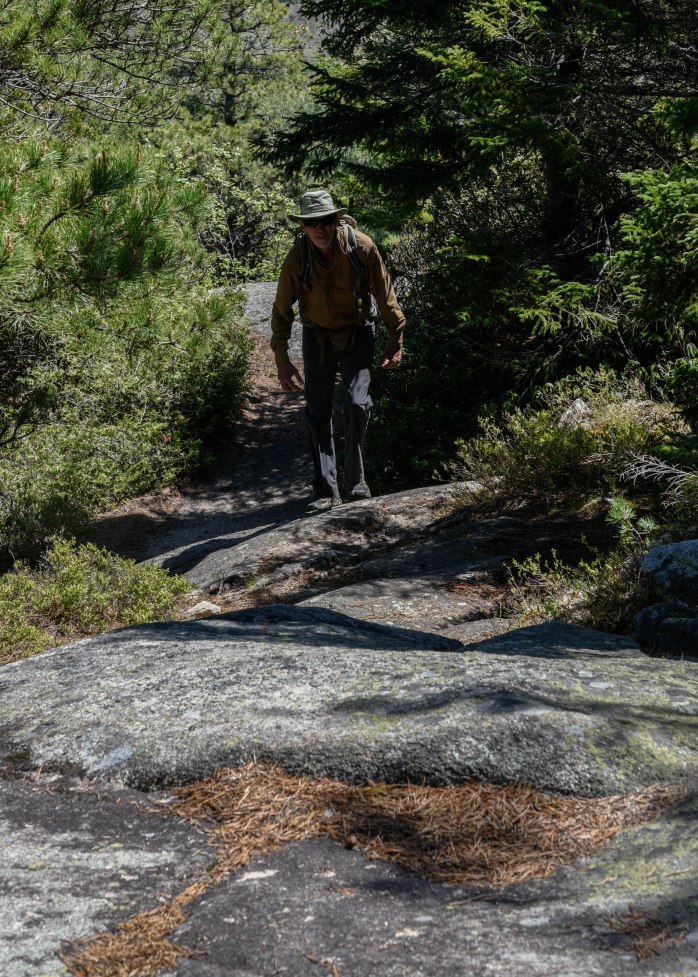
I set my alarm this morning (on my day off which I rarely do!) and got up early so I could catch the 8:30am shuttle to the Sieur de Monts area. My goal was to transfer to the Park Loop shuttle and get dropped off at the trailhead for the Champlain North Ridge Trail. It was already way to hot and humid at 8:30 am! This was going to be one hot hike. I wanted to get an earlier start to beat the heat but am limited by the shuttle schedule. Perseverance is the name of the game today! I started my hike this morning trailing two couples accompanied by their dogs. We traded taking the lead all the way to the summit. I truly felt sorry for the dogs. They had water for them but still had to stop frequently during the steep mile climb to the summit of Mt. Champlain. And the rocky granite trail was heating up fast and must have been hot on their little paws!
I was well-equipped with water and snacks. A year ago, in the Tetons I purchased a small Camelbak pack called the L.U.X.E. NV. It is just the right size for me for both hiking and biking, and has a 3-liter capacity water bladder. What I really love about this small pack is that it has a magnetic attachment for the water line that very nicely stays put while hiking. Since using this pack, I have found that I stay much better hydrated on the trail. I can take small sips as I am hiking instead of needing to stop and pull water bottles out of side pockets! I started the day with 2-liters of water which I was sure would be adequate for the 5 mile hike. 😊
I’m going to offer up a list of some of my favorite hikes – starting with this mornings hike. Short, sweet entries detailing route and mileage with pictures – starting with two of my most recent hikes.
CHAMPLAIN MOUNTAIN TO BLACKWOODS CAMPGROUND
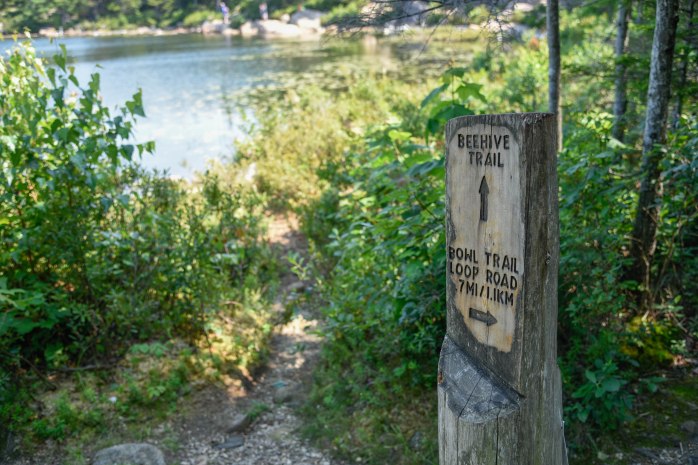
Take the Park Loop shuttle to the Champlain North Ridge Trail, hike up and over Champlain Mountain. Take the Champlain South Ridge Trail to the Bowl Trail. Two choices depending on weather and preferences – take the Bowl Trail to the Ocean Path Trail and hike along the cliffs until reaching the Gorham Mountain Trailhead parking lot. Take the Gorham Mountain Trail to its junction with the Otter Cove Trail. Pick up this trail and hike the Quarry Trail back to Blackwood’s Campground. Alternately, you can take the Gorham Mountain North Trail off the Bowl Trail and hike up and over Gorham Mountain – picking up the Otter Cove Trail on the other side. Either route gives you about a 5.7 mile hike.
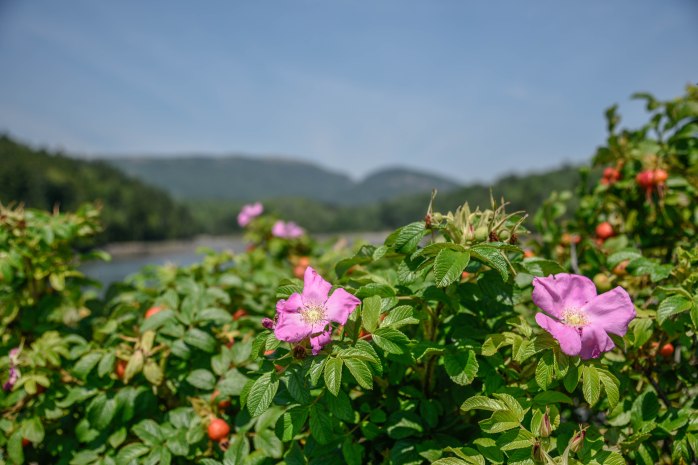
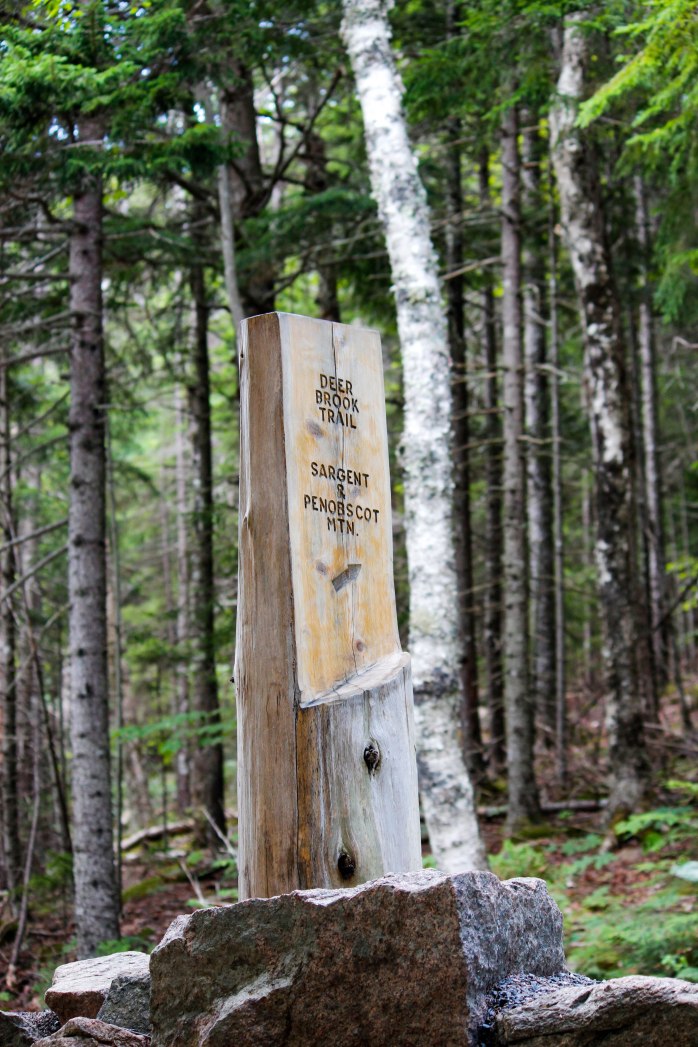
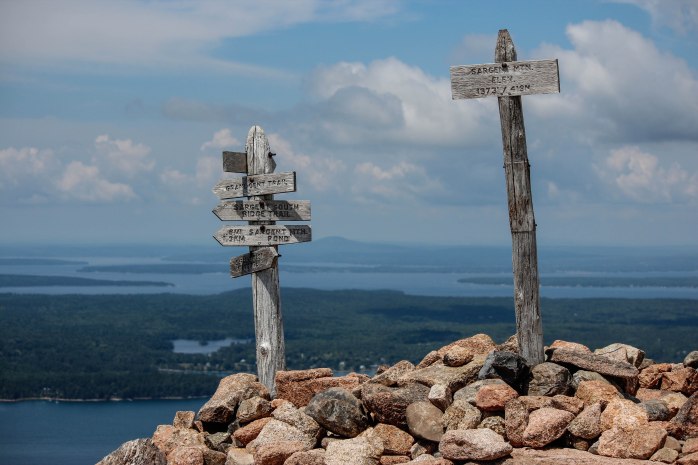
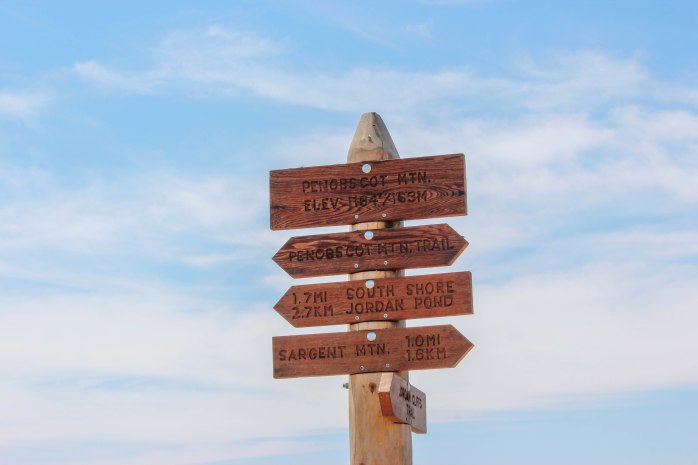
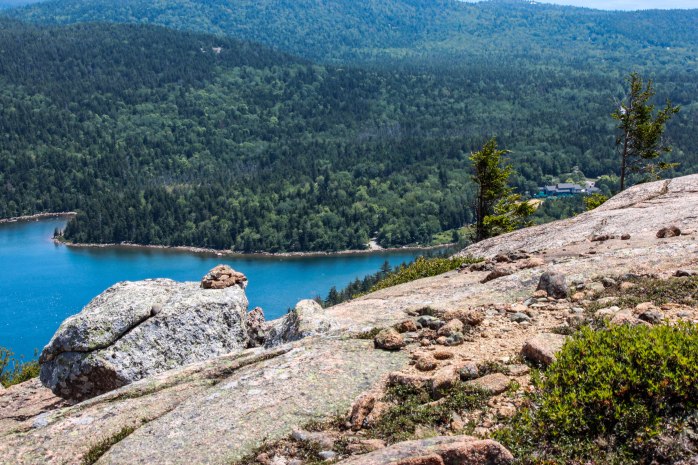
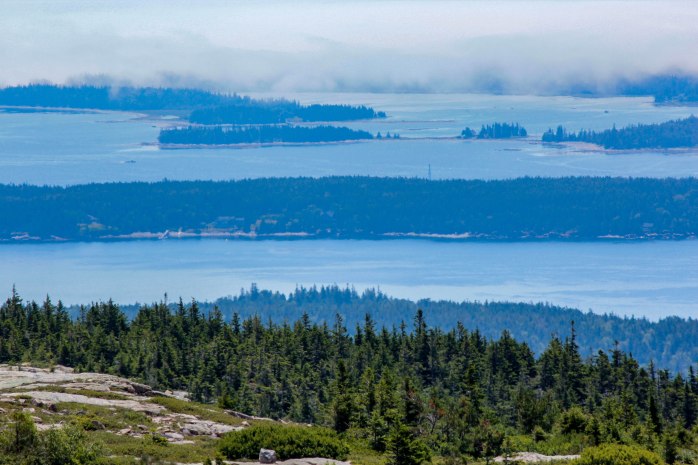
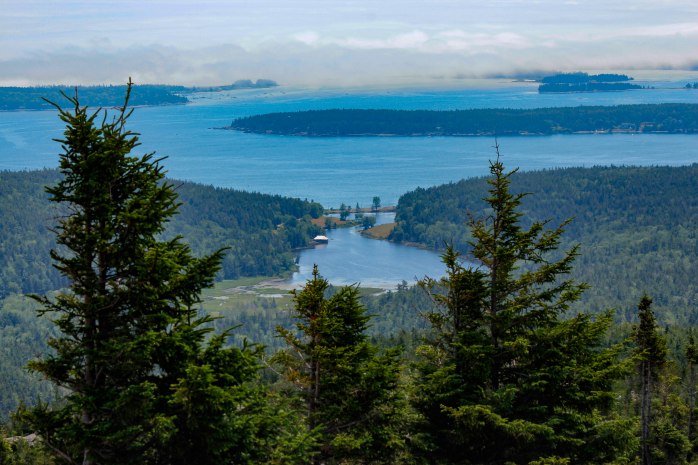
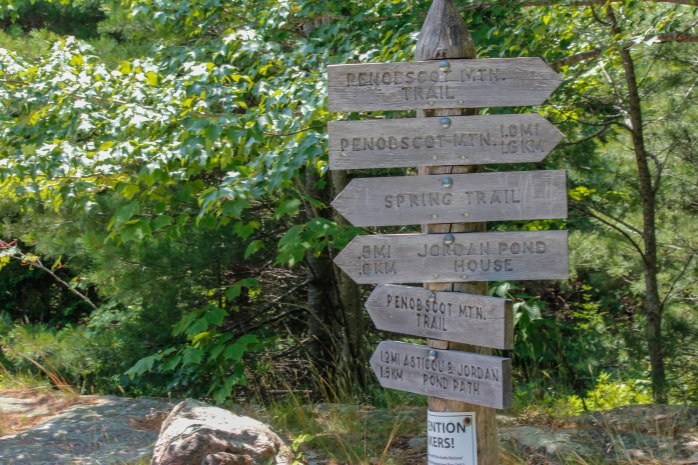
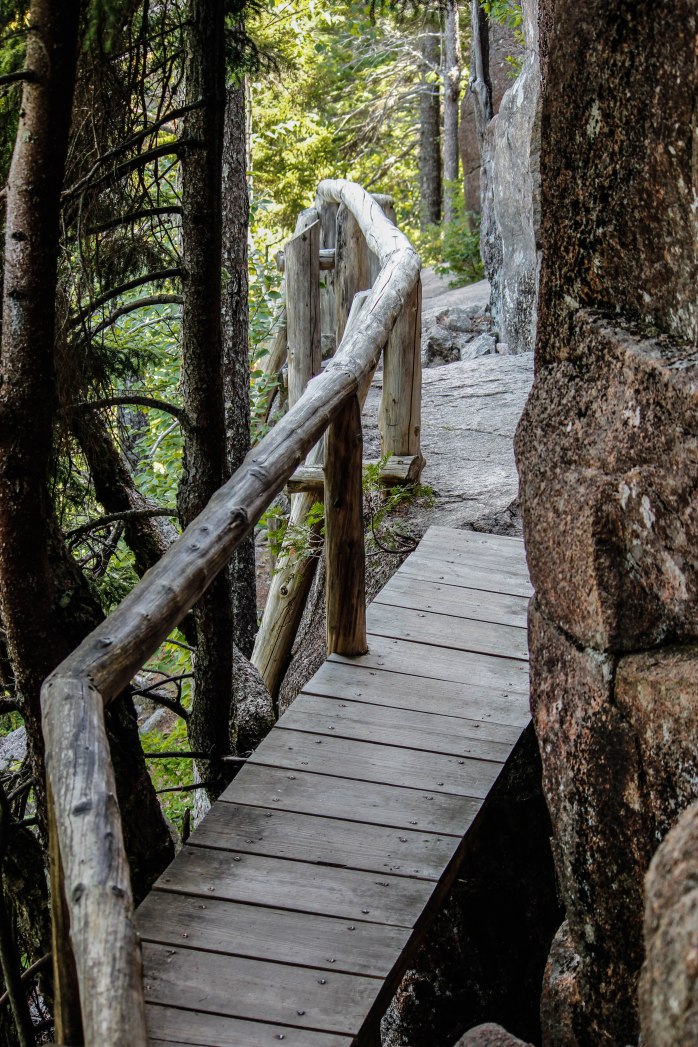
SARGENT AND PENOBSCOT MOUNTAINS
Park at the Jordon Pond Boat Launch Parking Area and take the Jordon Pond Path to the Around Mountain Carriage Road. Hike this to the Deer Brook Trail and start your ascent. Vere off onto the East Cliffs Trail (.8-mile steep climb) and take this to the summit of Sargent. Pick up the South Ridge Trail to Penobscot Trail via the Sargent Mtn. Pond. After summiting Penobscot Mountain continue on this trail to its junction with the Spring Trail. This steep descent lands you at the carriage road back to the Jordon Pond Path and the parking lot at boat launch. Approximately a 5.4-mile loop hike.


Hiking with a swollen, rolled ankle was not pleasant. Once I got back to the parking lot, I felt a sigh of relief that I did not injure it more. Back at the trailer, I was surprised how swollen it was when I took my boot off! Iced it up, and was lucky that it was just a sprain. Three weeks later, I’m fully healed!!
Thuya Garden Revisited


“A garden is a grand teacher. It teaches patience and careful watchfulness; it teaches industry and thrift; above all it teaches entire trust.” –Gertrude Jekyll
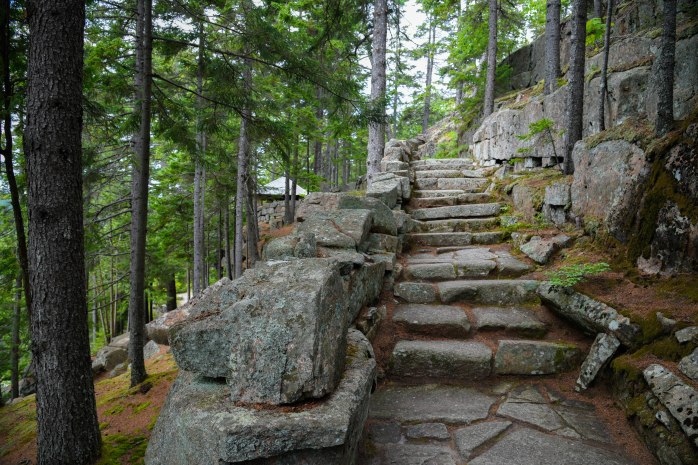
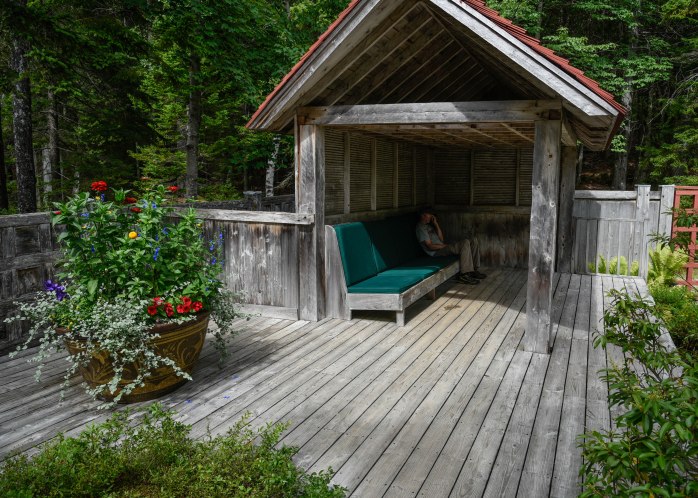
I finally took the time to return to Thuya Garden so that I could see the perennial borders in full bloom. As I approached the Thuya Lodge from the Asticou Terraces ascent, I was happy to see that the Lodge was now open for visitors. Built between 1912-16, Thuya Lodge was the summer home of Joseph Curtis – Brown University and MIT alumnus – and self-proclaimed landscape “engineer.” He began the work on his Maine estate in 1880, designing and overseeing the property development. One of his early projects was designing the eastern approach to the estate up a steep granite cliff – creating terraces and stairs out of the native granite. He incorporated rustic “gazebo” structures along the terraces overlooking Northeast Harbor.

Stepping inside the Thuya Lodge was like entering a sanctuary for the soul. I’m not quite sure how to describe the architecture and interior design of the lodge except to say that it is characterized by a rustic elegance that captured my heart. Much to my delight was the discovery of an extensive botanical library located on the second floor. I perused the collection slowly picking out titles that embellish my own gardening book collection at home.


In 1905, Joseph Curtis established a trust that would allow for the preservation of his estate as a public park, and in 1928 named his friend and local resident Charles Savage as trustee of the property. Savage was descended from a local family of farmers and fishermen and his immediate family built and operated the Asticou Inn near the Thuya Lodge estate. He was a local businessman as well as an artist, woodcarver and landscape designer. He eventually planned and executed the current perennial border using plants gleaned from the Reef Point garden of landscape architect Beatrix Farrand. The perennial border occupies what was once the site of the old apple orchard on Curtis’ property. An original apple tree still holds court over the perennial border.


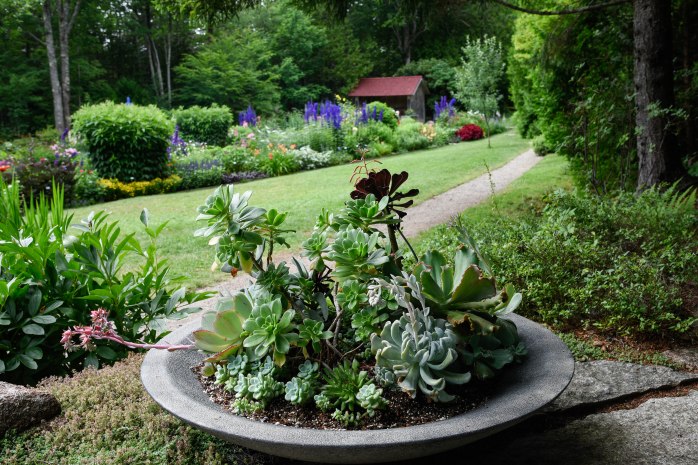

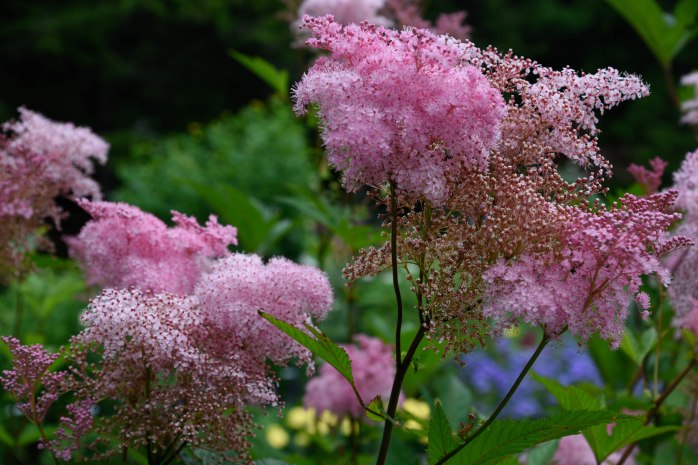
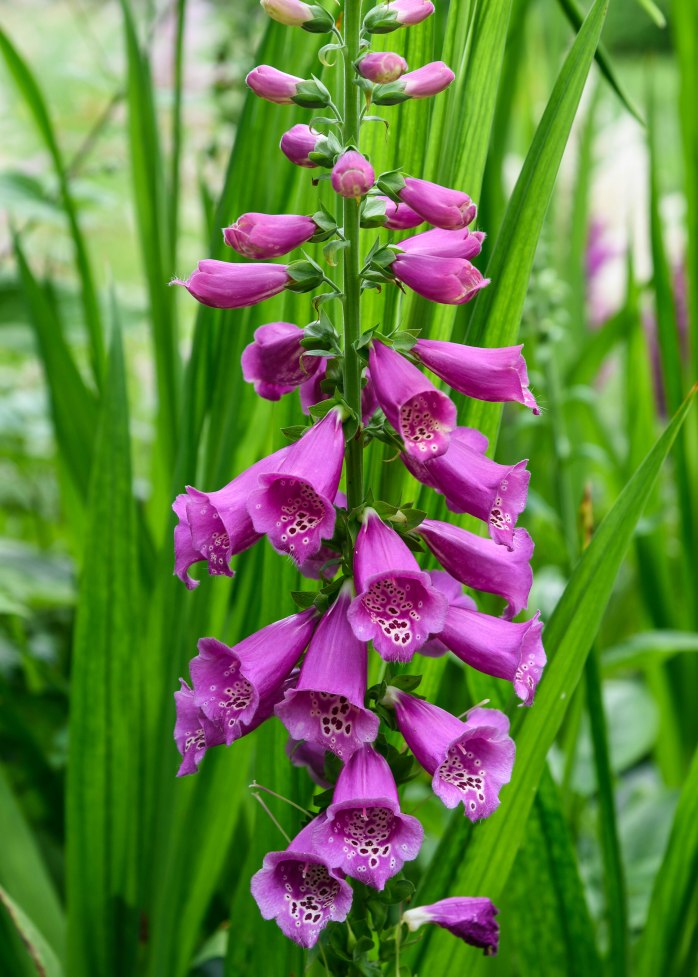
The flower border is a vibrant, happy mixture of perennials and annuals with a plentiful collection of delphinium, foxglove, dahlia, nicotiana and lily varieties. I’m not quite sure I’ve witnessed such a diverse mix of nicotiana cultivars!


Best of all, there was a small hidden section of the garden where native milkweed was serving as a foraging spot for monarch caterpillars. What a special thrill to observe these ravenous creatures at work!


I am convinced that I will wander through this garden many more times before I leave the island in the Fall – to rest, renew and rejoice in all that this special place has to offer.
Hiking Acadia – PART 1

“The only neighborhood of mountain and sea on all our Atlantic Coast. The cliffs look down, not on bay or lake, but upon broad ocean. It is to find in one, the Isle of Shoals and Wachusett; –Nahant and Monadnock; — Newport and the Catskills.” – Clara Barnes Martin, November 1866.
I came upon this quote recently and was struck by the observation of this long-ago visitor to Mount Desert Island. When I am “interviewed” by potential Junior Rangers here at the park, one of the questions in the booklet that the kids must ask me is “What is it you like most about Acadia?” My answer is always the same: I tell them that what I like most about Acadia is that the mountains and the sea converge here on this small island – and I like that this is very unique to the Atlantic coast. Imagine my surprise when I discovered the quote above by author Clara Barnes Martin that so mirrored my own reflections of this unique environment! I immediately felt a kinship to her.
It’s just past mid-July and so far, I’ve hiked almost 60 miles of trails and biked about 20 miles of carriage roads. I have read that there are about 150 total miles of hiking trails in the park, and close to 57 miles of carriage roads. I would say that I have a pretty good start towards completing at least 100 miles this summer!!! Given that, I thought it was about time to document some of my favorite hikes.
Quite by accident, I stumbled upon a two-volume publication that details the history and significance of trail building in Acadia and charts a path towards the perpetual maintenance and improvement of the trail and carriage road system here. Published in 2005, Pathmakers: Cultural Landscape Report for the Historic Hiking Trail System of Mount Desert Island addresses the historical perspective of trail building in Acadia. It’s sister volume, Acadia Trails Treatment Program proposes a plan for the long-term maintenance of the trail system in the park. The report was created through the collaboration of three main entities: Acadia National Park, Friends of Acadia and the Olmstead Center for Landscape Preservation.
I’m intrigued by this publication, was thrilled to find an online copy and look forward to learning a bit of history about the trails I’ve been hiking. Some of the trails in the park date back to a time when Native Americans lived and worked on the island. Early trails were also established during the turn of the century by local village associations and continued after the establishment of the park in 1916. On some trails, I have discovered memorial plaques commemorating people who contributed to the formation and upkeep of the trails in the late 1800’s and early 1900’s. The Pathmakers report is lengthy, so I will absorb it very slowly and – offer in “small tidbits” – what I discover about these historically significant and culturally unique trails.
Some of my thoughts on the condition of the trails in Acadia:
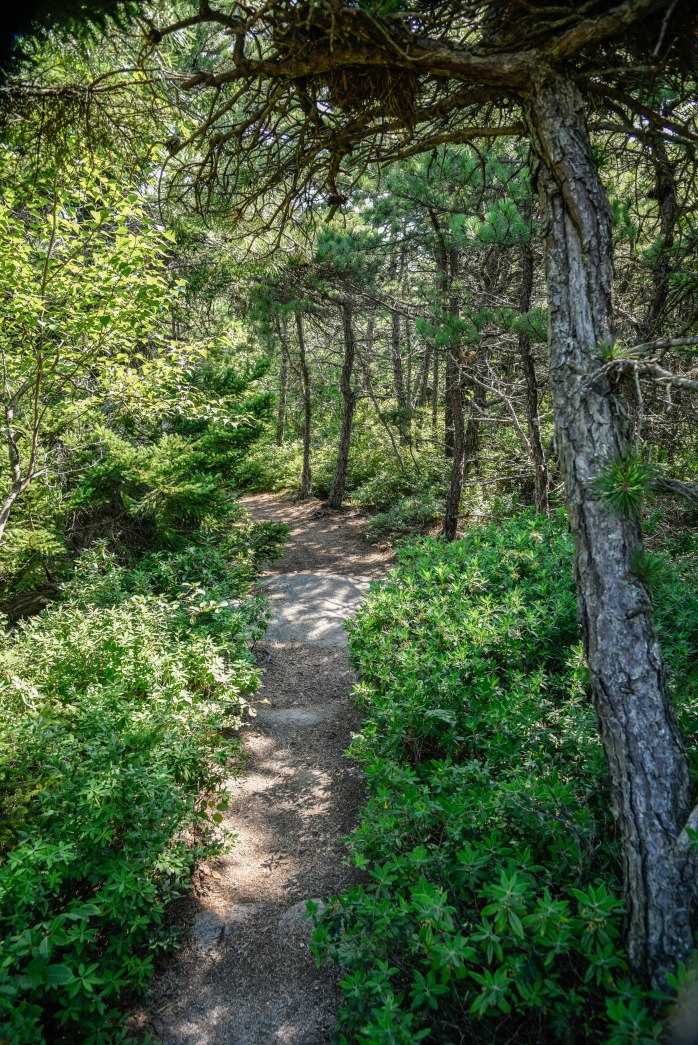
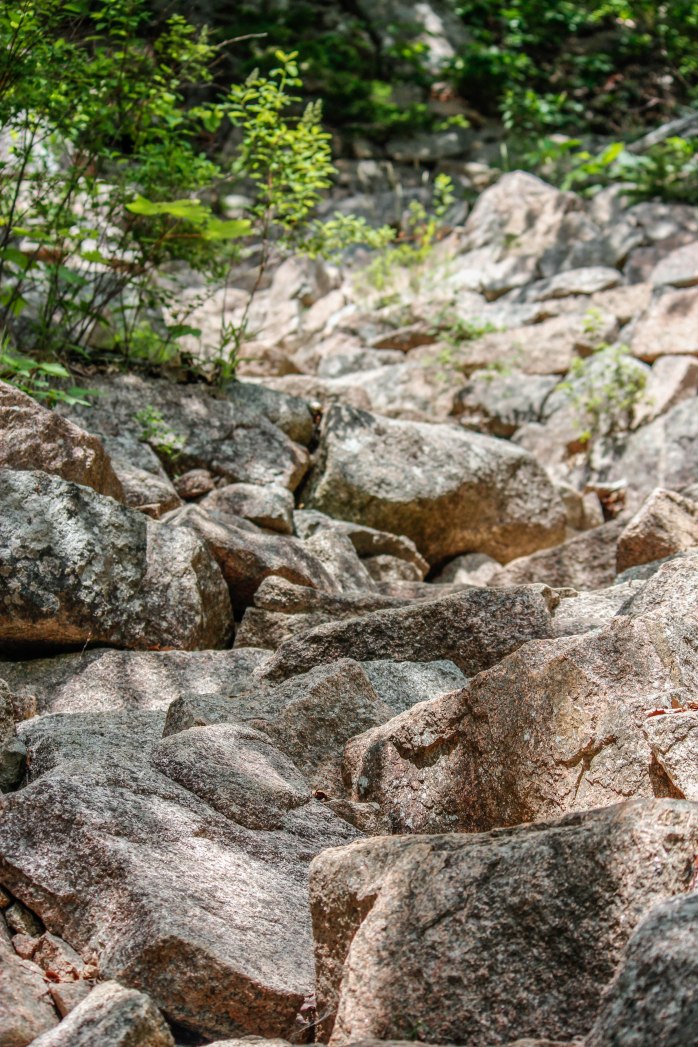
- At the lower elevations, expect to hike on rocky/dirt trails mixed with lots of tree roots! While the hiking in Acadia is not particularly strenuous when compared to the high-altitude hiking of the Tetons or Sierras from our past two summers, I have noticed that the footing can be somewhat more treacherous on many of these trails. This is a rocky island and the trails are well-used – producing many, many exposed tree roots in the forested sections of the trails. I find it exceedingly difficult to hike on trails dominated by tree roots. You have to be “aware” at all times. Tripping hazards abound!! Due to the glacial action that happened here as well, higher elevation trails are predominately granite rock ledge and pose their own challenges with regard to footing.
- Although the elevation is not outrageous at the summit of the mountains (we are on the east coast after all), some trails running east and west are steep (due to the glacial action here many years ago) and the elevation gain on these trails is substantial for short distances. So, it is possible to find strenuous hikes in these parts!
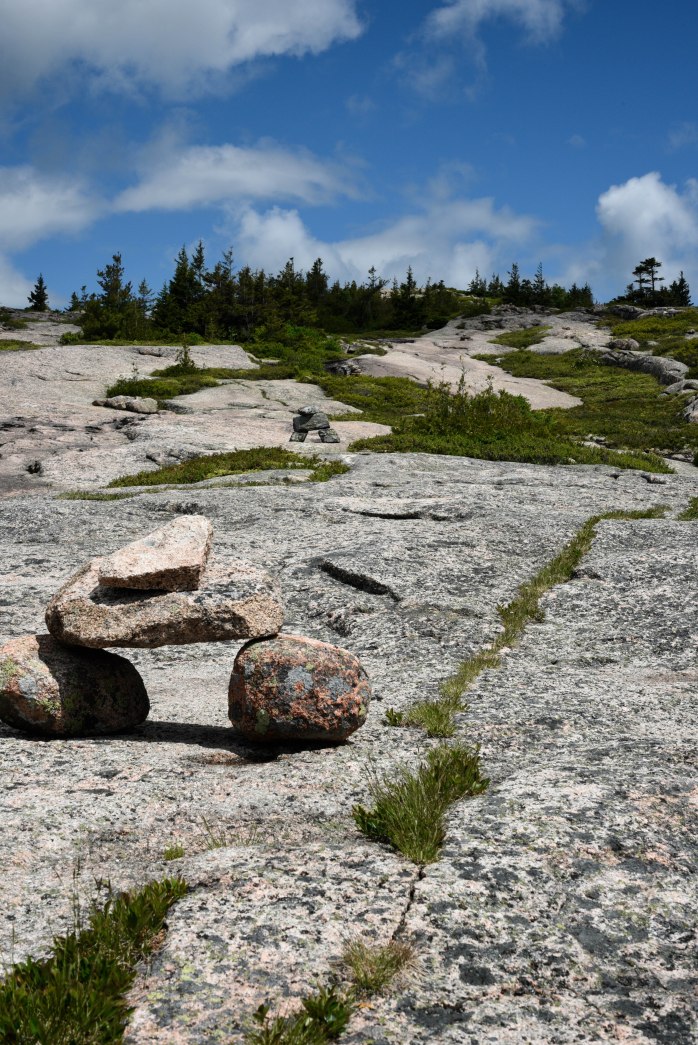
- Above the tree line, the trails tend to be on solid rock with trail markings designated by rock cairns. You need to pay attention when hiking above tree line so that you remain on the trail. This is critical to protecting the fragile natural environment and plant life.
- The trail markings seem to be more than adequate. I have “wandered” off trail by accident only a couple of times and immediately realized my mistake 😉 That said, I highly recommend purchasing a detailed hiking/biking trail map with distances and elevations marked. It is worth it’s weight in gold. My only regret is that I purchased a “paper” map when I first arrived, instead of the costlier ($10.50) waterproof map. I now have a paper map that is literally in shreds! That is how much I have referenced it, and it has not even gotten wet! I will be buying a sturdier, waterproof map shortly.
- Hiking alone brings a whole new perspective to the sport. I am realizing the importance of quality vs. quantity. It is important to be more aware of your surroundings and pay attention to every aspect of the trail. I walk more purposefully and try to always wear sturdy high-top hiking boots. I also recognize the value of trekking poles – which I would never have been caught hiking with just a few short years ago. I examine trail characteristics and descriptions, degree of difficulty and distances. I shy away from trails that are more difficult with regard to rock scrambling and exposure when I’m hiking on my own. “Safety first” is my new motto. Trail research is exceedingly easy in this technology-rich era.
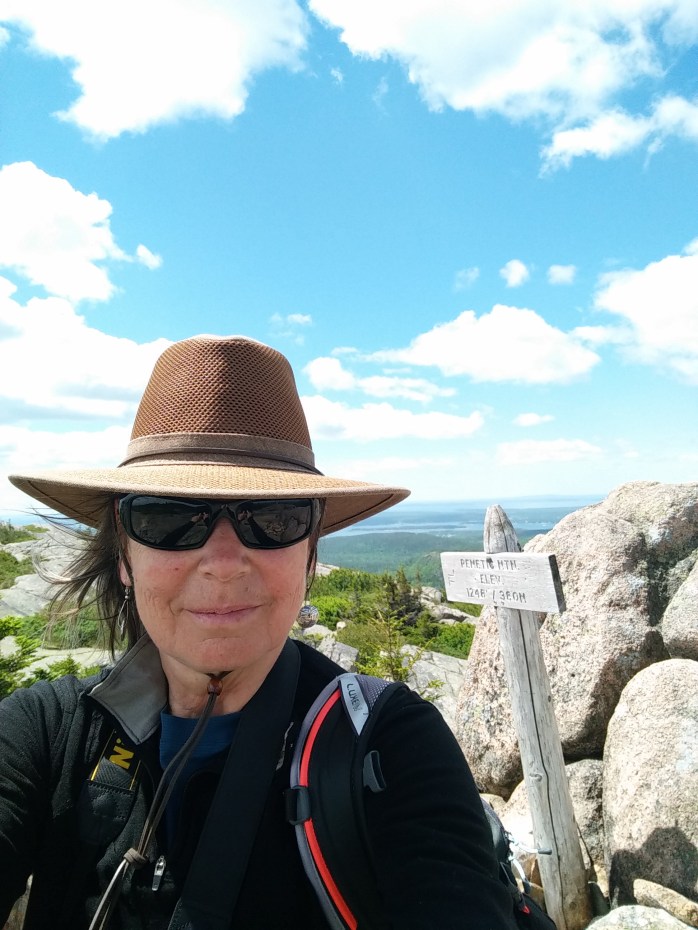
I will be sharing some of my hikes with very brief descriptions, total mileage and a few of my favorite photos. They are in no particular order – and for this post, I will start with my hike up Pemetic Mountain. I mentioned this hike in a recent post but did not go into detail about the hike itself. I call it my “forever hike.” Since it took me much less time than I thought to complete the out and back hike up Pemetic, I extended the outing to include the South Bubble Summit! As I was coming down the home stretch along Jordan Pond, I was definitely ready to get back to the Airstream and put my feet up!

Pemetic Mountain
Mount Desert Island was originally inhabited by members of the Wabanaki Confederation – including the Passamaquoddy and Penobscot Tribes. The island was named Pemetic by these native peoples. I’ve heard different interpretations of the anglicized meaning of this word – including “range of mountains” and “sloping land.” Pemetic Mountain is referenced a number of times in the “Pathmakers” report I mention above, and hiking to its summit is recorded in a passage from an interesting guidebook that was published in 1867 from articles written by Clara Barnes Martin. Apparently, she traveled to the island in 1866 and, from her journal excerpts, the trip was published as a series of weekly columns for the Portland Transcript. Later, the works were compiled into a guidebook available for tourists to the island.
Between 1910 and 1911, residents from Seal Harbor got together and purchased over 3,600 acres of land that included Pemetic Mountain, Cadillac Mountain and The Triad. This land was later donated to the Hancock County Trustees of Public Reservations – an organization established by prominent island citizens to preserve lands for public use. Acadia National Park was eventually created – by piecemeal – due to this individual effort to purchase and donate large tracts of land for “perpetual use of the public.”
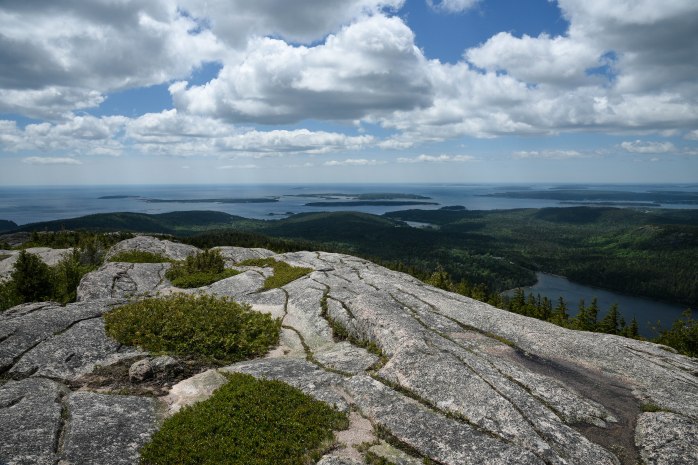
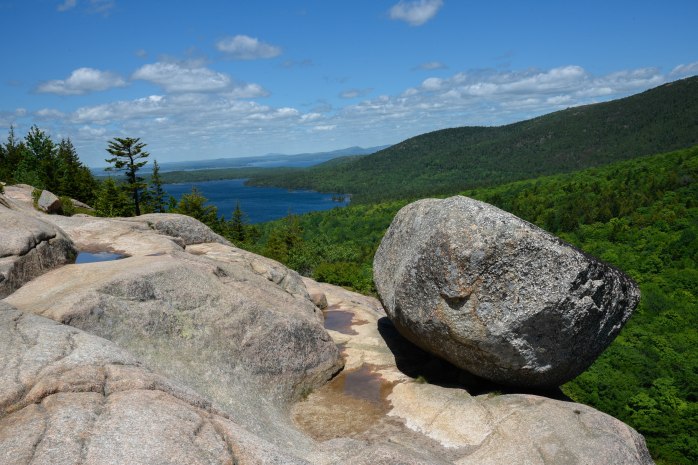
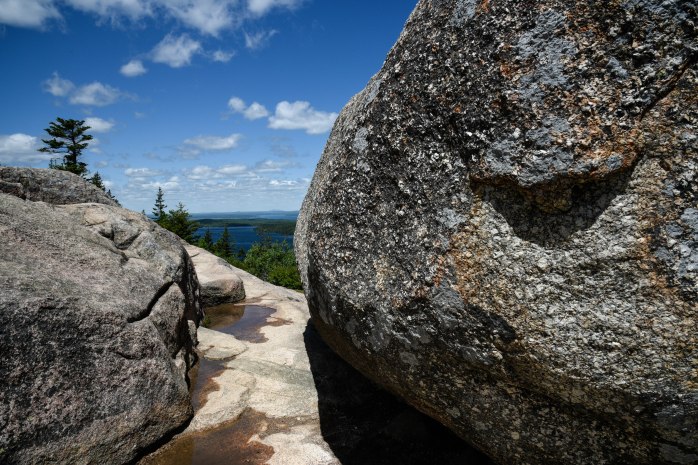
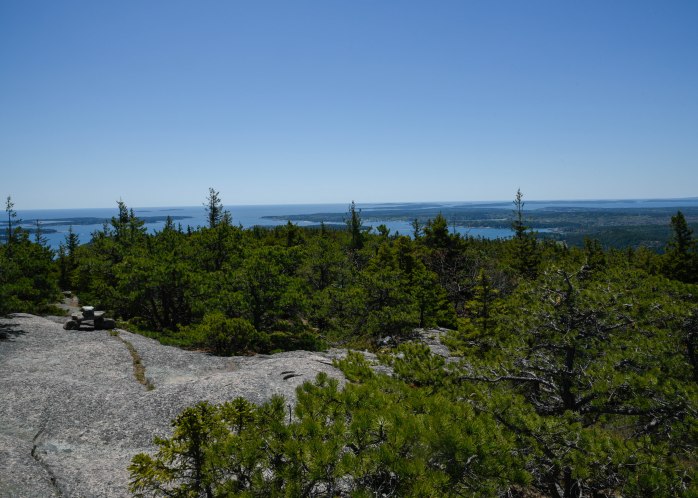
The Pemetic Mountain South Ridge hike was a spectacular surprise. I often seek hikes that are less popular (which translates to less people!) and had read that this was a gem. I can substantiate that claim unequivocally. It remains one of my favorite hikes so far this summer. I started the hike at the Jordon Pond boat launch parking lot. (Tip: In the height of the summer season, get there before 10 am to be assured a parking spot – or better yet, take the free shuttle bus!) From the parking lot, I accessed the Jordon Pond Trail heading east along the south end of the lake until it intersected with the Bubble Brook Trail. The Bubble Brook Trail then crossed the Park Loop Road and brought me to the junction with the Pemetic South Ridge Trail. The Pemetic South Ridge Trail rose steadily through the fir/spruce/pine forest eventually breaking out onto granite rock ledges and I traversed this rocky ridge to the summit. The vistas from this trail are amazing! The day I hiked the trail was quite possibly the windiest day of the summer thus far, and I felt like I would be blown off the mountain! This is a moderate “up and back” hike, and I extended it by hiking around the east side of Jordan Pond and up the Bubbles Trail to the South Bubble summit and the famous Bubble Rock. It made for a 9-mile hike overall. One of my longest and most memorable hikes this summer.


Stayed tuned for short posts on other hiking adventures – with a little history interspersed for interest!
Workamper Series – Part I: Arriving at a New Workamping Location – Survival Tips
The other day I was hiking alone up to the summit of Pemetic Mountain. Pemetic was the name given to Mount Desert Island years ago by the Native Americans who inhabited this region. It means “sloping land.” I’ve always wondered why we feel the need to change the names of places “discovered” by the early European explorers from their original designation. When Samuel de Champlain landed here, his September 5, 1604 journal entry described the island with this quote, “The summit of the most of them is destitute of trees, as there are only rocks on them. The woods consist of pines, firs, and birches only. I named it Isle des Monts Déserts.” (from his MEMOIR OF SAMUEL DE CHAMPLAIN Volume II 1604-1610 – chapter 5 found on http://mdi.mainememory.net) Personally, I think Pemetic Island is a lot easier to say – and we would not have to deal with the controversy surrounding how to pronounce Mount Desert Island – is it de-SERT or DE-sert? Better to just say MDI!
I arrived at the summit to find another solitary hiker sitting under the summit marker eating a snack. We struck up a conversation and, when he discovered I worked for the park service, asked me how I arrived at this point in my life. I recounted the multitude of occupations I’ve had over the years. After I was done, I laughed and said to him, “I guess you could say I’m a restless soul.”
I am a restless soul. I admit it. I’ve always enjoyed the anticipation of a new adventure – whether it was heading across the country for my first college experience, uprooting our family for a mid-life move to Vermont or planning our many family camping excursions. For me, the thrill of heading out for new territory with our Airstream in tow is exhilarating and energizing. Most RVing workampers choose this lifestyle because they want the freedom to move around and experience new parts of the country. This means picking up and moving every few months to a new location, often to an unfamiliar place. Many working RVers often return to the same work positions year after year – only traveling to new destinations in between work. But for me, the thrill of this lifestyle is discovering and experiencing new places and work experiences each season.
I am now positioned at my fourth workamping experience since hitting the road two years ago, and I think maybe that finally qualifies me as having enough expertise to relay some things I find helpful when settling in to a new job and location. While those who do not live this lifestyle might consider it stress-free and all fun and games, the reality is somewhat different. Even though we choose to live this way, there are still challenges and adjustments that have to be made on a regular basis. I thought I would document my main considerations and objectives when I arrive at a new place and set up residence. Focusing on this “loose checklist” of goals has proved beneficial to me in acclimating myself to a new place and feeling temporarily “settled.”
While many workampers live full-time in their RV’s and do not have a “brick-and-mortar” home base, we still maintain a residence in our home state of Vermont. We are working towards relinquishing this extra burden, but for now, we do still own property that must be maintained. My first task represented here is based on the fact that we still have this added responsibility.
Before you arrive at your new destination
- Before leaving for a seasonal workamping position, review checklist for home-base property and be sure all major areas are covered for either winterizing the property or maintaining the property in your absence. I’m not going to go into detail here, because this is so variable depending on what you choose to do with your primary residence and where that primary residence is located. Each person’s checklist will be unique! Just make sure that you have a checklist of all things that need to be taken care of before you leave and follow through on it!
- Whether you are a full-timer who has been stationary for a season or just heading out after your RV has been in winter storage, check all systems in your trailer, sanitize all lines and tanks, and make necessary repairs. Go over the maintenance checklist that comes with your RV manual and be sure that you are up to date on maintenance. Since we are not technically full-timers, we usually have a short period of time when our trailer is stored uninhabited for a few months. Our first task is to test all systems – heat pump/air conditioner, furnace, stove and oven, lights, solar set-up, refrigerator, water pump and heater, outside running lights and all water lines for leaks. Make sure everything is operational. This needs to be done well in advance of your departure date! After remaining stationary in Vermont this past winter, we tested all the systems in our Airstream at least three weeks before we were due to embark for Acadia. When we tested the toilet functionality, we found that it would not hold water, and determined that we needed to replace all the seals.


Jim – hard at work!
We had plenty of time to order the parts and schedule the work to be done prior to our departure. We also found a water leak in the line that goes to the shower due this elbow vibrating while traveling down the road. The fix was tightening up and remounting the line where it goes into the wall and the problem was solved.
Check your towing vehicle as well! Perform routine maintenance, replace tires as needed – make sure this critical piece of equipment is performing at its best!
- Set up a forwarding mail address and be sure that it is as secure as it can be. Since we still maintain a permanent post office address in Vermont, in some cases I have had to open a temporary post office box in the town where we are located and simply request mail forwarding for the duration of our stay. In my opinion, this is the safest way to handle forwarded mail if you still maintain a permanent home. I have used a temporary post office box in June Lake, CA and also use one here on MDI at Seal Harbor. Last summer we altered from this method. Our employer had an internal mail system whereby our mail was forwarded to their physical location and then distributed to employees via the company mailroom. This was not ideal, and in the future, I think I would opt for just getting a post office box. The mail room employees at this location were seasonal workers, and not well-trained in mail handling protocol. We had some critical pieces of mail that never made it to us. This was stressful for me and resulted in some formal complaints to the mailroom personnel. A third method of receiving mail is what I affectionately term a “periodic mail drop.” For a very short-term position where a temporary post office box was not practical, we simply asked a family member to collect our mail and do a mail drop to us every couple of weeks – once while we were traveling for several months – and another time when we were stationary for just two months. Again, this is not ideal. I generally do not want to impose on family for this task. I’m hoping that we develop a routine whereby we are traveling minimally to longer term summer/winter gigs and, therefore, can avoid enlisting the help of family.
Many full-timers (those who do not have a physical home-base) have mailing addresses based on their state of residency (where they have officially domiciled) and request regular mail drops. There are several mail services offered for full-time RVers for a fee. Workamper.com has several of these listed on their website. I’ve provided links below.
KOA Postal Mail ; Escapees RV Club ; Your Best Address ; Texas Home Base ; Fast Forward Re-mail (Florida) ; and Traveling Mailbox
After arriving at your site
Most employers allow you to move onto your campsite several days in advance of your first day of work. I take this time to get a few essential tasks completed.
- One of my first priorities is finding a decent grocery store and/or co-op and investigating the time and day for any local farmers markets. I love to purchase farm-fresh produce and other agricultural products to help out the local economy. Here in Bar Harbor, the only large supermarket is a Hannaford’s. That’s it! Since this is a familiar grocery chain for me, this worked out well! Other options exist in Ellsworth which is a 45-minute drive. I found out that the local farmers market in Bar Harbor is on Sunday mornings – so that is not convenient for me since I work. The same was true for the other small towns on the island. I was somewhat disappointed until I stumbled upon a farm on Beech Hill Road on the west side of the island when I was on my way to hike Beech Mountain. I noticed a farm stand sign and learned that this is an organic farm run by The College of the Atlantic. They offer CSA’s but also have a farm stand open Tuesday through Saturday. They have hours that coincide with mine! Hallelujah! I will definitely be back there for some fresh local organic produce.
- Another important task is locating the nearest merchants for RV supplies, propane re-fills and diesel fuel. Our first couple of days here, we noticed a leak behind the toilet and needed a new water module ASAP. I called several places and found a reliable, well-stocked RV supply store near Bangor – less than an hour away. Knowing the closest location and best price for propane refills and diesel fuel is also handy, not just for us, but also for the campers who visit the campground. I’ve been asked this question many times!
I am also once again in the position of needing to find a good, clean laundromat. Always a fun chore! It’s been interesting navigating the different laundromats across the country. The closest one to me is in Bar Harbor. I advise you to take the time to read the laundry instructions. All washers and dryers are operationally different. I can attest to that! The one in Bar Harbor has three different types of washers – depending on load size and content. I did not pay attention to this my first two visits. Also, read the dryer instructions before using them for the first time. On my first visit to this laundromat, I missed the fine print on the dryer and ended up spending double what I should have to dry my clothes! The second time I was there, a couple from Quebec were trying to figure out how to use the dryers. I was happy to explain the system to them! My mistake on my second trip to this laundromat was overloading the washer. I did not realize the subtle difference between the washer sizes. They all looked the same to me with the exception of 3 obvious large capacity washers. I loaded my clothes in an available washer (including one towel) and thought that it was totally within the capacity of the washer. I sat down to read and it was then that I noticed the wide-screen monitor with the capacity rules for each type of washer. I should have used a medium load washer, which were apparently the ALL stainless-steel washers vs. the regular washers. They sure looked like the same size to me! The screen also said that you should never put towels in the small capacity washers! It was too late to stop the washer. As a result, my clothes did not spin out properly and it cost me more to dry again!! They were dripping wet when I removed them from the washer! Good grief! You would think I could navigate this simple task without issues. I grew up accompanying my mother to the laundromat every Sunday morning. While most teenagers would find this a chore, I actually enjoyed spending this one-on-one time with her. She would probably be surprised that I remember this routine in such a positive light! That said, you would think I was laundromat-savvy! Apparently, 40 years of having my own washer has fogged my memory regarding laundromat protocol. They say the third time’s a charm, right? I think I’ll get it totally right on my next visit 😊
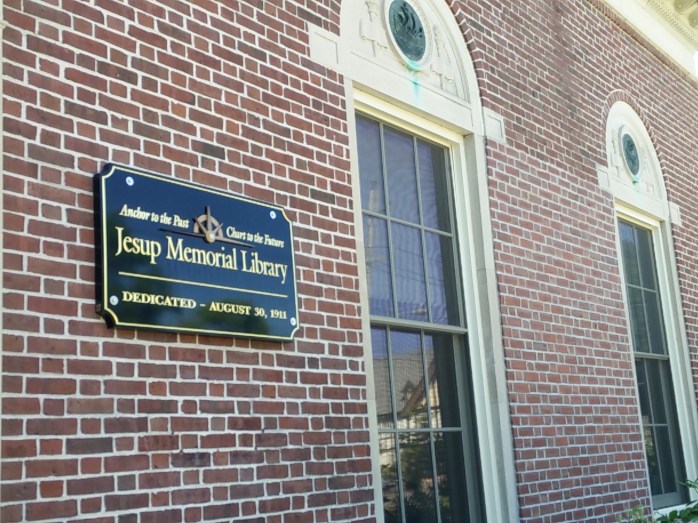
- In every place we have workamped, I have visited the local town library and signed up for borrowing privileges. In my wallet are library cards for the June Lake Public Library in California, the Decatur Public Library in Texas, the Teton County Library in Jackson, Wyoming and now the Jesup Memorial Library in Bar Harbor, Maine. Libraries are a great resource. Not only do they lend books and DVD’s but they usually have printers, copiers and free WiFi. Most public libraries also subscribe to downloadable e-book vendors if you have a Kindle or Nook or any device that supports this functionality. When we worked for California Land Management in a forest service campground on June Lake in California, I had no access to WiFi in the campground. Since I do not have unlimited cell data or pay for satellite internet, I utilized the tiny June Lake Public Library all summer – borrowing reading material and using the WiFi for my blog postings. I have the same situation here in Acadia. I signed up for a library account during my first week and use their WiFi frequently. I have already checked out numerous books and DVD’s on the history of Acadia, and borrowed some pleasure reading material as well as movies. Libraries are also a great source of information for finding out about local events and programs. The Jesup Memorial Library in Bar Harbor advertises itself as a “community and cultural center” and hosts a number of community events – including a knitting group, a writer’s workshop and a monthly contra dance. Support the local library in your area! You will not regret it! Librarians are great people and always willing to help – straight from the mouth of a former librarian, ha!

- My next important mission is familiarizing myself with the history and general geographic area where I’m stationed. Sometimes this means doing some research ahead of my arrival. For example, I compiled a list of places I wanted to visit on my days off as soon as I knew I would be working here on Mount Desert Island for the summer season. Since most of the positions I’m attracted to require direct interaction with visitors either in a campground or other park location, answering questions about things to do and places to visit is inevitable and ultimately part of my job. For example, here in Acadia, one of the first things I did was drive the 27-mile park loop road stopping at the most popular attractions. I need to be able to give campers directions to the places they want to go – which includes them telling the best way to access the park loop road for their desired destination. I also began hiking the trails on my days off starting those that are accessible from the campground, then moving on to hiking the most popular trails.
I’m now starting to branch out into other activities, exploring the west side of the island and continuing to explore the over 120 miles of hiking trails. Biking the 50+ miles of historic carriage roads within Acadia is an activity that many visitors partake in, so I will soon be starting to bike these pathways. I am waiting for the free park shuttle to start running to I can get to the carriage roads without using the winding, narrow, heavily-traveled automobile roads! I have also noted where our internal print and online resources are located in the ranger station to aid in answering questions about trails, fishing, swimming, biking, boating, flora and fauna. I’ve been here a month, have logged many miles of hiking trails already, and am feeling confident in the knowledge I have gained so far! Information services continue to be at the heart of what I love! People are so grateful for advice that contributes to a successful and fun vacation.


History was always one of my favorite subjects in school. Immerse yourself in the local history. I borrowed two DVD’s about the history of Acadia NP that were recommended by the librarian in Jesup Library and watched them my first week here. I also checked out books about the history of the carriage road system in Acadia and some material on a local landscape architect (since that is a passion of mine). If you’re going to live somewhere for a few months, you might as well understand the significance of the region and why people settled there. Visit museums, gardens and other cultural entities to broaden your knowledge of these local inhabitants. I’ve posted a blog about some local gardens I’ve visited. Recently, I embarked on the ranger-led Islesford Historic Boat Cruise and learned some more local history and stories about life on an island.


- And now comes the fun part! Jim and I enjoy eating out on occasion and hate wasting time and money on substandard restaurant food. We also enjoy finding local breweries and wineries to patronize. Talk to the locals and find the out what the best deals are in your area and where they choose to dine. Sometimes the restaurants that cater to tourists are more interested in quantity rather than quality. When we were looking for a spot to have lunch in Bar Harbor on one of our first days here, we asked a gentleman with a briefcase who was walking past us down the sidewalk. We figured him for a local given his attire and purposeful walk. He recommended the Side Street Café and we were not disappointed! I have already returned there for lunch when in town running errands. While in the Jackson, Wyoming area, we found several favorite haunts and enjoyed them throughout the summer. Our summer in June Lake, we located a great Mexican cantina in the town of Mammoth Lakes where we could sit and enjoy football games – complete with Happy Hour prices on beverages and all the chips and salsa you could eat! Find some good local eateries and support them!
- Community involvement is rewarding if you can take the time to volunteer in some capacity. I’m not saying you should spend all your free time doing this but it’s a great way to get to know the local residents and feel connected to the community, even if you are only there for a season. I must admit that I have not taken advantage of this as much as I could. We did volunteer for a day in the Tetons doing some trail work. It was a joint effort with the park service, the park concessionaires and the local community. We worked alongside a boy scout troop, other park personnel and visitors who found out about the volunteer work day on the NPS website. It was a rewarding experience. I’ll be looking for some potential prospects here in the near future. You can find these opportunities at local Chamber of Commerce websites, from area environmental clubs and non-profits, hospitals, YMCA/YWCA’s and nearby colleges and universities. Even if you only participate once or twice in a season, the benefits are great and the organizations are appreciative of the help.
As I sit in the Jesup Library working on this post, I realize this is the first time I’ve visited the library on a Thursday morning. Note to self – do not try to come here on Thursday mornings to get work done! As soon as I sat down to work, someone started playing the baby grand piano located in a corner of the library. The sound reverberated throughout the entire library. While it was very nice, I was finding it hard to concentrate. Then, it became obvious that she was just warming up for the children’s program that was about to start. As a former children’s librarian, I was very impressed with the quality of their program. But, it was not exactly quiet 😊 Next time, I will try and get here on my normal Wednesday morning schedule! So, if I have many errors in this blog, it’s because of the distraction of working while also tuning in to the kids program!!
I do apologize for the formatting. Working in word and then copy and pasting into WordPress is not always ideal. And with time constraints and distractions today, I’m not inclined to re-format to my liking. Time to get back to the campsite and get ready for work!
I am hoping to continue with the Workamping Series – with some posts dedicated to topics specifically oriented to this life-style. Cheers!!
In Search of Acadia’s Public Gardens
Wherever I travel, I am drawn to seeking out public botanical gardens much like a hummingbird is attracted to Monarda or Lupinus or Aquilegia. Just as the hummingbird gets its nourishment from these flowers, visiting gardens and walking in nature sustains me. My love of gardening and the art of landscape design has its foundation in my early life as a resident at Longwood Gardens. I treasure my childhood spent wandering around this phenomenal garden created by Pierre S. DuPont. Living at Longwood instilled in me a love of plants and the natural world that remains a guiding force in my life. (Ask Jim how many times I stop while hiking to admire and snap photos of plants discovered along the trail!)
I am close to three public gardens here on Mount Desert Island and made it a priority to visit them before the hoards of summer tourists descend upon the island. On one of my first days off, I traveled the short distance to the Asticou Azalea Garden and the Thuya Garden. Both gardens are free while a suggested donation of $2 is appreciated. The third garden I really want to experience is the Abby Aldrich Rockefeller Garden – on the grounds of the former estate, The Eyrie, of John D. Rockefeller, Jr. This garden is not as accessible to the public and requires reservations as it is only open for a limited amount of time during the summer months. So, I will be looking to reserve a spot to tour this garden later in the summer when at its peak.
I grabbed a brochure at the entrance to the Asticou Azalea Garden and, in that publication, learned about the Mount Desert Land & Garden Preserve. This foundation was established by John D. Rockfeller’s son, David and his wife Peggy as a means of preserving gardens and the natural landscape in the Seal Harbor area. At present, the preserve manages over 1,100 acres including the three gardens mentioned above. In addition, there are carriage roads and hiking trails throughout the preserve which borders Acacia National Park. For more information about the preserve, visit the website.
The next revelation was the discovery that both the Asitcou Azalea Garden and the Thuya Garden were created with plants secured from the former Bar Harbor garden of landscape architect Beatrix Farrand. She was an early female pioneer in the landscape architecture movement back in the time period of the great country estates. It is no secret that her initial success was due in large part to her well-connected social status. While she had no formal college education, in 1893 through her prestigious social connections, she secured an apprenticeship with Charles Sprague Sargent, the director of the Arnold Arboretum at Harvard. After an intensive year of study under his tutelage, she had the luxury of traveling throughout Europe studying garden design up close and personal. In particular, her time spent at the Munstead Wood garden of Gertrude Jekyll appears to have influenced her later style with regard to flower borders.
Upon her return from Europe, she set up shop in her mother’s New York City home, and again through her influential society connections, acquired commissions from some affluent clients. So, while it has been stated that her success was due largely to her social prominence, she clearly had the talent and drive to sustain her career and gain admiration. From 1891 through the 1940’s, she designed gardens for both private and public entities – including work done at both Princeton University and Yale. She served as a role model for women endeavoring to enter the field of landscape architecture and will certainly be remembered for her perseverance and achievement in a male dominated profession. Her connection to Mount Desert Island was largely due to the summer family estate on Reef Point that she inherited from her mother.
I remembered Beatrix Farrand’s name from my time spent studying landscape design at Temple University’s Ambler campus. The school was originally founded in 1910 by Jane Bowne Haines as the Pennsylvania School of Horticulture for Women. Beatrix Farrand was commissioned in 1931 to create a design plan for the college. I spent countless hours enjoying and studying the prominent English-style perennial border she developed for the school. I graduated with Summa Cum Laude honors from Temple with a degree in Landscape Design in 1987. My most memorable experience at Ambler was having a design I developed for a class on naturalistic planting techniques used for the school’s exhibit at the Philadelphia Flower Show! I can remember standing in the crowd looking at the exhibit with my pen and ink hand-drawn design on display, feeling very accomplished and proud!
Returning to the present day, I checked out some books about Beatrix Farrand from the Jesup Memorial Library in Bar Harbor, and enjoyed refreshing my memory with regards to her life and work.
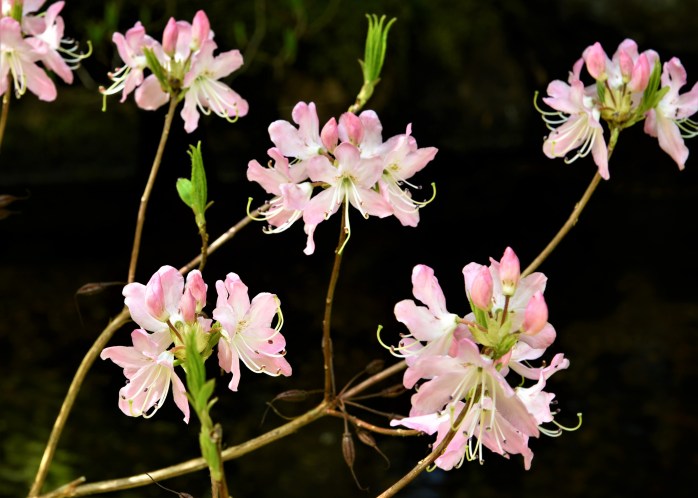
I hope you enjoy some of the photograph’s I’ve taken during my visit at the Asticou Azalea Garden and the Thuya Garden, both created with a foundation of plants from the former gardens of Beatrix Farrand.
Asticou Azalea Garden
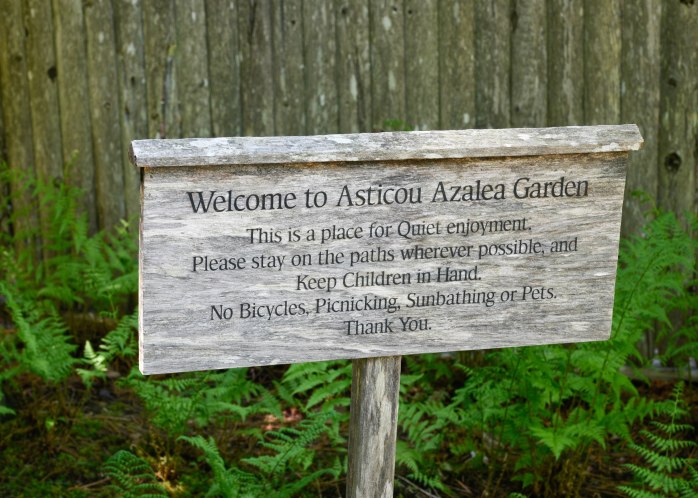
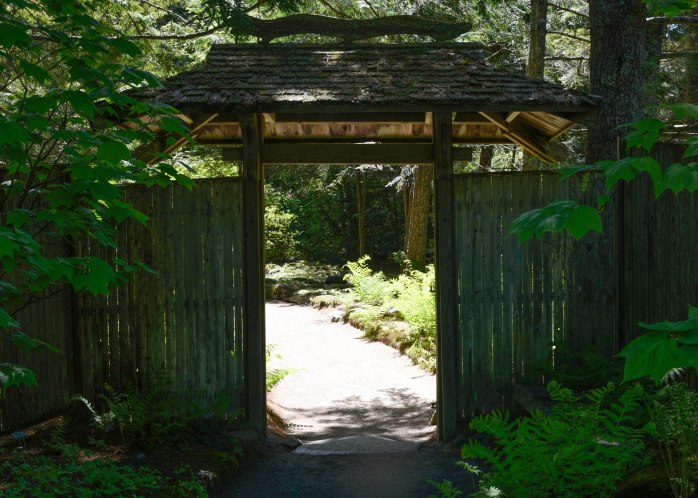
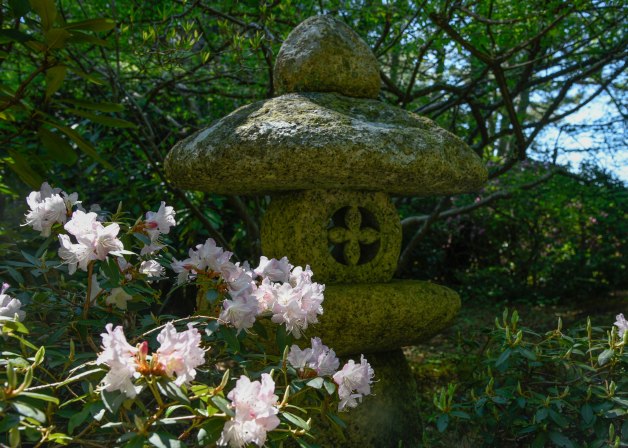
Located in Asticou, between Seal Harbor and Northeast Harbor, the Asticou Azalea Garden was designed by landscape architect Charles Savage with Japanese-style plantings and hardscapes. He secured the acquisition of many plants from Beatrix Farrand’s Reef Point garden when she sold her property in 1956, and incorporated these plants into the plan for this garden. While small in acreage, the garden provides quiet spots for reflection and solitude.
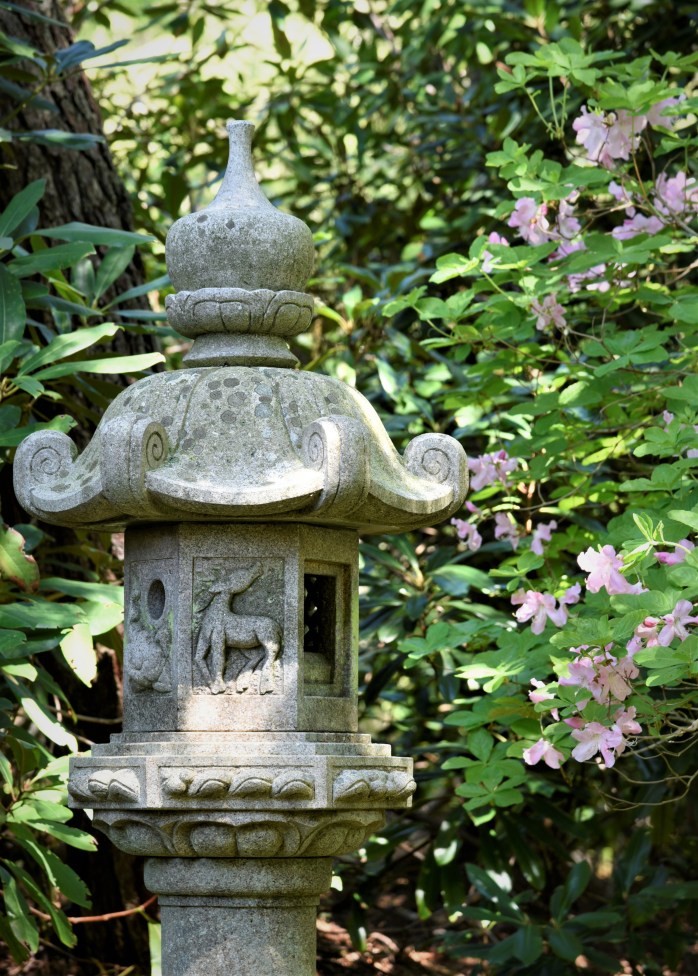

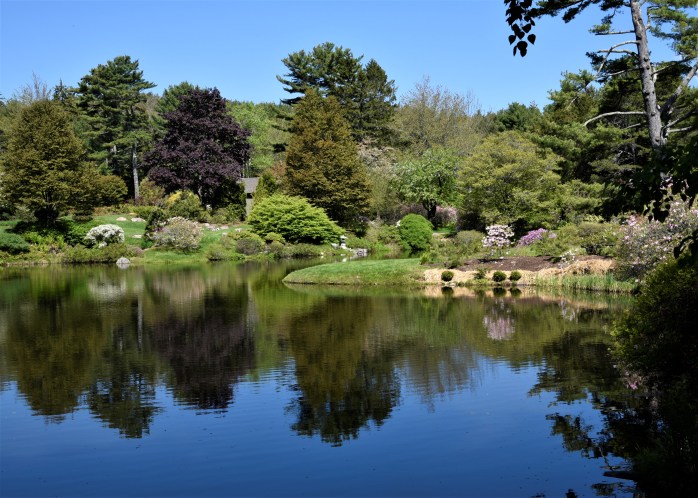
Strolling through the garden, there are hidden gems like the above sculpture just waiting to be discovered! And walking around the pond pathway, views are framed with lush plantings of both native and non-native plants. I enjoyed recognizing some of the plants I remember from my landscape design days in Pennsylvania!


Thuya Garden
This property was once belonged to Boston-based landscape architect Joseph H. Curtis as his summer home. After his death, his friend Charles Savage accepted the responsibility of caretaker for the property. After working on the design for the Asticou Azalea Garden, he began work on designing the Thuya Garden and it officially opened to the public in 1962. Again, he used plants from Beatrix Farrand’s garden. When I visited, the large perennial borders were still more or less in dormancy. There was a gardener’s cart with a hand-drawn planting plan spread out on it – in between the two large borders. Obviously, it was planting time! This garden is designed to be at its best in July through September. I will be making a return trip later in the summer in order to enjoy the garden in all its glory.
For this trip, since there was not much in bloom, I focused on the architecture in the garden – a very simple combination of wood structures embellished with details I found delightful!
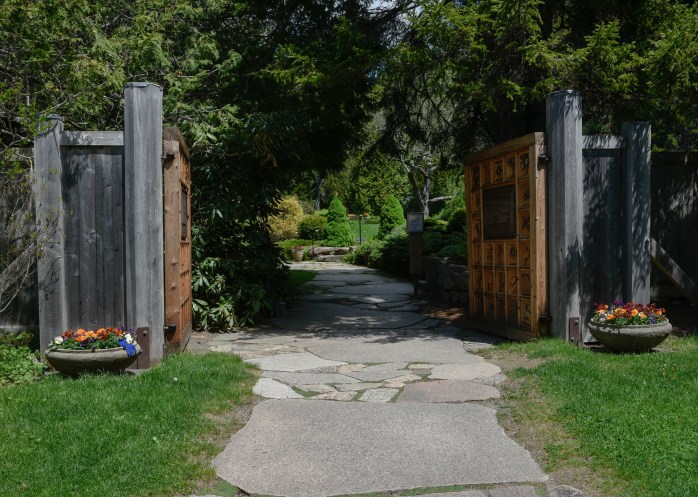

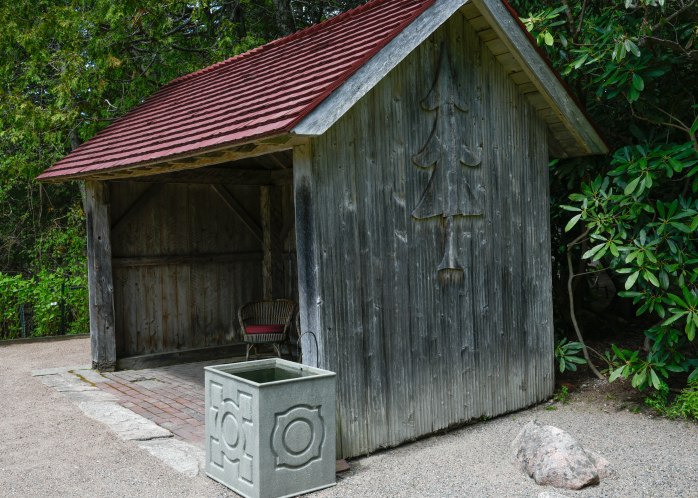
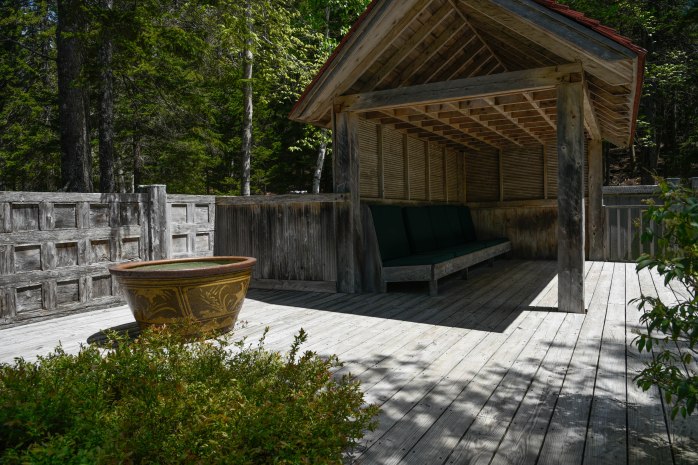
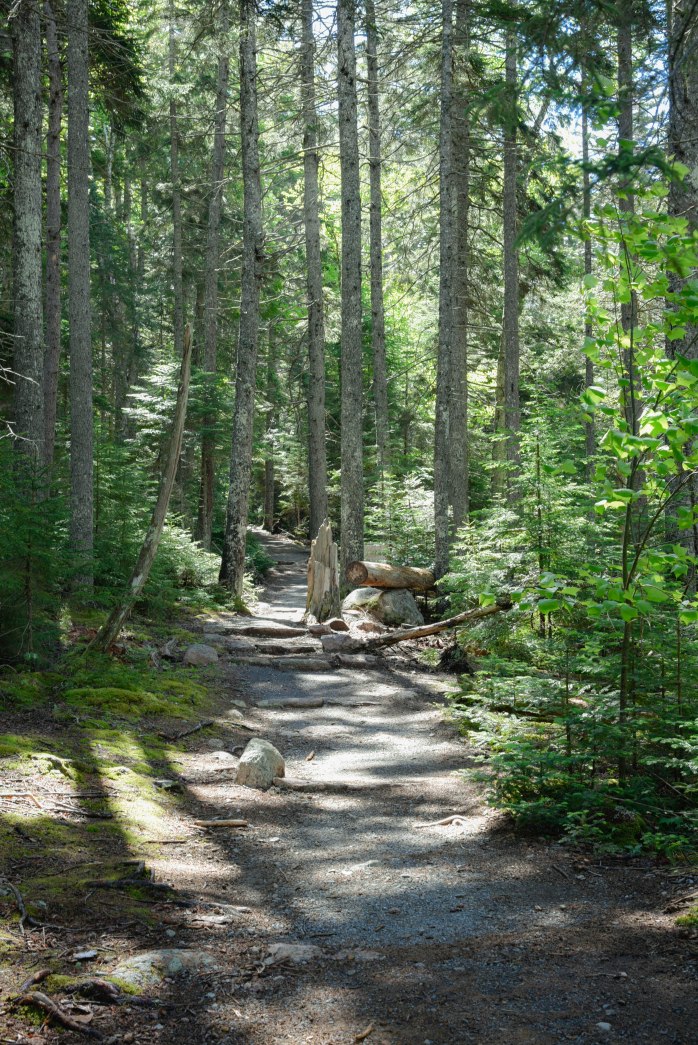
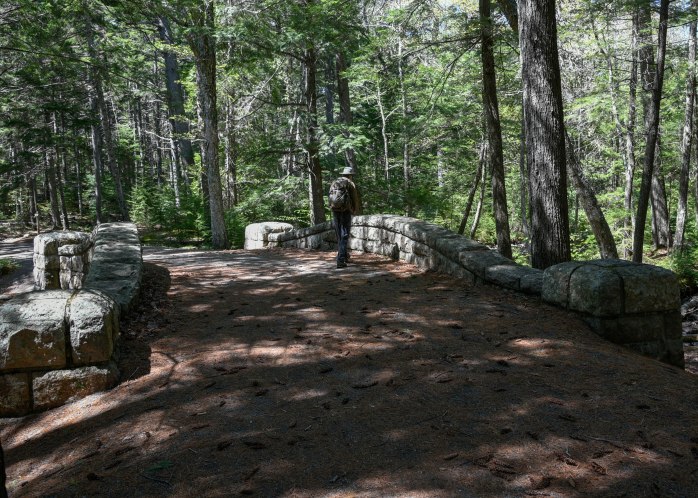
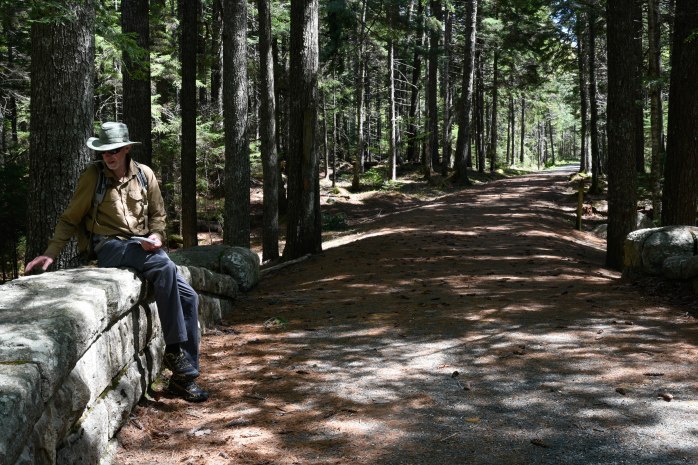
Since there was not much in bloom, and after admiring the rustic garden embellishments, I noticed that there are hiking trails that leave from the garden and into the preserve. I decided to take “the paths less traveled” and climb to the top of Eliot Mountain. Along the way, I discovered some memorials to those who called Mount Desert Island home, and were instrumental in preserving the land here.
")
")
")
")
")
The trails in the preserve are maintained very minimally, and less traveled. I never saw another human being through the entire hike up to Eliot Mountain. If you are looking to avoid the crowded Acadia NP trails, consider spending some time in the Land and Garden Preserve.
On my way back through the Thuya Garden after my hike, descending the steep Asticou Terrace entrance to the garden, I took the time to capture the view towards Northeast Harbor. And, came upon a little creature, all tucked up against a rock waiting for mama.
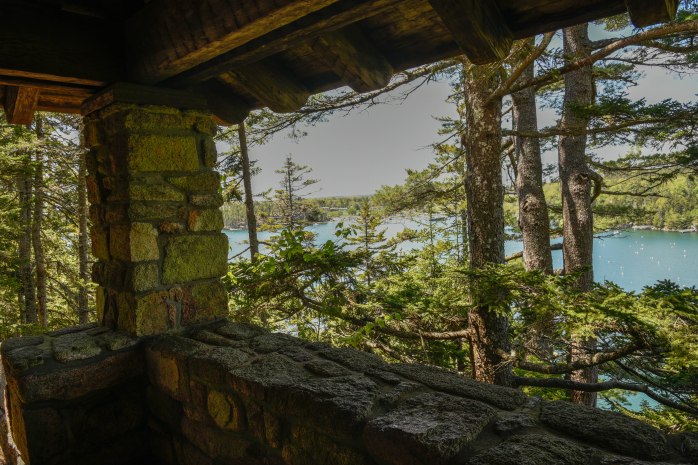
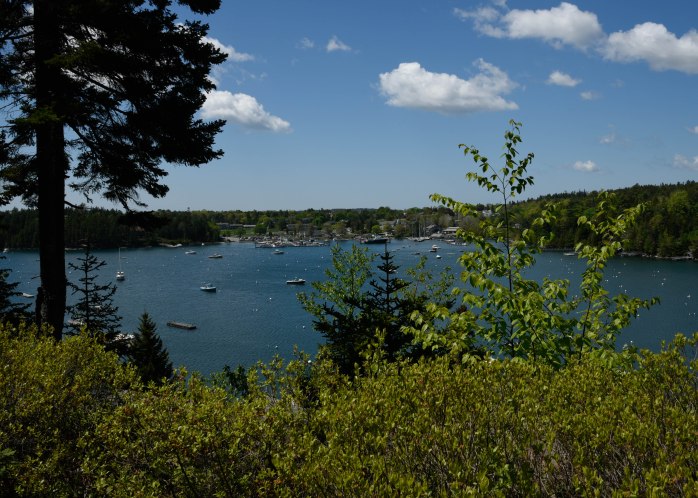

I cannot wait to revisit Thuya Garden later in the summer and see the perennial borders in full bloom. Thankful to these affluent landowners for donating their properties for the benefit of all. 🙂
Settling in at Acadia NP
“My heart is tuned to the quietness that the stillness of nature inspires.” – Hazrat Inayat Khan
I’ve completed my first two full weeks of work at Acadia NP and celebrated after the first week with an 8-mile round trip hike up Cadillac Mountain. It was a cool, cloudy start to the morning but quickly gave way to sunny skies. I started to shed layers almost immediately! But, I’m getting ahead of myself……
Let’s begin with our arrival here on Mount Desert Island. Jim and I drove up from our Airstream’s winter home (A.K.A. our son’s home in southern NH) on May 17th. Jim was a little nervous about driving without a co-pilot in the adjacent seat. Just before our departure, my daughter-in-law offered us her older model Honda Insight hybrid for the summer. So, we were traveling in separate vehicles for the first time. It was decided I would be the leader, and Jim would follow. Given that the Insight is a tiny, 3-cylinder car and I would not be driving very fast, I was pretty sure Jim could keep me in his sights! He had hand-written directions and I had my Google Maps. The uneventful trip took us about 7 hours and we arrived around 5 pm with plenty of daylight left to get set up, which ended up being a good thing.

I was surprised that the foliage was so far behind even central Vermont in leafing out! We investigated the situation and decided just how we wanted to position the trailer before backing into the site. I remember remarking on how easy this was going to be. The site seemed fairly level with ample room to jockey the trailer into position. Jim commenced to back the trailer up, and once I was satisfied with the angle of the trailer in relation to the site amenities and the approximate level seemed manageable to tweak, we got everything properly leveled up, unhitched and lowered the stabilizers. Jim started working on getting the outside lines all hooked up while I worked on the inside, our normal division of labor tasks.
It was then that we realized we were too far away from the septic hookup! We had noticed where the water and electric hookups were placed when deciding on where to locate the trailer, and decided we were okay, but neglected to double-check the septic connection distance. After all that work! We both felt pretty darn foolish. This was the first time in 4 years of owning the Airstream that we had made the mistake of not checking ALL the hookup distances before unhitching. Arghhhhh……we needed to back the trailer up quite a bit further than we would have liked and move it more towards the far edge of the site. Even then, we were going to need all the sewer hose we had with us. I have already silently cursed the designer of these two employee sites for lack of planning and attention to detail. The WSE hookups should have been positioned better given the generous space available on each site. It meant being much closer to the back of our fellow employee’s camper. The only consolation was that at least we had not physically hooked up the water and electric lines yet! But, we still had to hitch back up to the truck and manipulate the trailer into a different position on the site. And, it still meant using our extra sewer hose.
It all worked out in the end, and we still managed to have everything set up before dark. A lesson learned…the hard way! Motto of the Day – never boast about how easy a set up is going to be until completed! Our site has a picnic table, a fire ring and a permanent stand-up wood/charcoal grill – although I plan on using our portable Weber grill for the ease and convenience. (When I’m feeling less embarrassed I will share my Weber grill tale!) We spent the next two days before I had to start work getting everything in working order and exploring a bit of the area. On Friday, we decided to head to Seal Harbor first thing in the morning so I could get my temporary post office box registered. It was then I discovered that Seal Harbor is much smaller than even our town in Vermont. The post office has 24-hour access to the lobby and PO boxes, but the window is only open for 4 hours in the afternoons! That’s definitely going to limit my access to mail.
We had a couple of hours to kill before the window opened, so our first stop was to the little café next door to the post office for a cup of coffee. Since we had already eaten breakfast, I did not sample any of their baked goods, but I will be back to do just that! They looked delicious! The Coffee Shop Café has a nice selection of fresh baked goods, a simple yet impressive sandwich menu, and a small counter against the window for enjoying a cup of java. Once our caffeine infusion kicked in, we drove on to Northeast Harbor to check out this town and the Pine Tree Market. I was curious how extensive their product line was and found it to carry all the essentials. I’m not sure that it would be better than driving into Bar Harbor for me, though. I read in the Acadia Weekly that this is the most exclusive of the island villages so I’m guessing prices are high, maybe? I might, however, change my mind when the height of the season descends upon us and Bar Harbor becomes inundated with summer visitors. After checking out the market in Northeast Harbor, we headed back through Seal Harbor in time to catch the post office open and my first checklist item was complete!
Another plumbing issue…
When we returned to the campsite from Seal Harbor, Jim noticed that we had some water leaking from behind the toilet in the bathroom. Since we had just replaced all the seals in the toilet right before the trip, he was coming to the conclusion that it was the water module behind the toilet where the water intake is located. He thought perhaps this was the source of an occasional “drip” in the past but he was never quite sure. I looked up the part number online and after numerous phone calls to local hardware and RV suppliers nearby, I found the part in stock at McKay’s RV and Boat located near Bangor, ME. It was about 45 minutes to an hour away from us, and if we left immediately, we would get there and back in time for me to still accomplish an afternoon grocery store trip. This RV parts place was great! They had our part put aside for us and receive high marks from me for their customer service. It’s reassuring to know there is a decent RV parts store relatively close by.
I headed into Bar Harbor to find the Hannaford’s grocery store while Jim commenced to do yet another “toilet” repair. Don’t feel bad for him though – I guarantee you he would much rather do that than grocery shop! There’s something comforting about shopping at a familiar grocery chain. This store was smaller and more cramped than the remodeled versions in Vermont, but still stocked all the same items I’m used to purchasing. An added bonus is that, unlike our store in Vermont, the organic options are all grouped in the same aisle with their non-organic counterparts! I love that! I’ve always preferred this aisle arrangement and am glad to see it in practice here!
Getting our hiking legs…
Due to my work schedule, I had two days off after just one day of work so Jim and I took that opportunity to explore the area and get some initial hikes under our belt! I love the hiking and carriage road map I purchased at the Nature Center. The trails are marked with distances and contour lines as are the carriage roads. We can instantly map out potential loops and calculate distance and elevation gain. I am thinking that I probably should have spent the extra $$ for the waterproof version as I’m sure this one will be tattered by the end of the summer!
The Park Loop and Gorham Mountain
I thought it would be a good idea to drive the park loop and get familiar with all the major tourist spots, so we hopped on the park loop road at the Sieur du Monts entrance and made a brief stop at the Nature Center. I purchased a cheap, but very detailed trail and carriage road map here for reference. I love the hiking and carriage road map I bought. The trails are marked with distances and contour lines – as are the carriage roads. We can instantly map out potential loops and calculate distance and elevation gain. I am thinking that I probably should have spent the extra $$ for the waterproof version as I’m sure this one will be tattered by the end of the summer!
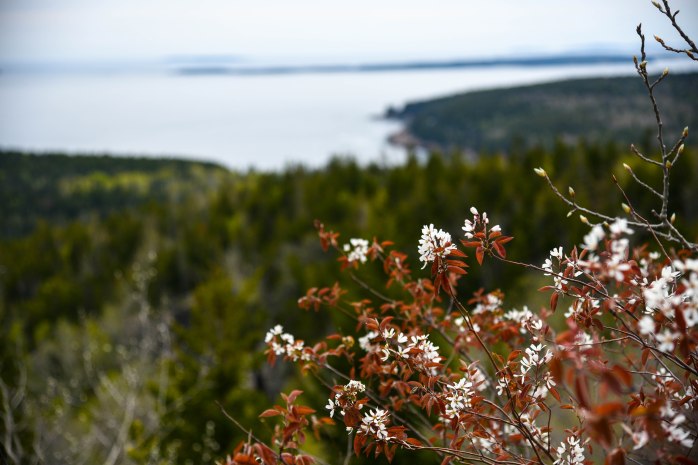
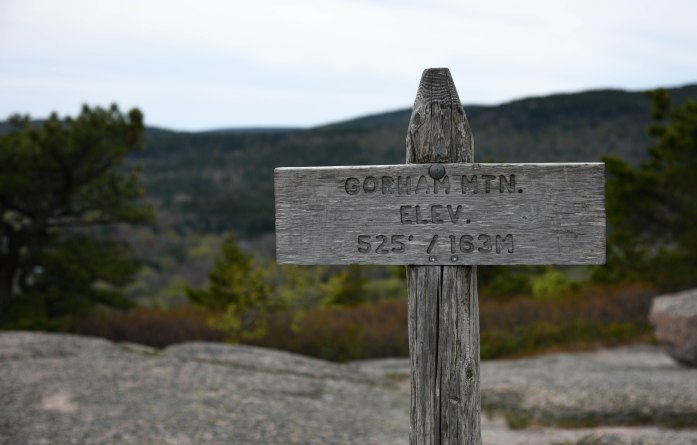
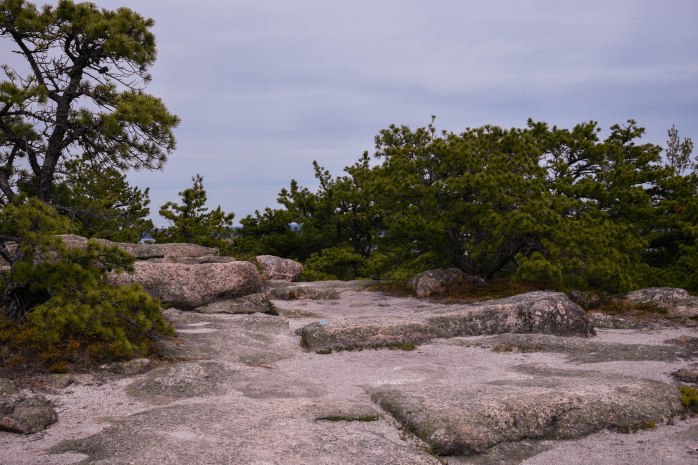
I also made a mental note to return and walk through the Wild Gardens of Acadia. Continuing onto the one-way loop road to Sand Beach, we stopped in here and decided to park and hike the Ocean Path Trail to the Gorham Mountain Trail and complete a small, loop hike. The loop was about 2.6 miles in length and the view from Gorham Mountain summit was beautiful. The Downy Amelanchier were in full bloom, and you know that serviceberry is one of my favorite native plants – so I was thrilled!
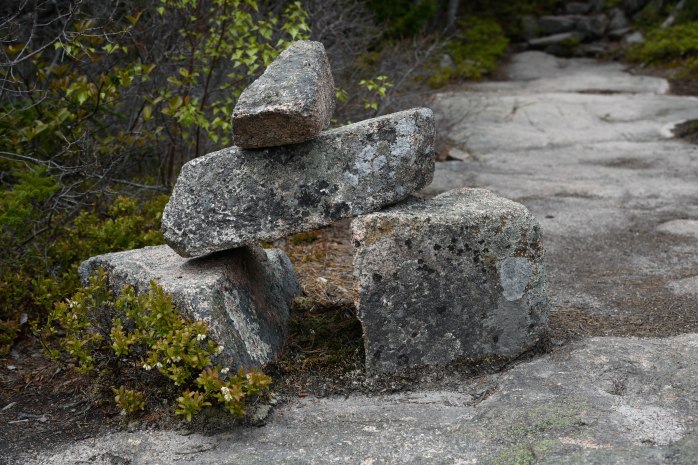

Throughout Acadia National Park, trails are marked with Bates Cairns – directional points of reference. He was a Harvard graduate and lawyer from the Boston area who spent time on Mt. Desert Island. He eventually became chairman of the Path Committee of the Bar Harbor Village Improvement Association. During his tenure, he established the idea of building cairns during trail construction and maintenance. Today, these cairns serve to guide hikers and keep them on the trail – thus preserving the natural environment.
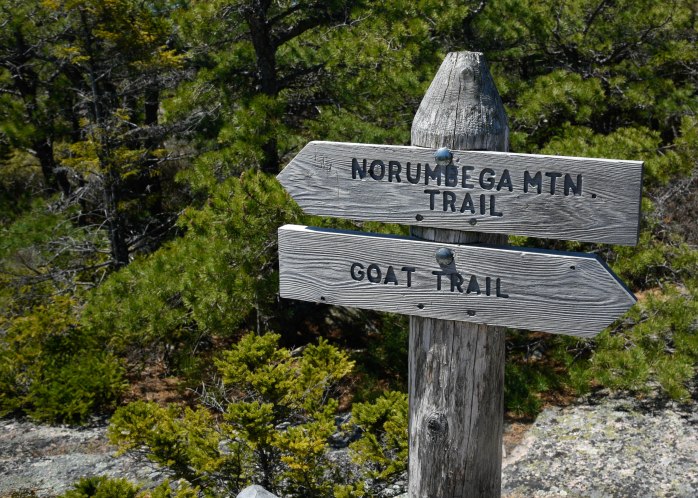
Norumbega Mountain Trail via the Goat Trail
The next day I wanted to do another hike that was not too long so I could get my hiking legs in shape again. I chose a loop that would take us up and over Norumbega Mountain. I heard the views of Somes Sound from the summit were very nice. And, the trail would take us past one of the parks many lakes – Lower Hadlock Pond. The trail begins on the Goat Trail at a parking lot off Route 3, and ascends rather steeply for .6 miles to the summit.
After reaching the top, it was somewhat disappointing to discover that the vegetation really obscures much of the view towards Somes Sound. But, as the trail descends rather gently to Lower Hadlock Pond, there are glimpses of the “sound” here and there.
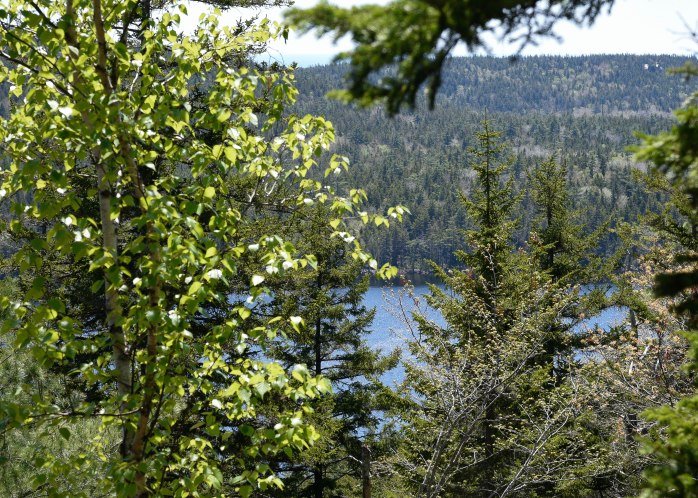
Once we reached Lower Hadlock Pond, instead of taking the Norumbega Parking Lot connector trail, we continued onto Hadlock Ponds Trail, crossed over Route 3 and traversed along Upper Hadlock Pond. This small detour was worth it. We had the luxury of watching a loon cruising around on Upper Hadlock Pond!

On the other side of Upper Hadlock, the trail crosses a carriage road and, somehow, we missed the trail head on the other side of the carriage road. So, we simply continued on the carriage road since it would intersect with the Bald Peak Trail and take us back to where we parked the car. I love the fact that there are multiple loop options while hiking the trails in the park. There are endless possibilities for extending or shortening a hike – and can often be done in route. I love the flexibility of altering my plans on a whim.
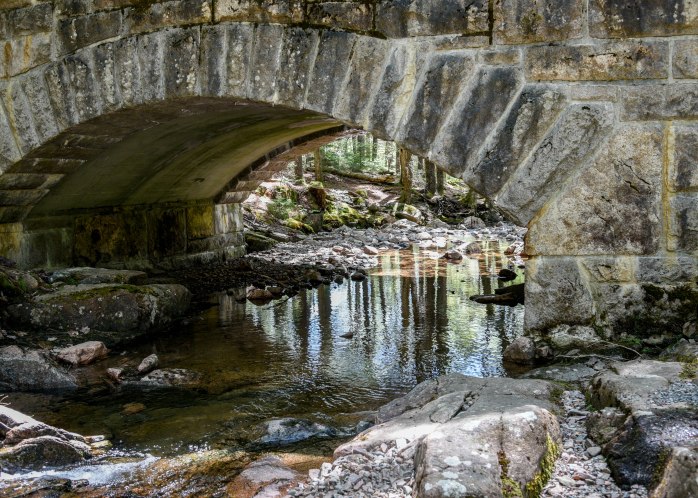
I understand there are 16 bridges that John D. Rockefeller constructed on the carriage road system, and I’ve made it my goal to find and photograph each one. (The 17th bridge was constructed by the park service.) It ended up being fortunate that we remained on the carriage road because we came across the Hadlock Brook Bridge – one down!! It was completed in 1926 and is 46.9 feet long and 12.8’ high. Apparently, Rockefeller fashioned this bridge based on inspiration from a bridge in Central Park. Jim wandered around noting the construction for quite some time! Each bridge in the carriage road network is unique, and they were all designed by well-known, skilled architects hired by Rockefeller, who oversaw each step of the process whenever possible. The masonry is flawless and Rockefeller had insisted that the stone used for the bridges was to be quarried nearby the site of each bridge. As a result, each bridge blends in with the natural landscape surrounding it. I’m looking forward to discovering the remaining 15!
This loop hike totaled 3.8 miles in all and while probably not the most scenic trail in Acadia, it was certainly less travelled! We only saw one other pair of hikers throughout the entire hike. 😊
More issues…
When I returned to the campsite after hiking, Jim continued to get the camp site in order and decided to get the Weber grill out and hooked up to our small propane tank. I had started marinating some chicken breasts and wanted to cook them on the grill. He let me know that it seemed the Weber grill was not getting fuel to the burners. This is disappointing since we have only used this grill a handful of times over the last two years. In the Tetons last summer, we never even pulled it out of the truck due to the bear issues.
Jim quickly put on his “trouble-shooting” hat. He checked the grill with our trailer propane tanks, in case it was an issue with our small portable tank. No luck. After I researched the issue online, he checked the burners and took everything apart and made sure there were no obstructions but everything looked clean. Unfortunately, we came to the conclusion that it was the regulator on the grill.
While I went back to work the next day, Jim kept busy removing the regulator from the Weber grill and taking it into the hardware store in Bar Harbor to see if they had one in stock. He was informed that they could order the part, but it would be best if we called Weber and talked to them first. Apparently, the regulators are guaranteed for two years. Long story short, a new, free-of-charge regulator is on its way to us! I’m appreciative of the employees at the hardware store for being honest. They could have made the sale and we would have been none the wiser. They will get my business this summer!
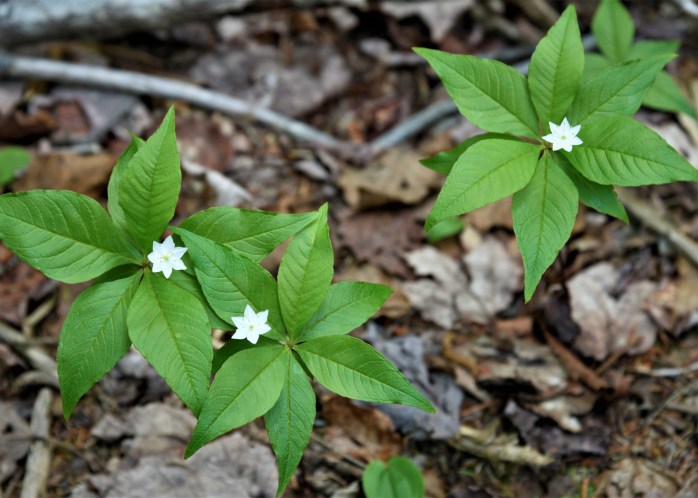
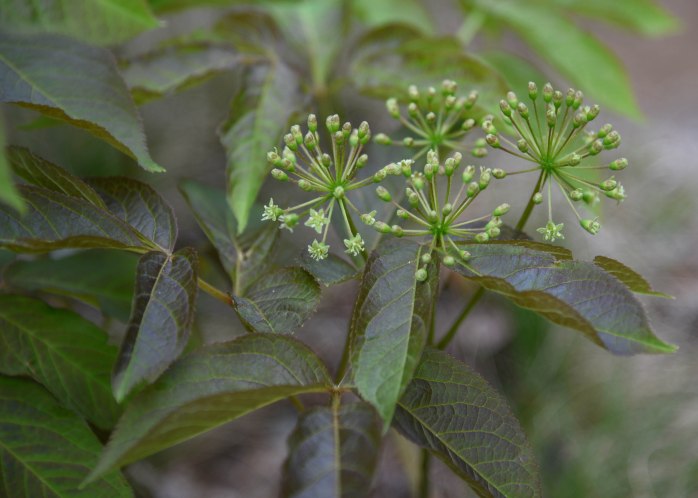
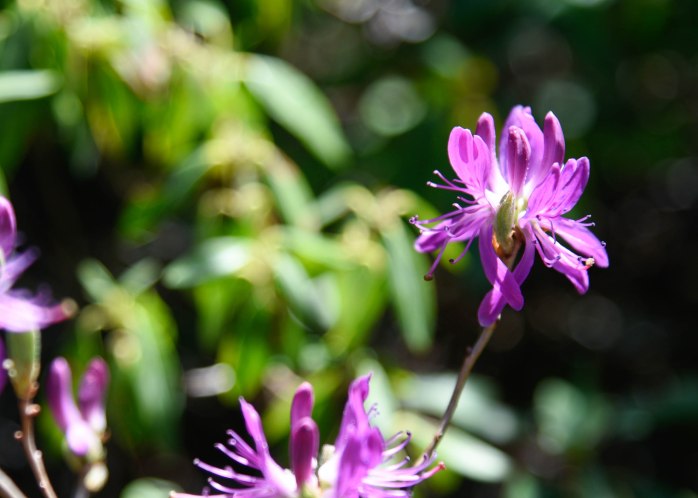
Trientalis borealis – Starflower
This prevalent native perennial herb is in bloom all over Acadia right now. What I love about this little gem is its daintiness. It more or less goes dormant in mid-summer, and therefore, is not really used in more formal gardens. That makes it all the more satisfying that it must often be enjoyed only in its native habitat. 🙂
So, what about my 8-mile round trip hike up Cadillac Mountain? Until next time… 😊
Revisiting Acadia National Park

Just as my garden is emerging after a long winter’s nap, so too am I! Since we’ve been stationary for the winter at our home in Vermont, I’ve taken a hiatus from blogging, with the exception being the series I’ve started on my photographic journey. I’m awake now, and ready to exercise my fingers on the keyboard once again.
I wandered around this morning capturing some of the flowers and admiring my garden since I will not see it again until next Fall!
")

")
")
In less than a week, I will be traveling to my summer workamping spot and I thought it fitting to wake up the creative, writing side of my brain with a reflection on Acadia National Park – past, present and future – and how I got to this point.

Let’s begin with the present – as this is where my story really unfolds. For the past two years, while performing various workamping posts, I have diligently pursued applying for National Park Service positions with the hope of landing a job as an interpretive ranger or visitor use assistant. My objective resting on the fact that I am very well-qualified for one of these positions given my background. I am a Parks and Recreation major from Penn State University, and at the time I graduated (way back in 1979) my sole purpose in life was to secure a position with the park service. I was naïve back then and did not realize how difficult these jobs were to obtain. It was somewhat easier to attain a state park ranger position, so I settled for a seasonal position with the Pennsylvania State Park system. My rationale being to gain experience and be more marketable when a federal job opened up.
Well, it did not happen – and at that time, I really needed to be realistic and look for stable, full-time work. So, “stuff happened” and I moved in a different direction. After a lifetime of raising my family and pursuing other fields of interest, I’ve jumped head on into this new nomadic life-style, and I have returned to my long-ago dream and, once again, set my sights on the park service. It’s been a frustrating experience fraught with disappointment, but I have learned a good deal about how to approach filing applications with the federal government. With some helpful advice from a human resources employee I met while at Glacier NP, and the endless encouragement from some of my dear fellow workampers and friends, I persevered. After endless applications spanning two years, this was my year.
In January, I received a referral to the hiring supervisor at Acadia National Park. I had been at this stage of the process before, so was optimistic as well as realistic. To my surprise, she kept in touch and eventually offered me a position. Finally, I had managed to fulfill one of my life goals – to work for the National Park Service! It only took me 40 years – Ha! I’m excited about living in Acadia NP for the summer, and looking forward to revisiting this beautiful place on the Maine coast.

My first trip to Acadia was in 1985 with my husband, Jim. We tent camped in the Blackwood’s Campground and our timing was impeccable as usual. (Note the sarcasm in my “voice”) We arrived during the last hurrah of the summer – the week before Labor Day. Since we did not travel with reservations, even back then, we were forced to endure the morning ritual of showing up at the ranger station hoping for a cancellation. Luck was with us, and we were able to stay in the campground for the entire week. Our favorite memory from that trip was the invitation we received from an older couple. We woke up one morning to a drenching rain, and the prospects of cooking breakfast were dim. The couple in the campsite next to us had a travel trailer, and as we emerged from our tent, they were there inviting us to have breakfast with them. That kindness is something we will never forget!


Hiking Cadillac Mountain – 1985


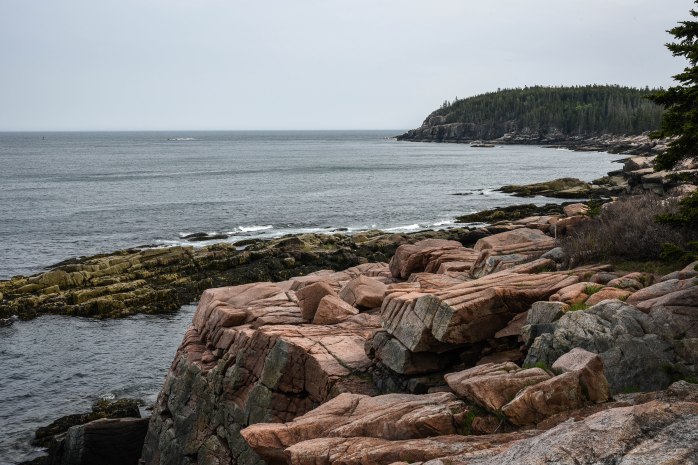
Along the coast – 1985
Our second trip to Acadia was in 1998 – with two kids in tow, and the families of Jim’s sister and brother. This was one of the few times we secured reservations in advance since we were a sizable group. The vacation was incredible. We all enjoyed endless excursions to the rocky coast, biking the carriage roads, and the infamous whale watching trip (that we still laugh about today).


Hiking with family – 1998


The infamous and eventful Whale Watch trip – 1998!
Twenty years later, I’m thrilled to be spending the entire summer on the Maine coast exploring old sights as well as new places of interest. I’ve already started a bucket list of things to do and see.
Look for my posts from Mount Desert Island throughout the summer as I chronicle my time along this rugged coastline. Although I am going to miss the West and the mountains this summer, I’m looking forward to being on the east coast near family and friends – many of whom are planning a trip North to visit me.
jusqu’à la prochaine fois (until next time)
.
Photograph Tales 5 – Amateur Photography Primer 3

It’s sugaring season in Vermont. It represents, to me, the beginning of the end of winter! I walked back to our sugarhouse a few days ago to shoot some pictures and reminisced about the days when we built the sugarhouse and started tapping our own small sugarbush. We used to put in about 70 taps which would garner us about 15 gallons of syrup on average. It was our own private store that we used throughout the year and shared as gifts come the holidays. Walking out to the sugarhouse with hot drinks and snacks, watching the sparks rise in the night air from the chimney, accompanied by my ever-faithful dog Lucy, I remember how peaceful I felt. I would often stand outside and just breathe in the stillness of the night air. Listening to the conversation going on inside between Jim and the boys gave me a sense of tranquility and contentment that will remain with me always. Our small evaporator is still there. But after the boys went off to college and I was working full-time a 2-hour round-trip drive away each day, it just seemed that Jim and I did not have the time or energy to carry on the tradition. I’m not sure we’ll ever tap our trees again, but I treasure those memories and the hard work we did to make them. It was all worth it!
Our first year of sugaring – 2005


Time to carry on with my photography journal, and what I’ve absorbed over the last months and years! As I mentioned at the end of the last post, I will start off here with a discussion on the light metering system internal to the camera. In the more manual shooting modes (P,S,A, and M), there are several options available that determine how the camera sets the exposure. Different camera brands use a variety of terms to describe these. I will use Nikon nomenclature. If you are shooting in any of the “auto” modes, then the metering is set automatically.
vi. Metering System
Matrix – this is the setting that I have used almost exclusively and is the most generic. The camera determines exposure by measuring light in various areas of the frame based on information such as perceived subject, color, composition, and tone. It’s designed to strike a balance between light and dark areas in the frame. For most situations, your camera should be set to this option.
Center-weighted – with this option, the camera gathers information from the entire frame, but gives the greatest weight to the center of the frame. For those who like to do a bit of portrait photography where composition puts the subject in the center of the frame, this would be a viable use for this setting.
Spot – similar to center-weighting except that the camera chooses the focus point area that is selected. If your subject is off-center, and you’ve chosen to set a specific focal point (see last blog post on this), then the exposure will be set based on the selected focus point.
Highlight-weighted – this is a very specific type of metering that is designed to preserve detail in areas that are extremely highlighted. An example might be shooting indoors with a subject that is well lit with a spotlight. Not all Nikon cameras offer this option (mine does) but I would love to be in a situation sometime where I might be able to experiment with this!
vii. Release Mode
On my Nikon D750, the release mode dial is directly underneath the shooting mode dial. This setting controls how the shutter will react when you depress the shutter-release button.
Single Frame (S) – when you depress the shutter-release button, the camera will take a single photograph. This is my default setting.
Continuous low speed (CL) and continuous high speed (CH) – my Nikon has two options here, other cameras might only have one. Continuous shooting allows you to take multiple shots with the shutter-release button depressed. The difference between these two settings is in the # of frames shot per second. Common sense and knowing the subject will determine which is ideal for a particular setting. These two settings are used most often for sports photography and others instances where your subject is moving across the frame. Try it out when you are in a situation that might warrant the advantages of this setting. I have used this minimally but have started to experiment with it more when I’ve seen an opportunity.


In the shots above, I used the continuous low speed mode. It allowed me to take several quick shots, and capture one good picture of both subjects. Note that I also had the auto-focus set to continuous as well.

 2016")


I’ve also tried this setting when photographing my nieces in their cross-country ski events. Knowing the sport you are photographing and paying attention to the angle you are shooting helps tremendously!
Quiet shutter-release and Quiet continuous shutter-release – similar to the above descriptions but reduces the noise (click) made by the camera. When the shutter-release button is depressed, the “click” will not sound while the button is fully depressed.
Self-timer – the last setting on the release mode dial is the self-timer. You can customize the self-timer in the camera menu for duration, number of shots, and time interval between shots. I have been using this setting more lately as I experiment with using my tripod. I finally found a company that sells replacement quick release plates for all types of tripods – old and new. I had somehow lost the one that came with my tripod and have been unable to use it the past two years. Why has it taken me so long to get a replacement? I do have a very good reason! The first year on the road, I forgot to pack it and left my tripod at home! The second year, when we headed out, I remembered the tripod but had not checked it for any missing parts. When I wanted to start experimenting with the tripod last summer, I realized I did not have the quick release plate and it was too late in the season to have one ordered and shipped to me before we were leaving to head back to Vermont. So, once here, I researched where to find one. I have a very inexpensive tripod, and an older one. I looked online and found a company that appears to have quite a selection of quick release plates and cross-references them with different brands. Success on the very first try!


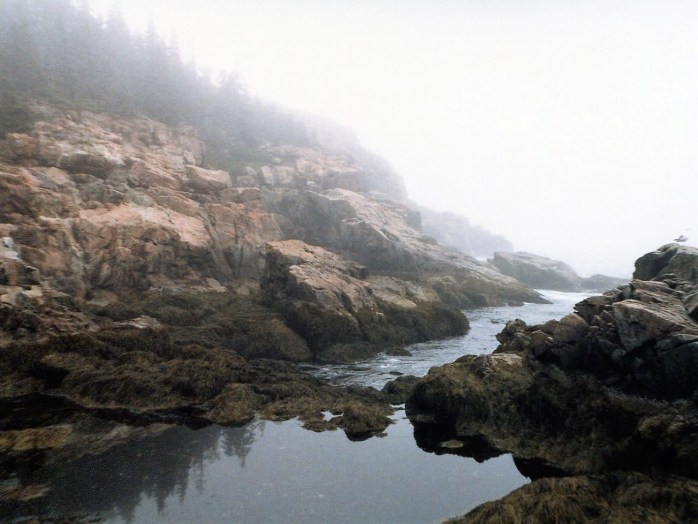
In the above photos, I was using a tripod and the self-timer to try and slow down the shutter speed to get the blurred movement of the water. I took one shot at a fast shutter speed and one at a slow shutter speed. Not a terrific photo per se – but the creek in my backyard is close and a great spot to practice this technique!
viii. Built-in flash
Most cameras have a built-in flash and there are a few things to keep in mind here, and some basic settings to decide on. In the “auto” shooting modes, the built-in flash will automatically pop-up if exposure dictates a need for additional light. There are several flash modes that you can select for these shooting modes.
Auto Flash – the flash is triggered in low light situations or when your subject is backlit
Auto Flash with red-eye reduction – good for when you are shooting portraits to eliminate that “red-eye” issue!
Auto slow sync and Auto slow sync with red eye reduction – similar to the above situations but used with slow shutter speeds to take advantage of background lighting. I’ve not ever used this, but the manual says it is used in nighttime situations? I’ll have to experiment with this.
When you are operating in the manual shooting modes, you must manually pop-up the flash in order to use it. There is different setting options for using the built-in flash in these modes:
Fill Flash and Fill Flash with red-eye reduction – with this setting the flash will fire with every shot you take, the red-eye reduction option will help if you are shooting portraits
Slow sync and slow sync with red-eye reduction – shutter speed slows so that background light can be captured when in nighttime or very low lighting situations.
Rear-curtain sync and slow rear-curtain sync – I’ve not used this setting, but it appears to be used for special effects with nighttime photography. Shutter speeds are slowed down to effectively capture background lighting.
In both auto-flash settings and manual-flash settings, there is the option to have the flash turned off. I prefer to have the flash off. I generally do not use the flash and would rather turn it on when I know I want to take advantage of it. There are situations where using the flash will improve the exposure. For example, if you are taking a portrait and the subject is backlit.
ix. Live View – I tend to use the viewfinder for almost all of my photography. After taking two photography courses this winter, I have come to realize the benefits of switching to Live View in certain circumstances. Some of the reasons I might now choose to use live view include:
- I’ve struggled at times trying to figure out why my focus is not as “spot on” as I would like in some of my photographs. I now know more than I used to about the focusing options and technology in my cameras and understand the mistakes I’m making. I also recently learned that I can use Live View to “check” my focus by magnifying the area I want in sharp focus and adjusting accordingly. I have found this to be a tremendous help in helping creating good, sharp pictures.
- At times, the shot you want to take is at an angle that makes it hard to view through the viewfinder – you either have a very low-to-the-ground shot or a shot too high to get an accurate composition angle. Cameras with tilting LCDs make it easier to compose the pictures more accurately through Live View.
- Through Live View, you see the entire frame of the picture. The viewfinder does not give you 100% of the frame. If I want to see exactly what the sensor is seeing, I might choose to use Live View.
- In Live View, there are options to view a live histogram on the screen, see the horizon lines for accurate composition, and also view grid lines if you use these for framing and composition.
Live View has its own set of focusing options as well. I will be experimenting with this feature more and more in the coming year.
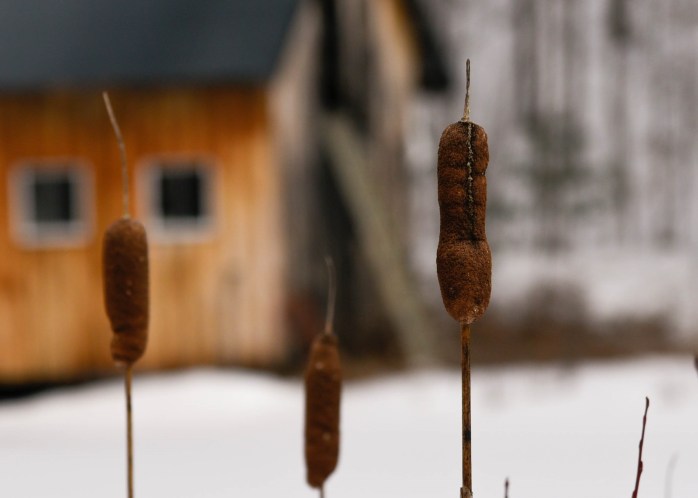
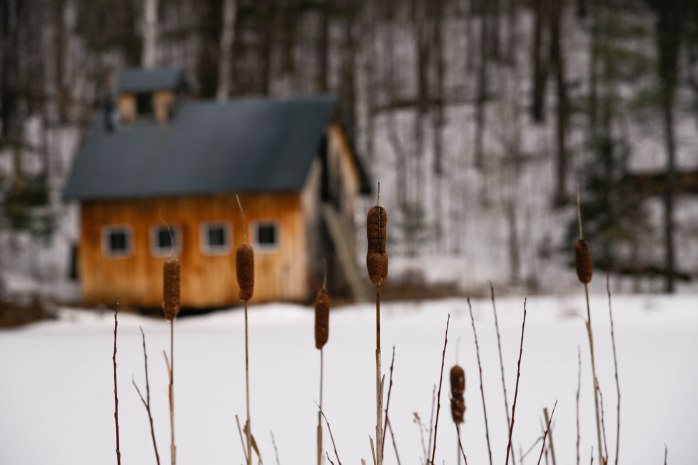 I experimented with Live View on another shot of our sugar house – wanting to make sure that the prominent cattail was in good, sharp focus. If you zoom in on that cattail, you can see that I accomplished my mission.
I have completed Step 1 of my Amateur Photography Primer – “There’s a Setting for That.” These are the basic settings and functions that I think all beginning photographers should become familiar with and be able to manipulate easily. I know it has been beneficial for me to write this down as it helps me cement these principles and alter these settings intuitively on both my cameras. Future photography posts will continue with some basic photography principles as I continue to sift through my class notes and highlight my field experience observations.
