Lynn Amber - Travel & Photography
sharing my thoughts through words and images
Photograph Tales 5 – Amateur Photography Primer 3

It’s sugaring season in Vermont. It represents, to me, the beginning of the end of winter! I walked back to our sugarhouse a few days ago to shoot some pictures and reminisced about the days when we built the sugarhouse and started tapping our own small sugarbush. We used to put in about 70 taps which would garner us about 15 gallons of syrup on average. It was our own private store that we used throughout the year and shared as gifts come the holidays. Walking out to the sugarhouse with hot drinks and snacks, watching the sparks rise in the night air from the chimney, accompanied by my ever-faithful dog Lucy, I remember how peaceful I felt. I would often stand outside and just breathe in the stillness of the night air. Listening to the conversation going on inside between Jim and the boys gave me a sense of tranquility and contentment that will remain with me always. Our small evaporator is still there. But after the boys went off to college and I was working full-time a 2-hour round-trip drive away each day, it just seemed that Jim and I did not have the time or energy to carry on the tradition. I’m not sure we’ll ever tap our trees again, but I treasure those memories and the hard work we did to make them. It was all worth it!
Our first year of sugaring – 2005


Time to carry on with my photography journal, and what I’ve absorbed over the last months and years! As I mentioned at the end of the last post, I will start off here with a discussion on the light metering system internal to the camera. In the more manual shooting modes (P,S,A, and M), there are several options available that determine how the camera sets the exposure. Different camera brands use a variety of terms to describe these. I will use Nikon nomenclature. If you are shooting in any of the “auto” modes, then the metering is set automatically.
vi. Metering System
Matrix – this is the setting that I have used almost exclusively and is the most generic. The camera determines exposure by measuring light in various areas of the frame based on information such as perceived subject, color, composition, and tone. It’s designed to strike a balance between light and dark areas in the frame. For most situations, your camera should be set to this option.
Center-weighted – with this option, the camera gathers information from the entire frame, but gives the greatest weight to the center of the frame. For those who like to do a bit of portrait photography where composition puts the subject in the center of the frame, this would be a viable use for this setting.
Spot – similar to center-weighting except that the camera chooses the focus point area that is selected. If your subject is off-center, and you’ve chosen to set a specific focal point (see last blog post on this), then the exposure will be set based on the selected focus point.
Highlight-weighted – this is a very specific type of metering that is designed to preserve detail in areas that are extremely highlighted. An example might be shooting indoors with a subject that is well lit with a spotlight. Not all Nikon cameras offer this option (mine does) but I would love to be in a situation sometime where I might be able to experiment with this!
vii. Release Mode
On my Nikon D750, the release mode dial is directly underneath the shooting mode dial. This setting controls how the shutter will react when you depress the shutter-release button.
Single Frame (S) – when you depress the shutter-release button, the camera will take a single photograph. This is my default setting.
Continuous low speed (CL) and continuous high speed (CH) – my Nikon has two options here, other cameras might only have one. Continuous shooting allows you to take multiple shots with the shutter-release button depressed. The difference between these two settings is in the # of frames shot per second. Common sense and knowing the subject will determine which is ideal for a particular setting. These two settings are used most often for sports photography and others instances where your subject is moving across the frame. Try it out when you are in a situation that might warrant the advantages of this setting. I have used this minimally but have started to experiment with it more when I’ve seen an opportunity.


In the shots above, I used the continuous low speed mode. It allowed me to take several quick shots, and capture one good picture of both subjects. Note that I also had the auto-focus set to continuous as well.

 2016")


I’ve also tried this setting when photographing my nieces in their cross-country ski events. Knowing the sport you are photographing and paying attention to the angle you are shooting helps tremendously!
Quiet shutter-release and Quiet continuous shutter-release – similar to the above descriptions but reduces the noise (click) made by the camera. When the shutter-release button is depressed, the “click” will not sound while the button is fully depressed.
Self-timer – the last setting on the release mode dial is the self-timer. You can customize the self-timer in the camera menu for duration, number of shots, and time interval between shots. I have been using this setting more lately as I experiment with using my tripod. I finally found a company that sells replacement quick release plates for all types of tripods – old and new. I had somehow lost the one that came with my tripod and have been unable to use it the past two years. Why has it taken me so long to get a replacement? I do have a very good reason! The first year on the road, I forgot to pack it and left my tripod at home! The second year, when we headed out, I remembered the tripod but had not checked it for any missing parts. When I wanted to start experimenting with the tripod last summer, I realized I did not have the quick release plate and it was too late in the season to have one ordered and shipped to me before we were leaving to head back to Vermont. So, once here, I researched where to find one. I have a very inexpensive tripod, and an older one. I looked online and found a company that appears to have quite a selection of quick release plates and cross-references them with different brands. Success on the very first try!


In the above photos, I was using a tripod and the self-timer to try and slow down the shutter speed to get the blurred movement of the water. I took one shot at a fast shutter speed and one at a slow shutter speed. Not a terrific photo per se – but the creek in my backyard is close and a great spot to practice this technique!
viii. Built-in flash
Most cameras have a built-in flash and there are a few things to keep in mind here, and some basic settings to decide on. In the “auto” shooting modes, the built-in flash will automatically pop-up if exposure dictates a need for additional light. There are several flash modes that you can select for these shooting modes.
Auto Flash – the flash is triggered in low light situations or when your subject is backlit
Auto Flash with red-eye reduction – good for when you are shooting portraits to eliminate that “red-eye” issue!
Auto slow sync and Auto slow sync with red eye reduction – similar to the above situations but used with slow shutter speeds to take advantage of background lighting. I’ve not ever used this, but the manual says it is used in nighttime situations? I’ll have to experiment with this.
When you are operating in the manual shooting modes, you must manually pop-up the flash in order to use it. There is different setting options for using the built-in flash in these modes:
Fill Flash and Fill Flash with red-eye reduction – with this setting the flash will fire with every shot you take, the red-eye reduction option will help if you are shooting portraits
Slow sync and slow sync with red-eye reduction – shutter speed slows so that background light can be captured when in nighttime or very low lighting situations.
Rear-curtain sync and slow rear-curtain sync – I’ve not used this setting, but it appears to be used for special effects with nighttime photography. Shutter speeds are slowed down to effectively capture background lighting.
In both auto-flash settings and manual-flash settings, there is the option to have the flash turned off. I prefer to have the flash off. I generally do not use the flash and would rather turn it on when I know I want to take advantage of it. There are situations where using the flash will improve the exposure. For example, if you are taking a portrait and the subject is backlit.
ix. Live View – I tend to use the viewfinder for almost all of my photography. After taking two photography courses this winter, I have come to realize the benefits of switching to Live View in certain circumstances. Some of the reasons I might now choose to use live view include:
- I’ve struggled at times trying to figure out why my focus is not as “spot on” as I would like in some of my photographs. I now know more than I used to about the focusing options and technology in my cameras and understand the mistakes I’m making. I also recently learned that I can use Live View to “check” my focus by magnifying the area I want in sharp focus and adjusting accordingly. I have found this to be a tremendous help in helping creating good, sharp pictures.
- At times, the shot you want to take is at an angle that makes it hard to view through the viewfinder – you either have a very low-to-the-ground shot or a shot too high to get an accurate composition angle. Cameras with tilting LCDs make it easier to compose the pictures more accurately through Live View.
- Through Live View, you see the entire frame of the picture. The viewfinder does not give you 100% of the frame. If I want to see exactly what the sensor is seeing, I might choose to use Live View.
- In Live View, there are options to view a live histogram on the screen, see the horizon lines for accurate composition, and also view grid lines if you use these for framing and composition.
Live View has its own set of focusing options as well. I will be experimenting with this feature more and more in the coming year.
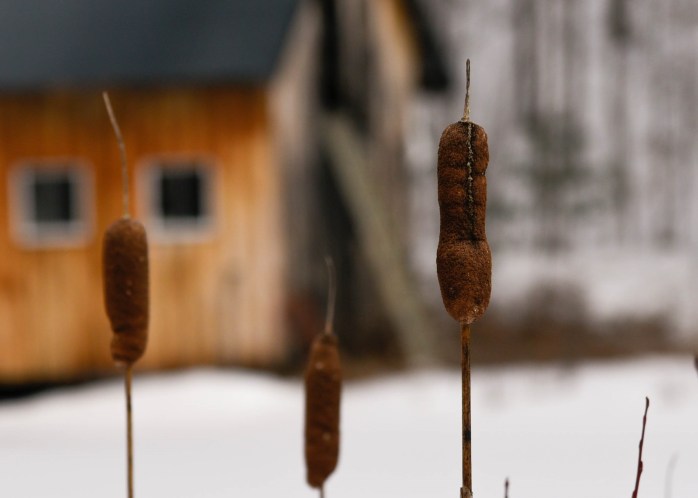
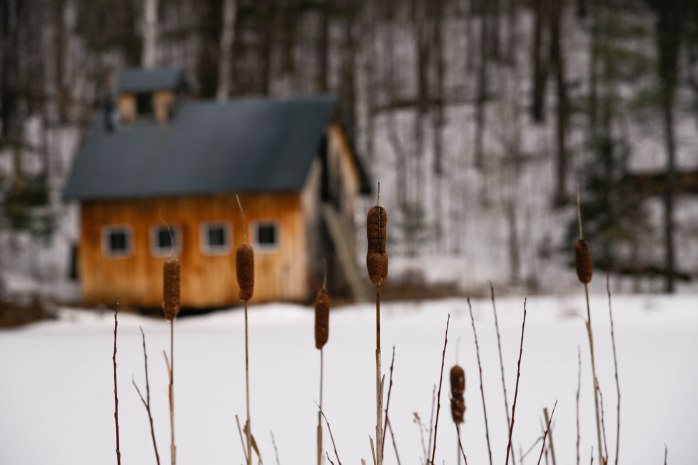 I experimented with Live View on another shot of our sugar house – wanting to make sure that the prominent cattail was in good, sharp focus. If you zoom in on that cattail, you can see that I accomplished my mission.
I have completed Step 1 of my Amateur Photography Primer – “There’s a Setting for That.” These are the basic settings and functions that I think all beginning photographers should become familiar with and be able to manipulate easily. I know it has been beneficial for me to write this down as it helps me cement these principles and alter these settings intuitively on both my cameras. Future photography posts will continue with some basic photography principles as I continue to sift through my class notes and highlight my field experience observations.
