Lynn Amber - Travel & Photography
sharing my thoughts through words and images
30 Days and 30 Photos – Day 12
When I visited the library in Bar Harbor yesterday, I noticed a book on one of the display tables called “Living on the Edge.” It’s not what you might think given that title! The book is a guide to life along the seacoast environment here in Maine. It focuses on the natural environment – both plant and animal life – that survives where at the intersection of land and sea. Written by a local naturalist with photographs by a former Acadia park ranger, it is an easy, informative guide. Scanning the book when I got home, I became inspired to more closely walk the shoreline and examine the plant and animal life. I’m certainly more familiar with the plant life here but regarding the marine animal life I am a novice.
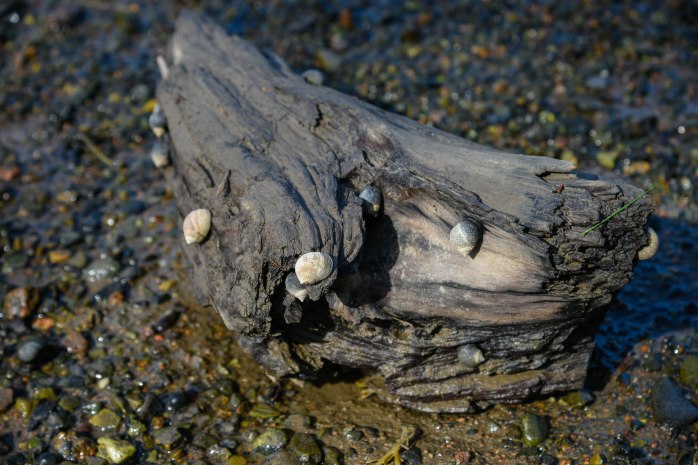
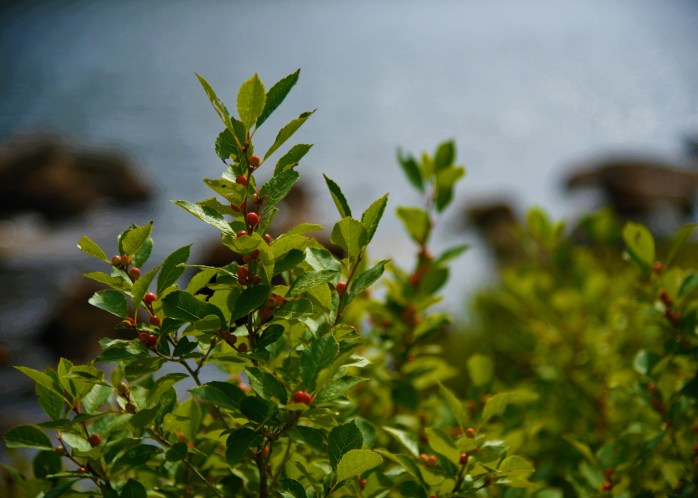
When I think of the word periwinkle, images of the “plants” that use this common name come to mind. In a word association game, if someone said periwinkle to me – I would respond – Vinca minor. Or perhaps, think of the annual periwinkle “Catharanthus.” In Maine along the coast, periwinkle takes on a completely different meaning! Periwinkles are gastropods (think marine snail) and are abundant in the tidal pools and shores along the Maine coast. I’m thoroughly enjoying this book with its excellent photographs and narrative.
- I used the Aperature-priority setting and had it set to f/7.1 My ISO was set at 100. The final shot was recorded at 1/125 sec. f/7.1 86mm
- I used live view and manual focus zeroing in on the whitish periwinkle in second from left
- Tripod shot for sure with the timer set on release mode dial
- Exposure Compensation setting was at -0.03 for this photograph
- In Lightroom, the adjustments I made were to Highlights, slightly Shadows and Vibrance settings. I did sharpen the photo a tad.
A couple of other photos I took along the way that I thought were interesting and fun are added here.


30 Days and 30 Photos – Day 11
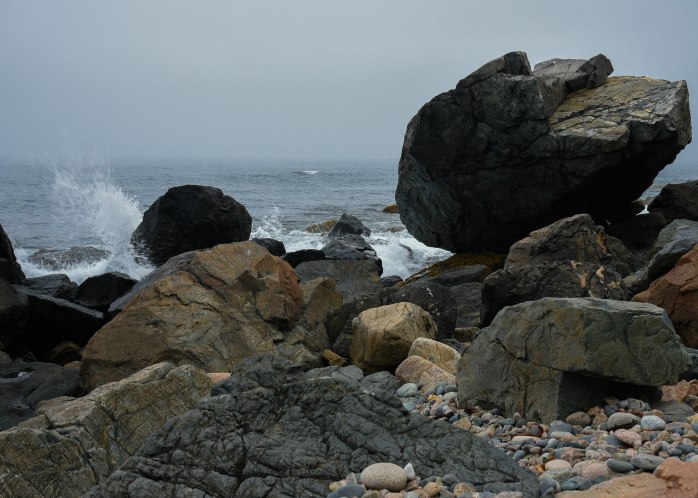
Torrential rain fell upon Mount Desert Island today. I hunkered down inside my trailer for much of the day and thought about how I would manage to get a photo opportunity. I cleaned, read and eventually took the shuttle into Bar Harbor to the library for MORE reading material. By the time I got back to my campsite, the rain had ended but the fog was rolling in thick. I could hear the thunderous roar of the pounding surf from the campground and decided to walk down to the cliffs with my camera and tripod to see if I could somehow conjure up a Day 11 photo.
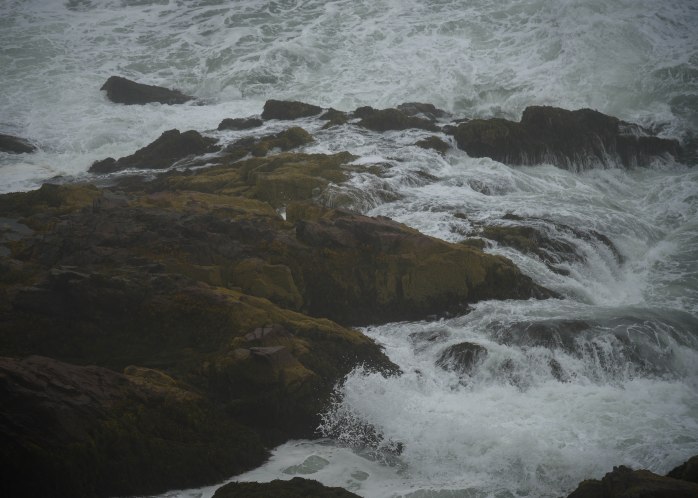
I stopped at numerous places along the loop road – setting up my tripod and shooting photographs of the tumultuous surf. It sure was impressive but I was having a hard time capturing it on “film.” Eventually, I even picked my way down the slippery rocks to “my cove.” Since it was low tide, the surf was not close enough to be impressive from this angle. It was getting late so I headed back home and that’s when I saw a little used path down to a cliff that I had never discovered before now. I gingerly picked my way down there and, lo and behold, had my picture! A single Seaside Goldenrod was poking up from a crevice in the rock and lent a bit of color to an otherwise drab landscape. You can still see the raindrops clinging to the leaves.

- I used the Aperature-priority setting and had it set to f/4. My ISO was set at 400. The final shot was recorded at 1/200 sec. f/4 48mm
- I used live view and manual focus zeroing in on the goldenrod in the foreground
- Tripod shot for sure with the timer set on release mode dial
- Exposure Compensation setting was at -0.03 for this photograph
- In Lightroom, the adjustments I made were to ever so minor in Highlights and Vibrance settings.
A couple of other photographs taken right before this one are worth posting – one of the water and one of the rocks in “my cove.”

30 Days and 30 Photos – Day 10
I needed to plan an extended hike today. After five days of working, and no extended hike last week, I was long overdue. I decided to hike to the top of one of my favorite peaks in the park – Pemetic Mountain via a route that I have not taken. I started at the Jordan Pond boat launch parking area, and hiked over to the carriage road that passes by Bubble Pond. From there, I hiked up the steep North Ridge Pemetic Trail. It was a little over a mile to the summit from Bubble Pond along a ankle-turning, rocky, root-infested trail – lots of fun despite my description!
Hauling my large tripod on a 6 mile hike was out of the question, so I brought along my itsy-bitsy, teeny-weeny Canon tripod. It really barely supports my heavy Nikon and I confess that I’m not happy with the pictures I took with it. But, since I diverted from my tripod rule for the last two photos, I’m sticking to my guns today and posting a tripod photo! The Bates cairns are iconic here in Acadia so it is only fitting that I highlight one of these trail markers! I was struck by the position of this cairn and the view of the islands in the background as I descended Pemetic.
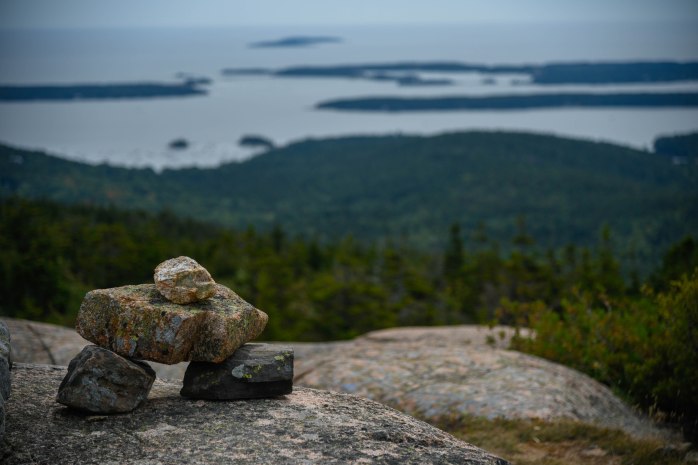
- I used the Aperature-priority setting and had it set to f/4. My ISO was set at 100. The final shot was recorded at 1/1250 sec. f/4 95mm
- I used autofocus and the viewfinder to frame the photo trying to focus on texture of the rock in the foreground
- Tripod shot with my very, very small mini-pod!
- Exposure Compensation setting was at 0.00 for this photograph
- In Lightroom, the adjustments I made were to Highlights, Shadows and Vibrance settings – I little heavier on revving up the intensity of the color due to the drab, cloudy day.
At the beginning of my hike, as I was walking along the Jordan Pond and Bubble Pond Path, I caught a glimpse of the light playing off the Moosewood Maple (Acer pensylvanicum) leaves in the otherwise coniferous forest. I have fallen in love with this small tree since my arrival here. The leaves catch the light sifting through the canopy of the forest and brighten an otherwise shady spot. I don’t know why – but it always lifts my spirits to see how it reflects the sunlight.

The other highlight of my hike today was walking along Bubble Pond. The masses of Winterberry Holly ( Ilex verticillata) growing along the banks of the pond are showing their fall display of red berries now. It has always been one of my all-time favorite native plants and one I’ve used extensively in garden design. It is at its best in its native environment!
30 Days and 30 Photos – Day 9
Sunday’s are my Friday’s, if you get my meaning. I usually have a much reduced energy level after five days of work. I also needed to make a trip to the grocery store to replenish supplies. So, in thinking about where I would go for my photo of the day, I chose to stop at the Wild Gardens of Acadia on my way back home from Bar Harbor. My thought was to get some close-up shots of some fall wildflowers. Again, I was without my tripod – these shots needed to be fast and efficient since I had cold food in the car needing to get refrigerated.
It is getting dark earlier and the light was low. I knew I would be shooting without a tripod, so I set my ISO at 400 and still had “slower than I wanted” shutter speeds, but doable. In the end, the photo I liked best was not a wildflower! The white, papery bark of this birch tree trunk enhanced by the bright green ground cover of the New York Fern beneath it caught my eye. I just love the contrast and the light it emits in this shady spot.

- I used the Aperature-priority setting and had it set to f/4. My ISO was set at 400. The final shot was recorded at 1/80 sec. f/4 120mm
- I used autofocus and the viewfinder to frame the photo trying to focus on the bark and nearby fern texture
- This was a hand-held shot – no tripod!
- Exposure Compensation setting was at +0.03 for this photograph
- In Lightroom, the adjustments I made were to Exposure, Highlights, Shadows and Vibrance settings. I also just slightly increased the sharpness with that editing feature. I did not crop the photo.
30 Days and 30 Photos – Day 8
I heard about the Bar Harbor Inn Arts Festival happening in town today, and decided to jump on the shuttle after work to go and check it out. I slung my camera over my shoulder to see if I could get some inspiration for my Day 8 photo in “town.” Walking through the art festival booths, I was intrigued by the photography art – especially some that were displayed on canvas. I’ve never printed any of my photographs on canvas. I’m now motivated to choose a photograph that I think would lend itself to canvas and experiment with this medium! After viewing the art – all of which was out of my price range – I headed down towards the harbor hoping to see a scene that would catch my eye for a photograph.
It was the dahlias that did it. There was an island flower bed (and I’m a sucker for perennials) that was strategically placed overlooking the harbor and the dahlias were stunning. I decided to use a short depth of field and focus on the dahlias – with the harbor a blur in the background. I took several shots before heading up to catch the shuttle back to the campground. I have found in my travels to various gardens on the island that dahlias are a favorite perennial here. I’ve never in my life seen so many different cultivars and varieties of dahlias! I will confess that I broke one of my rules on this photo – I did not use a tripod. This was a quick trip to town with minimal baggage. Well – I’ve always said that rules are meant to be broken. 🙂
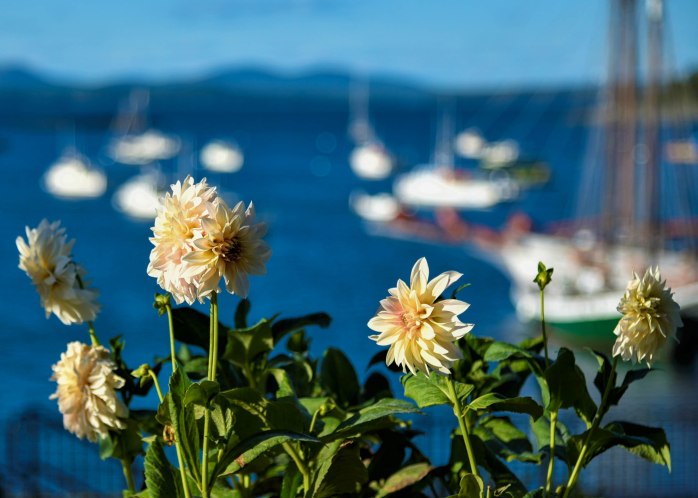
- I used the Aperature-priority setting and had it set to f/4. My ISO was set at 100. The final shot was recorded at 1/1000 sec. f/4 82mm
- I used autofocus and the viewfinder to frame the photo trying to focus on the dahlias in the foreground
- This was a hand-held shot – no tripod!
- Exposure Compensation setting was at 0.00 for this photograph
- In Lightroom, the adjustments I made were to the Highlights, Shadows and Vibrance settings. I did significantly crop the photo to make the dahlias more prominent. I should have zoomed in on them more closely right from the start – lesson learned.
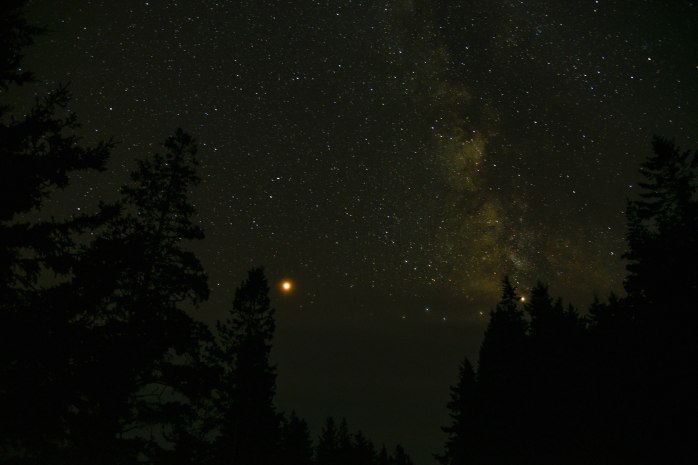
After I got home and had prepared and eaten dinner, I got the urge to try a night sky photograph. I’ve never experimented with this. A quick scan of the sky showed very little cloud cover, and brilliant stars with no moon. It seemed like a perfect opportunity to give this a try. I set my camera up before leaving, grabbed the tripod and my headlamp, and thought I would try to secure a spot where I had taken my latest sunrise photo. There were too many people there to suit me, so I trekked off down the park loop road to a quieter spot and ended up with a good place to get plenty of sky with evergreens framing the photo. It took some editing to bring out the foreground trees and I altered the exposure during editing to lighten up the sky a bit, but not bad for my first try. I decided it was about time I splurged and purchased a cable release so I can get some longer exposure times. It was pure joy capturing this night sky! I’m guessing the planet that is shining so brightly is Mars with it’s reddish tinge. I know that I am now hooked on sharpening my nighttime photo skills!
30 Days and 30 Photos – Day 7
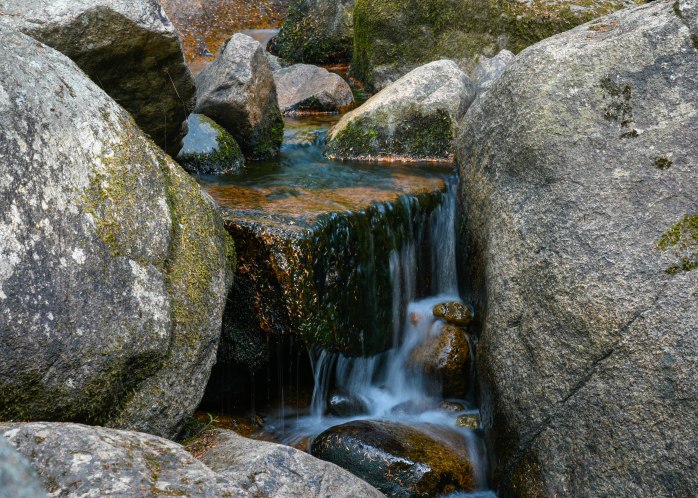
After work today, I headed to one of my favorite spots on the island. Strolling along the paths and carriage roads around Little Long Pond during the early evening is both meditative and rejuvenating. It is an activity I engage in at least once every week. I decided to try and capture one of Rockefeller’s infamous carriage road bridges for my Day 7 photograph. I have walked to this bridge numerous times this summer. Usually, late in the day, I am rewarded with solitude while enjoying the ambiance of the Cobblestone Bridge and the gentle sound of the Jordan Stream as it flows over the rocks and under the bridge. Today was no exception. The Cobblestone Bridge was the first of the bridges to be constructed on the carriage road system. Constructed in 1917, it is the only bridge built using the rounded cobblestones.
I took several shots from different perspectives on both sides of the bridge. I also captured some close-ups of the small “waterfall” cascading over some large rocks just before the stream passes under the bridge. I was not happy with my wide-angle photographs of the bridge. They were quite frankly very boring! Finally, I decided to set the tripod up close to one wall of the bridge and take a shot along the side. It was the best of the photos I took of the bridge. I focused primarily on the stones in the curved section of the bridge.
I have made it a goal to visit all of the Rockefeller Bridges this summer. So far, I have physically visited all but one and taken photographs of all but three.

- I used the Aperature-priority setting and had it set to f/11. My ISO was set at 100. The final shot was recorded at 1.3 sec. f/11 31mm
- I used Live View to set the focus manually – focusing on stones in the rounded portion of the bridge.
- My tripod was used along with the cameras timer
- Exposure Compensation setting was at -0.03 for this photograph as I was trying to tone down the sunlight in the background
- In Lightroom, the only adjustments I made were to the Highlights and Vibrance settings. I also just ever so slightly cropped the photo.
We have not had much rain here on Mount Desert Island this summer and as a result the Jordon Stream is low. I took the time to capture the small waterfall under the bridge. It’s subtle beauty never escapes me whenever I visit here.
30 Days and 30 Photos – Day 6
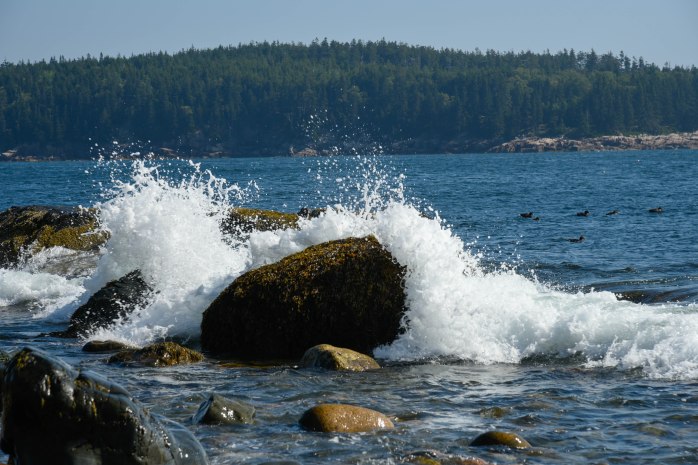
After getting up early yesterday for those amazing sunrise photos, and then working the late shift, I was not able to lift myself out of bed early this morning! Since I had to work at noon, I only had a short window of time to capture my photograph for Day 6. With that in mind, I walked down to my favorite little cove. I was not happy with the time of day – being late morning. The light is not at it’s best. But, when I reached the cove, the tide as out a bit allowing for the recently wet cobblestones to exhibit their true colors. I focused on attempting to pick up the array of colors in the rock. The waves added another dimension and, eventually, I tried setting my release mode dial – first to continuous low-speed and then to continuous high-speed. I thought that would allow me to capture the best wave splash!
With limited time to shoot this morning, I took fewer pictures and therefore had less options when selecting one for editing and submitting. The one I chose was a shot taken with Continuous high-speed in force. And was actually my last shot of the morning. I increased the ISO so I could gain a faster shutter speed to capture the motion of the waves more clearly.

- I used the Aperature-priority setting and had it set to f/9. My ISO was set at 250. The final shot was recorded at 1/400 sec. f/9 92mm
- I used Live View to set the focus manually – focusing on the center of the photo
- The release mode dial was set to continuous high-speed and used in conjunction with my tripod.
- Exposure Compensation setting was at -0.07 for this photograph
- In Lightroom, I played adjusted the Shadows setting to +26 and the Vibrance setting to +33 to intensify the color. I did not crop this photo.
I’ll include just one more photo that I took this morning from the same spot, just because there was a flock of birds playing around in the water and I managed to capture them in one picture!
30 Days and 30 Photos – Day 5
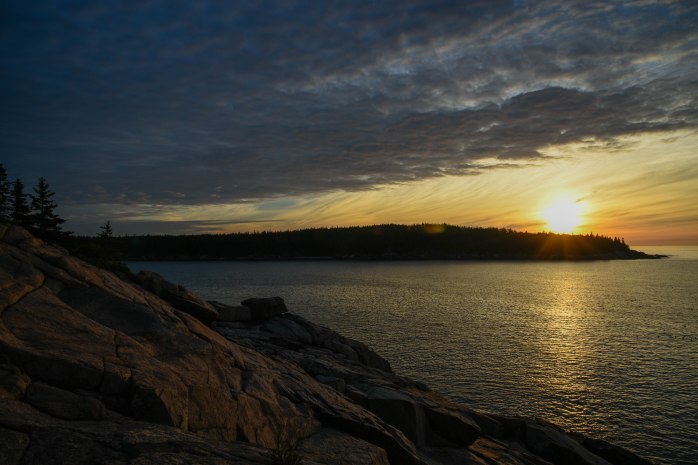
Since sunrise is coming at a more reasonable hour now, I decided to set my alarm and trek down to the cliffs for an early morning photo opportunity. Sunrise today was technically 6:01 am with first light coming at 5:31 am. I wanted to get down to the cliffs by first light so I could shoot pictures over the course of 1/2 hour. My alarm went off at 5:00 am and I hit the snooze button like I always do. As I rolled over for a few more minutes of sleep, I gave myself a pep talk. It’s now or never, I thought – crying out loud – “Get’r done!” (A phrase that my niece Grace coined at some point in time that always comes to mind during moments like this) I cancelled the snooze, vaulted out of bed before I’d change my mind and hastily pulled on my clothes. My motivation was basic – if I relinquished the extra “snooze” minutes, I’d have time to make some coffee!
I brewed a quick thermos of coffee to bring with me, grabbed my camera and tripod (which I had set out the night before) and headed down to the coast. Walking the small social path along the cliffs, I came to a secluded spot devoid of other sunrise worshippers. Positioning the tripod, I set up the camera and took my first picture just a few minutes after “official” first light. Close enough, I reasoned! I continued taking photographs for the next 1/2 hour until the sun rose above Otter Point. Looking back at the photographic progression, it was amazing to see how the light and the sky changed in less than an hour’s time.
The photo I chose for Day 5 was actually taken after sunrise by about 19 minutes – but it was at the point where the sun finally rose above Otter Point.
- I used the Aperature-priority setting and had it set to f/16. My ISO was set at 100. The final shot was recorded at 1/40 sec. f/16 24mm
- Live View was activated and manual focus was set to infinity
- The timer was set and used in conjunction with my tripod.
- Exposure Compensation setting was at -0.7 for this photograph
- In Lightroom, I played around with adjusting the Highlights setting to -60, the Shadows setting to +76 in order to bring out more detail in the foreground and the Vibrance setting to +26 to intensify the color. I could have really just left the Vibrance setting alone – at “0” it was just fine.
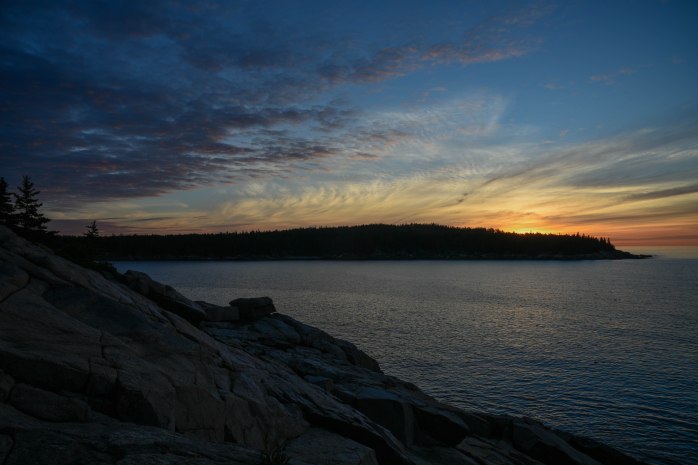
I thought I would just add a few of the other photos taken this morning – starting with the first light. It’s an interesting study in how the sky changes in such a short period of time.


30 Days and 30 Photos – Day 4
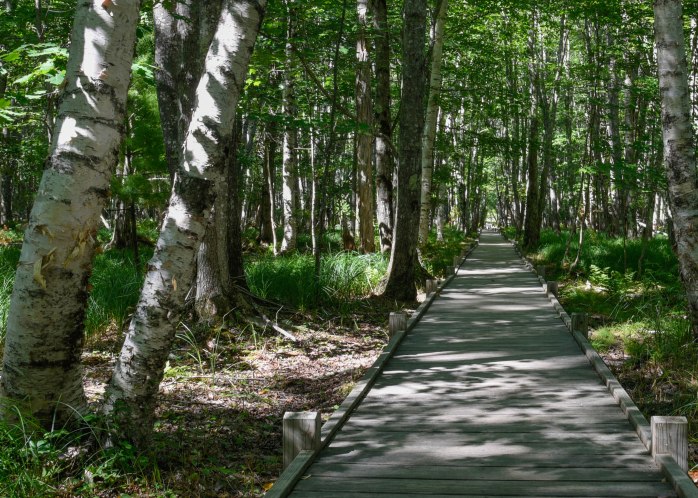
The Jesup Path near the Sieur de Monts area of Acadia has an interesting history. I have found references to this trail as early as 1895, and George Dorr once proposed that this path was originally a Native American carry route from Cromwell Harbor to Otter Creek area. The Jesup Path is named for philanthropists Morris K. and Maria DeWitt Jesup. It is one of several memorial paths in the Sieur de Monts area. Funding was provided to develop these memorial paths and George Dorr envisioned the Jesup Path as one of several designed to serve as “pedestrian gateways into Acadia” from Bar Harbor. The trail traverses a botanically rich area of moist meadow and wetland forest. A raised boardwalk serves to provide a dry avenue to walk through the area and protect the sensitive native flora.
I have walked here a number of times this summer – looking in vain for the Barred Owls who inhabit this forest. I have yet to see them but I will be back to walk in this shady, peaceful place. Who knows, I may get lucky and spot the owls on a future trip! I’m looking forward to capturing some terrific fall color here later on in September and October. For today, I was trying to capture the various light patterns flowing through the wooded area. My goal as well was to highlight the birch trees.
- I used the Aperature-priority setting and had it set to f/16. My ISO was set at 100. The final shot was recorded at 1/5 sec. f/16 31mm
- I used Live View and manual focus – which I set by zooming in to the bark on the birches
- II used the timer in conjunction with my tripod.
- I did not alter the Exposure Compensation settings.
- In Lightroom, I played around with adjusting slightly the Highlights, Shadows and Vibrance settings. I’m sorry to say I did crop this photo more than I would have liked. A lesson learned.
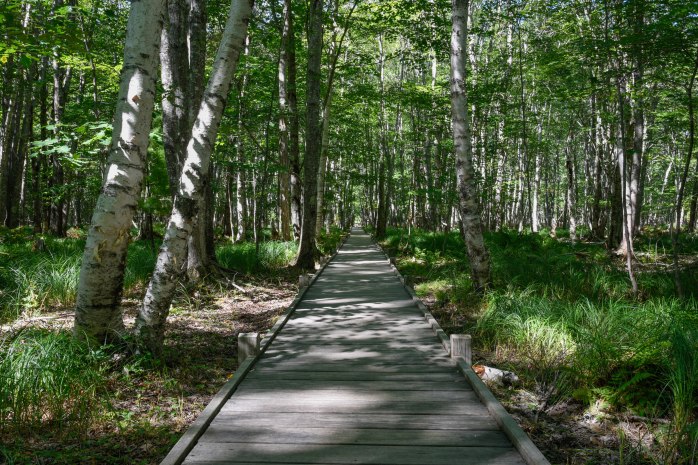
Just for fun – below is the original photo
30 Days and 30 Photos – Day 3
Today, I chose to walk to a favorite location near my camping spot for my next photograph. It’s a small cove off the Park Loop Road that is not visible from the road unless you pull over and look over the edge of the embankment. I walk here often and climb down to the cove. There is this really cool glacial erratic that is perched on the shore – I have affectionately dubbed it “Lynn’s Rock.” At high tide, the water crashes in around it and I took quite a few shots trying to get the splash of the waves. I am constantly amazed at the diversity of the color of the rock here in Acadia. This cove also has a fair amount of rounded cobblestones – and the sound of the stones rolling as the tide is washing out is so enchantingly meditative. There was a substantial amount of fog rolling in off the ocean while I was shooting here today. Breathtaking!
- I used the Aperature-priority setting and had it set to f/8. My ISO was set at 400 in order to increase the shutter speed so the splash of the waves was not so blurry. The final shot was recorded at 1/60 sec. f/8 38mm
- I used Live View and manual focus – which I set when zooming in to some of the foreground rocks.
- Instead of using the timer, I had the camera on the tripod but manually pushed the shutter release button so I could control the timing in relation to the wave splash.
- I also used my Exposure Compensation settings to under- and over-expose each shot. This photograph is slightly over-exposed at ++0.3
- In Lightroom, I adjusted the following settings very, very slightly: Highlights, Vibrance and Sharpening. For this photo, I did very little editing. I did crop this photo every so slightly.
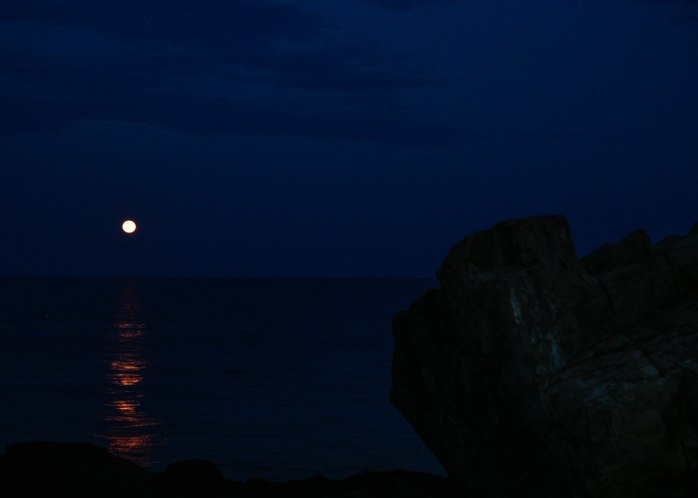
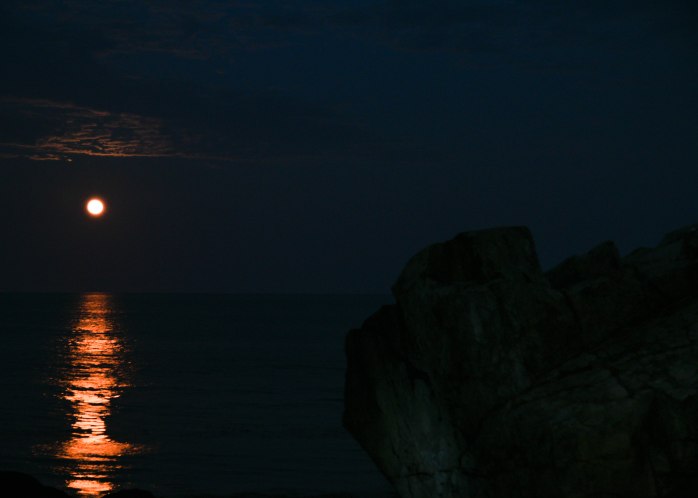
I have visited this spot numerous times and taken many pictures of this “rock.” I’d like to also share the couple of photos I took at this spot for the full moon rising on August 26th. The photos were taken at slightly different times – as the color of the moon’s reflection intensified. It was magical!