Lynn Amber - Travel & Photography
sharing my thoughts through words and images
Airstream Fun!

Spring has begun here in Vermont with the arrival of some feathered friends. In the past several days, I’ve listened to the melody of a song sparrow, heard the musical trill of Red-winged Blackbirds adjacent to the ponds up the road, watched an Eastern Phoebe characteristically flicking its tail while perched on a branch in our white oak and welcomed the true sign of spring – a yard full of robins looking for worms. The twin ponds near us are coming to life with the return of a pair of Canadian Geese, a Mallard Duck couple and a pair of Mergansers. I was also treated to an otter sighting on one of the ponds! He was swimming, diving and playing in the middle of the pond on a recent walk. Last fall there were 3 otters on the pond. I’m curious if his other two friends are also in the area.
My last blog post about springtime preparation of our Airstream was two years ago in April – as I was getting ready to return to my workamping position with the park service at Acadia National Park. Well, here we are again!
Now that the weather has warmed our focus has shifted to getting the Airstream ready for travel. I am once again returning to Acadia National Park this year. It will be my third season. After being stuck at home during Covid summer, it feels good to be going back to work in a place I love so much. As much as I would prefer to travel out west, it just seemed smarter to stay closer to home this season. During the winter, I was busy with some projects for the Airstream and researching some changes I wanted to make to the interior.
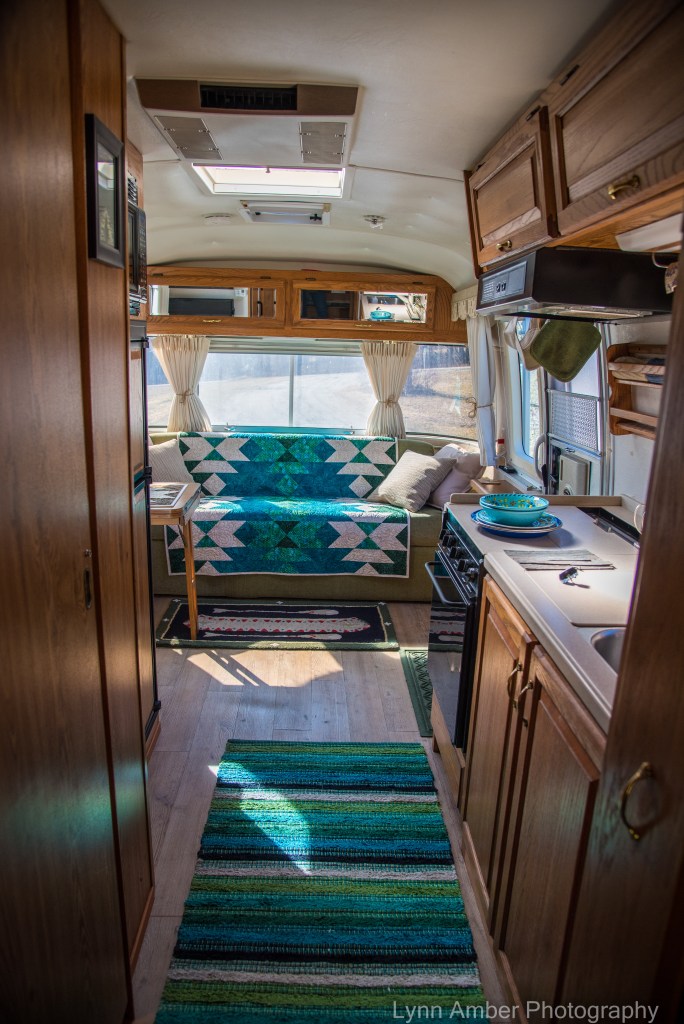
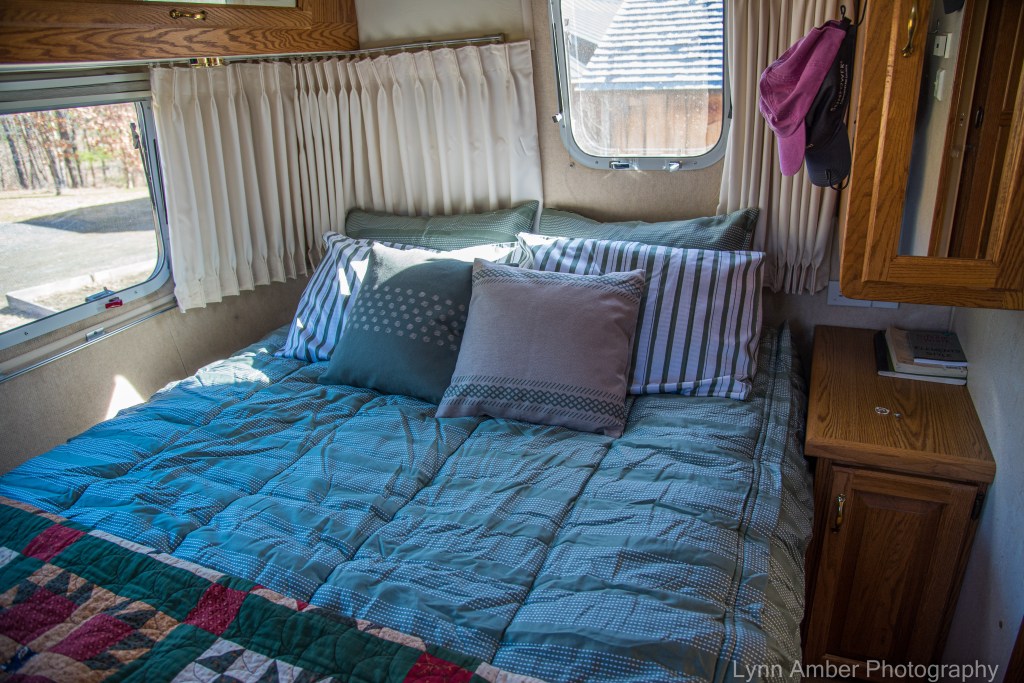
I spent about a week designing and sewing a new quilt throw for the front sofa. I chose colors that I love (teal blues and greens) and a pattern that was easy to work with. Of course, that also meant investing in a new runner rug that matched the quilt! A day trip last month to the Homeport store on Church Street in Burlington was a success and I scored the perfect rug for the galley area. The change has the desired effect – brightening up the interior.

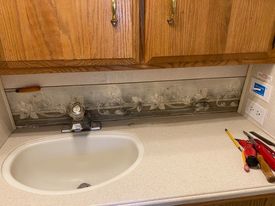
I also wanted to make a change to the backsplash in the bathroom. The existing backsplash was “original” and included a wallpaper strip that was outdated and definitely not my style! After researching options, I settled on a “peel and stick” weathered quartz panel. The panel consists of real quartz veneer adhered to a sticky backing. I like the natural look of the stone. We needed about 4 panels to complete the job, trimming the panels to size with tin snips as recommended. We opted to also use beads of construction glue on the backing as added insurance that the panels would stay in place. It was a little tricky getting the panels in place while also making sure the adhesive did not touch the wall until it was lined up perfectly. I can verify the adhesive is indeed very powerful! We will see how it holds up! I am making these decorative changes a little bit at a time and hope to continue to embellish the interior over time. I’ve been enjoying membership in a Facebook group called Airstream Interior Ideas. It’s amazing to see the transformations that people have made to their Airstream walls, lay-outs and countertops to customize the space. I’m a bit more timid than most when it comes to change, so I’ll continue to approach interior design alterations slowly and thoughtfully.


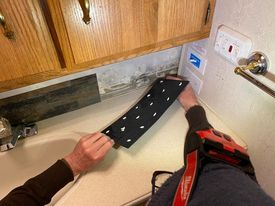
Jim did a great job negotiating the panels onto the wall while dealing with the very sticky adhesive!! If it sticks before you have the panel properly placed, there is no turning back! I guess that’s a good sign that it will remain in place!

One really exciting idea that I gleaned from Airstream Interior Ideas is Beddy’s RV bedding ensembles. I’ve been using traditional queen size sheets and comforters on our Airstream mattress and they don’t fit well due to the shape of the mattress. They also interfere with access to the built-in pull-out drawers and storage area under the bed. It’s been a constant struggle. I learned about Beddy’s on the Facebook group and investigated. It took me a couple of months (and a request on the FB group to share pictures the Beddy’s used on my specific mattress) before I took the plunge and ordered. I have no regrets! I am so happy with the way it fits and no more wrestling with sheets and blankets getting caught in the drawers!!

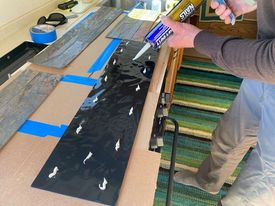
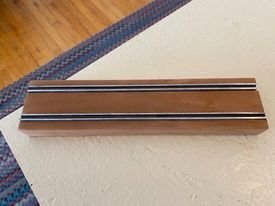
One other functional as well as cosmetic change that we are in the process of completing is the alteration of the magnetic knife rack that was screwed into the wall beside the kitchen sink. It was functional but not pretty – black plastic with metal/magnet strips that were starting to rust. It was also 18″ long extending all the way across the wall and interfering with my paper towel holder and cutting board storage. I literally have two, maybe three knives that I hang on the rack so I wanted a smaller one that was no more than 9″ long. As I researched ideas on the internet, I saw some unique knife racks made with wood and an idea began to form! If you have not noticed to date, I am the idea person in this couple, and Jim is the laborer – actually transforming my thoughts into reality. I designed a knife rack using a piece of cherry wood we had lying around thinking that we could remove the magnets from the old rack, cut them in half and route out two channels in the cherry strip to glue the magnets into – thereby creating a new, more decorative knife rack. Jim experimented with this and it was easy peasy! He has prepared the cherry wood and glued the magnets in place. One more step to tidy up the ends then I can put a finish on the wood and we can install it in the trailer. 🙂
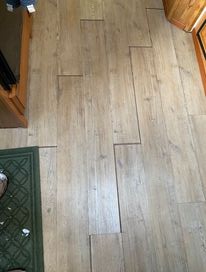
Every year after the Airstream has been in storage, we do an initial inspection to see what, if any, issues might have materialized due to the winter and cold temperatures. Unfortunately, we did have a major issue with the cork/vinyl click-lock floating floor that we installed 5 years ago. This is the first winter we have had the trailer in Vermont for the entire season and the cold temperatures caused the flooring to contract excessively and curl. We waited until temperatures started to moderate to fix the problem. I researched other flooring options extensively using Airstream Forums and corresponding directly with the Airstream company, but ultimately we decided that we did not want to do a major overhaul to the floor this year. Jim came up with the idea to “epoxy” together the sections that came apart as a temporary “not-so-quick” fix – giving us time to weigh the pros and cons of various other flooring options. The pictures are blurry due to my poor cell phone and cropping – but you get the idea. Sadly, this flooring was recommended to us by a flooring specialty shop knowing we were installing it in an RV. Live and learn!

The other issue we had with the trailer was actually something we noticed while traveling back to Vermont last spring from the southwest. Back in 2019, while checking all the water faucets for leaks during spring preparation, we noticed a leak where the water line enters the shower. This connection is a little funky and, over time, with road vibration it works itself loose. Jim tightened up the fitting from the bathroom cabinet side and that seemed to work. But, traveling across country this past year, we noticed that whenever we stopped and turned the water pump on, the shower faucet would be on and start leaking water. The vibration caused by traveling down the road was forcing the shower faucet out from the wall and turning it on. This was a new problem! When Jim investigated further, he realized that between the shower wall and the bathroom wall was a gap and the plumbing valve mechanism behind the wall was not well supported. It allowed for too much movement causing the shower faucet to “turn on” when the trailer was in motion. In the process of trying to trouble-shoot the problem, Jim managed to crimp the original escutcheon that surrounds the faucet and covers up the plumbing. My job was to find and order a new escutcheon – which I did – and Jim worked on crafting a custom wood block that would fit in the wall space and support the plumbing valve better. As usual, it was a longer, more involved repair but it worked! Hopefully, that problem is now permanently fixed and we’ll experience no more leaks around the shower! (Knock on Wood) 🙂
As with any older model trailer, things start to break over time and need to be replaced. In 2019, it was the Dometic refrigerator – BIG ticket item! In March of 2020, we were forced to replace the water pump during our boon-docking stay in southern Arizona. Luckily, we found an RV dealership and parts shop in a nearby town who were extremely helpful. And, replacing the water pump was way less painful from a cost perspective than the refrigerator!
Today, with the weather forecast indicating above freezing temperatures for the foreseeable future, we started the process of sanitizing the fresh water tank and water lines. We fill the 55-gallon fresh water tank – mixing in 8 oz. of chlorine – and run the water through the faucets until the chlorine smell permeates the air. This is the time when we also check for leaks around all faucets and water connections. We’ll let that chlorine water sit in the tanks and lines for a minimum of 4 hours before draining and filling back up to flush out the chlorine.
It feels so good to be starting this process! Before long, I’ll be hearing the sweet, meditative sound of the buoy bells coming from the ocean off the coast of Maine!

Very attractive enhancements and the back splash is also very functional. Your quilting efforts are so New England and the colors could fit coastal Maine or a Southwest Native American motif (almost turquois). Did you do the quilting work on the bed as well?
LikeLike
Yes – was going after a southwest native american feel – and Yes, the quilt on the bed is also my creation. I’ve been quilting for over 30 years – love it! Although, now I cheat, and have the actual quilting done by a professional on a long-arm machine. I used to hand quilt but not anymore!
LikeLike